Friday, August 22, 2025

Freeway Work

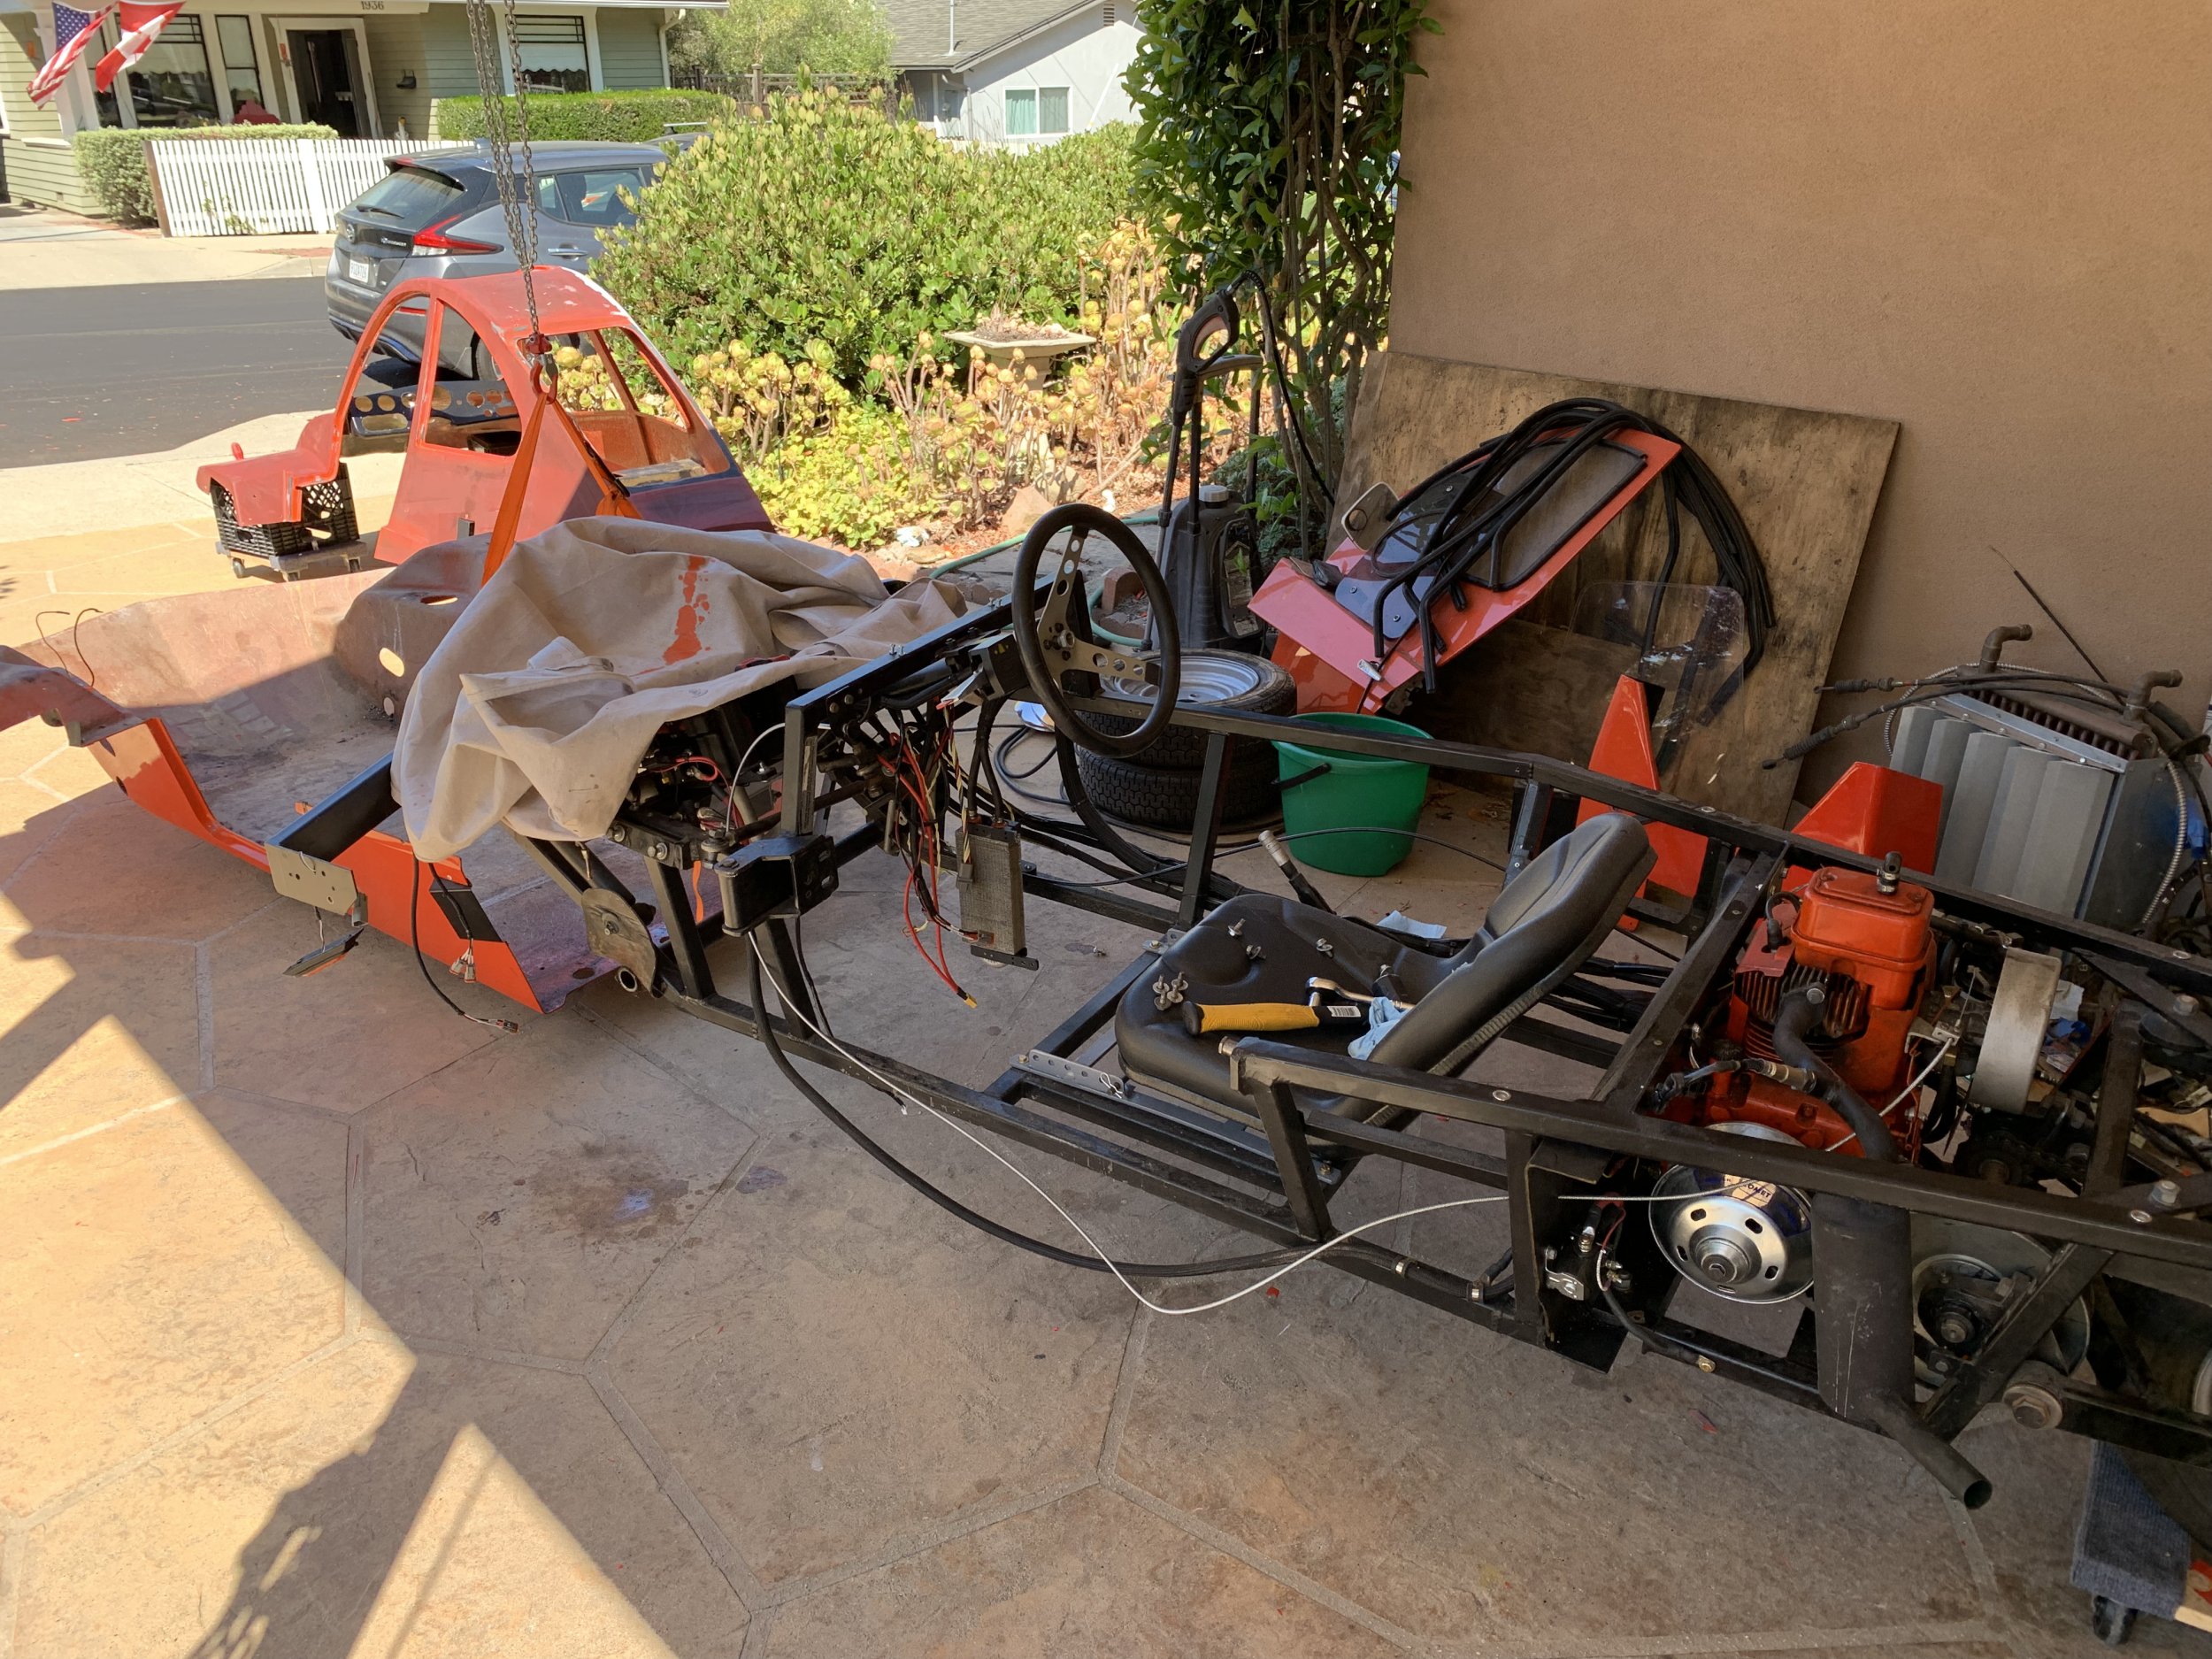
So I mentioned in the previous post that I’ve got my HMV freeway to the point where I’ve been able to drive it to work on a regular basis. This is a bunch of the stuff I’ve done, in no particular order.

Bodywork

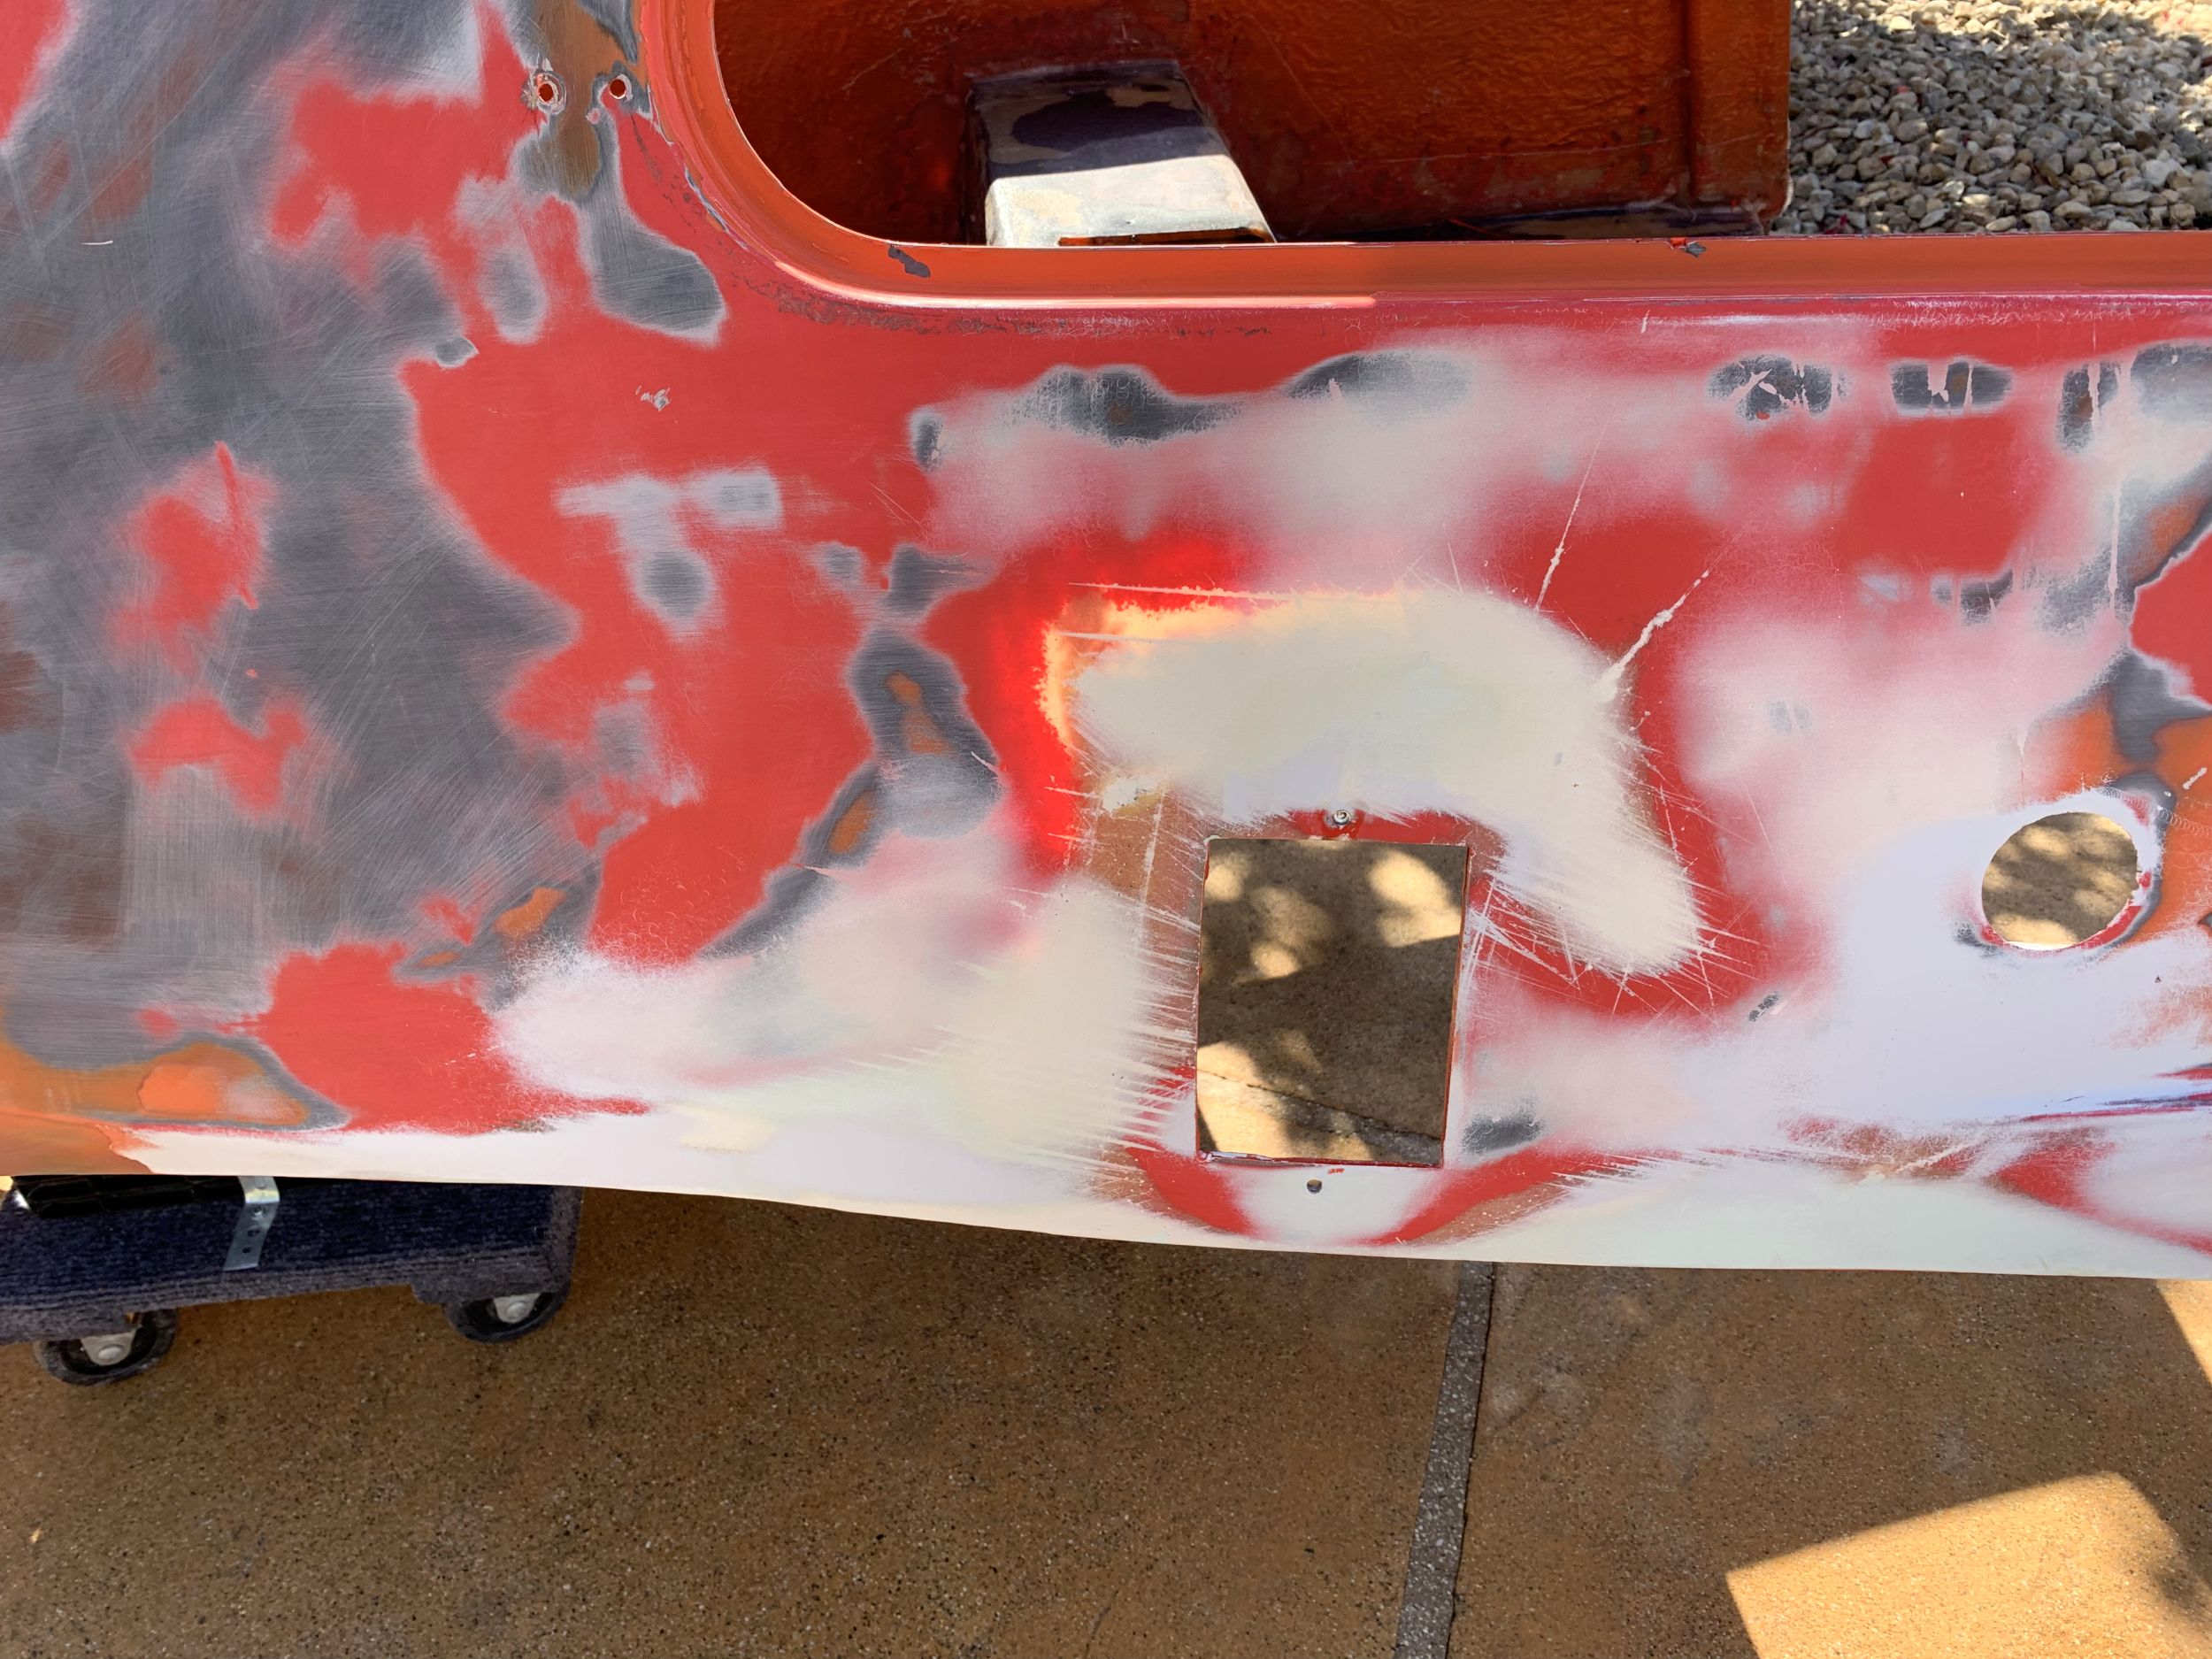
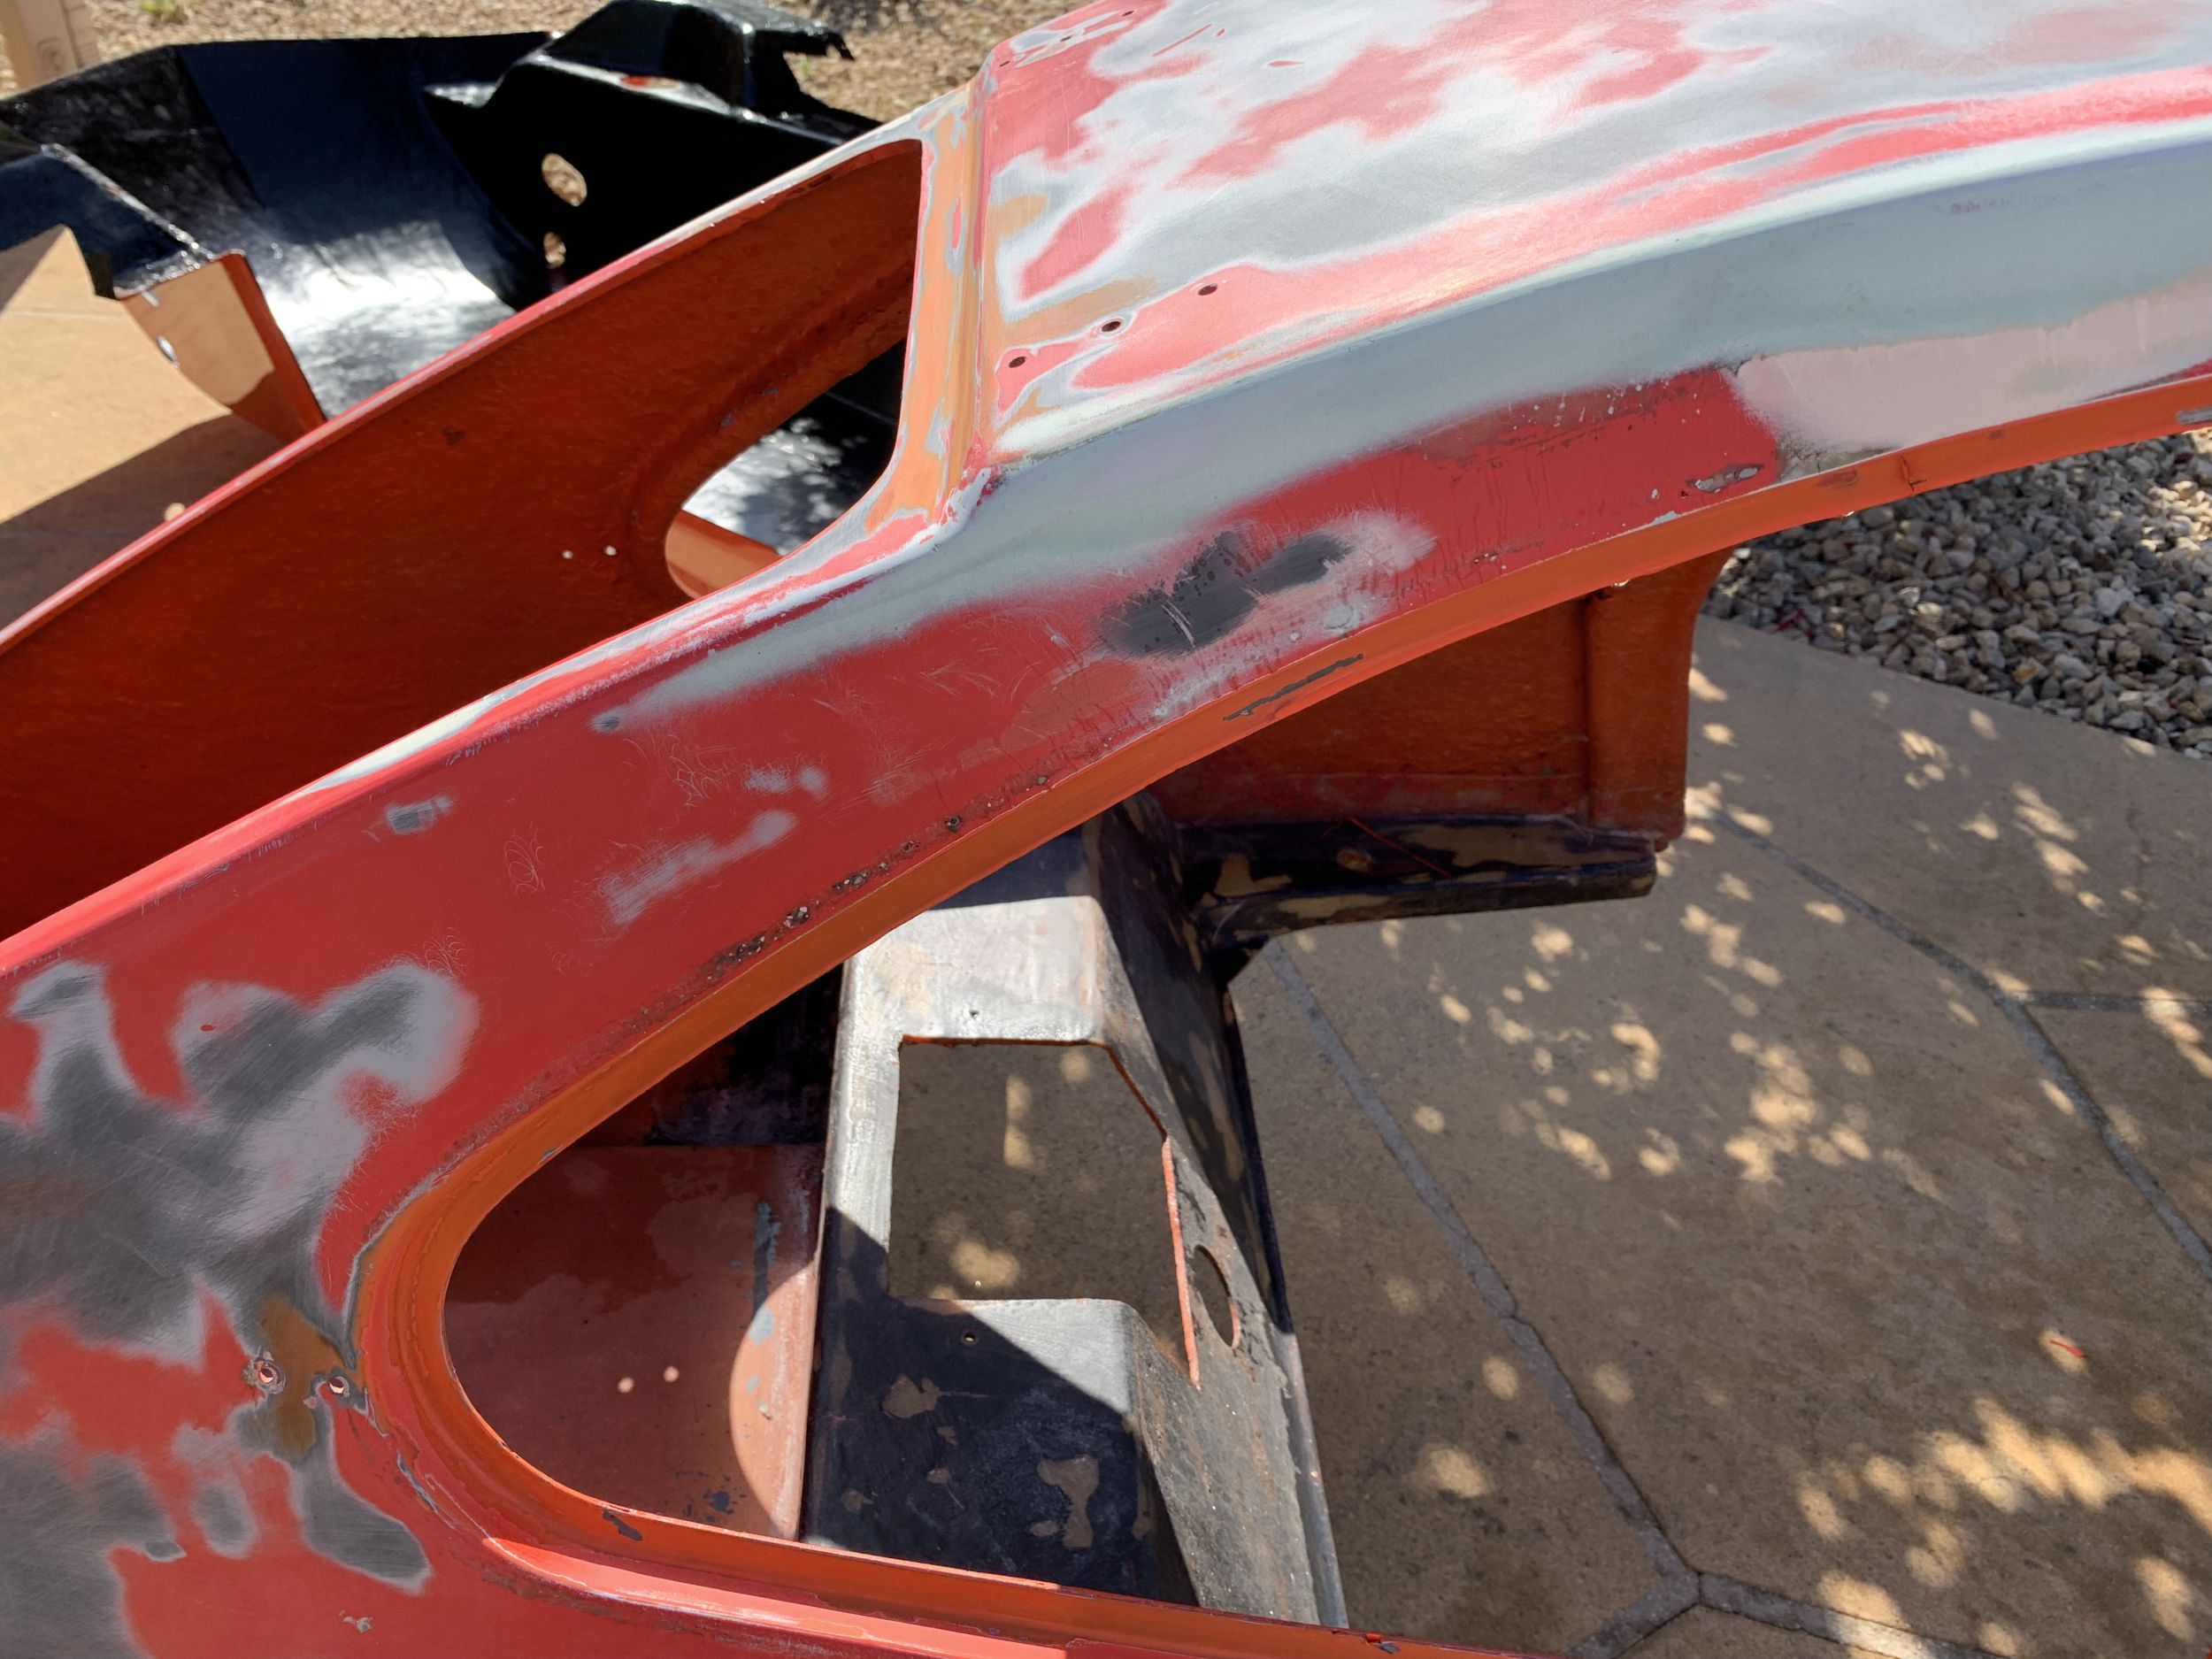
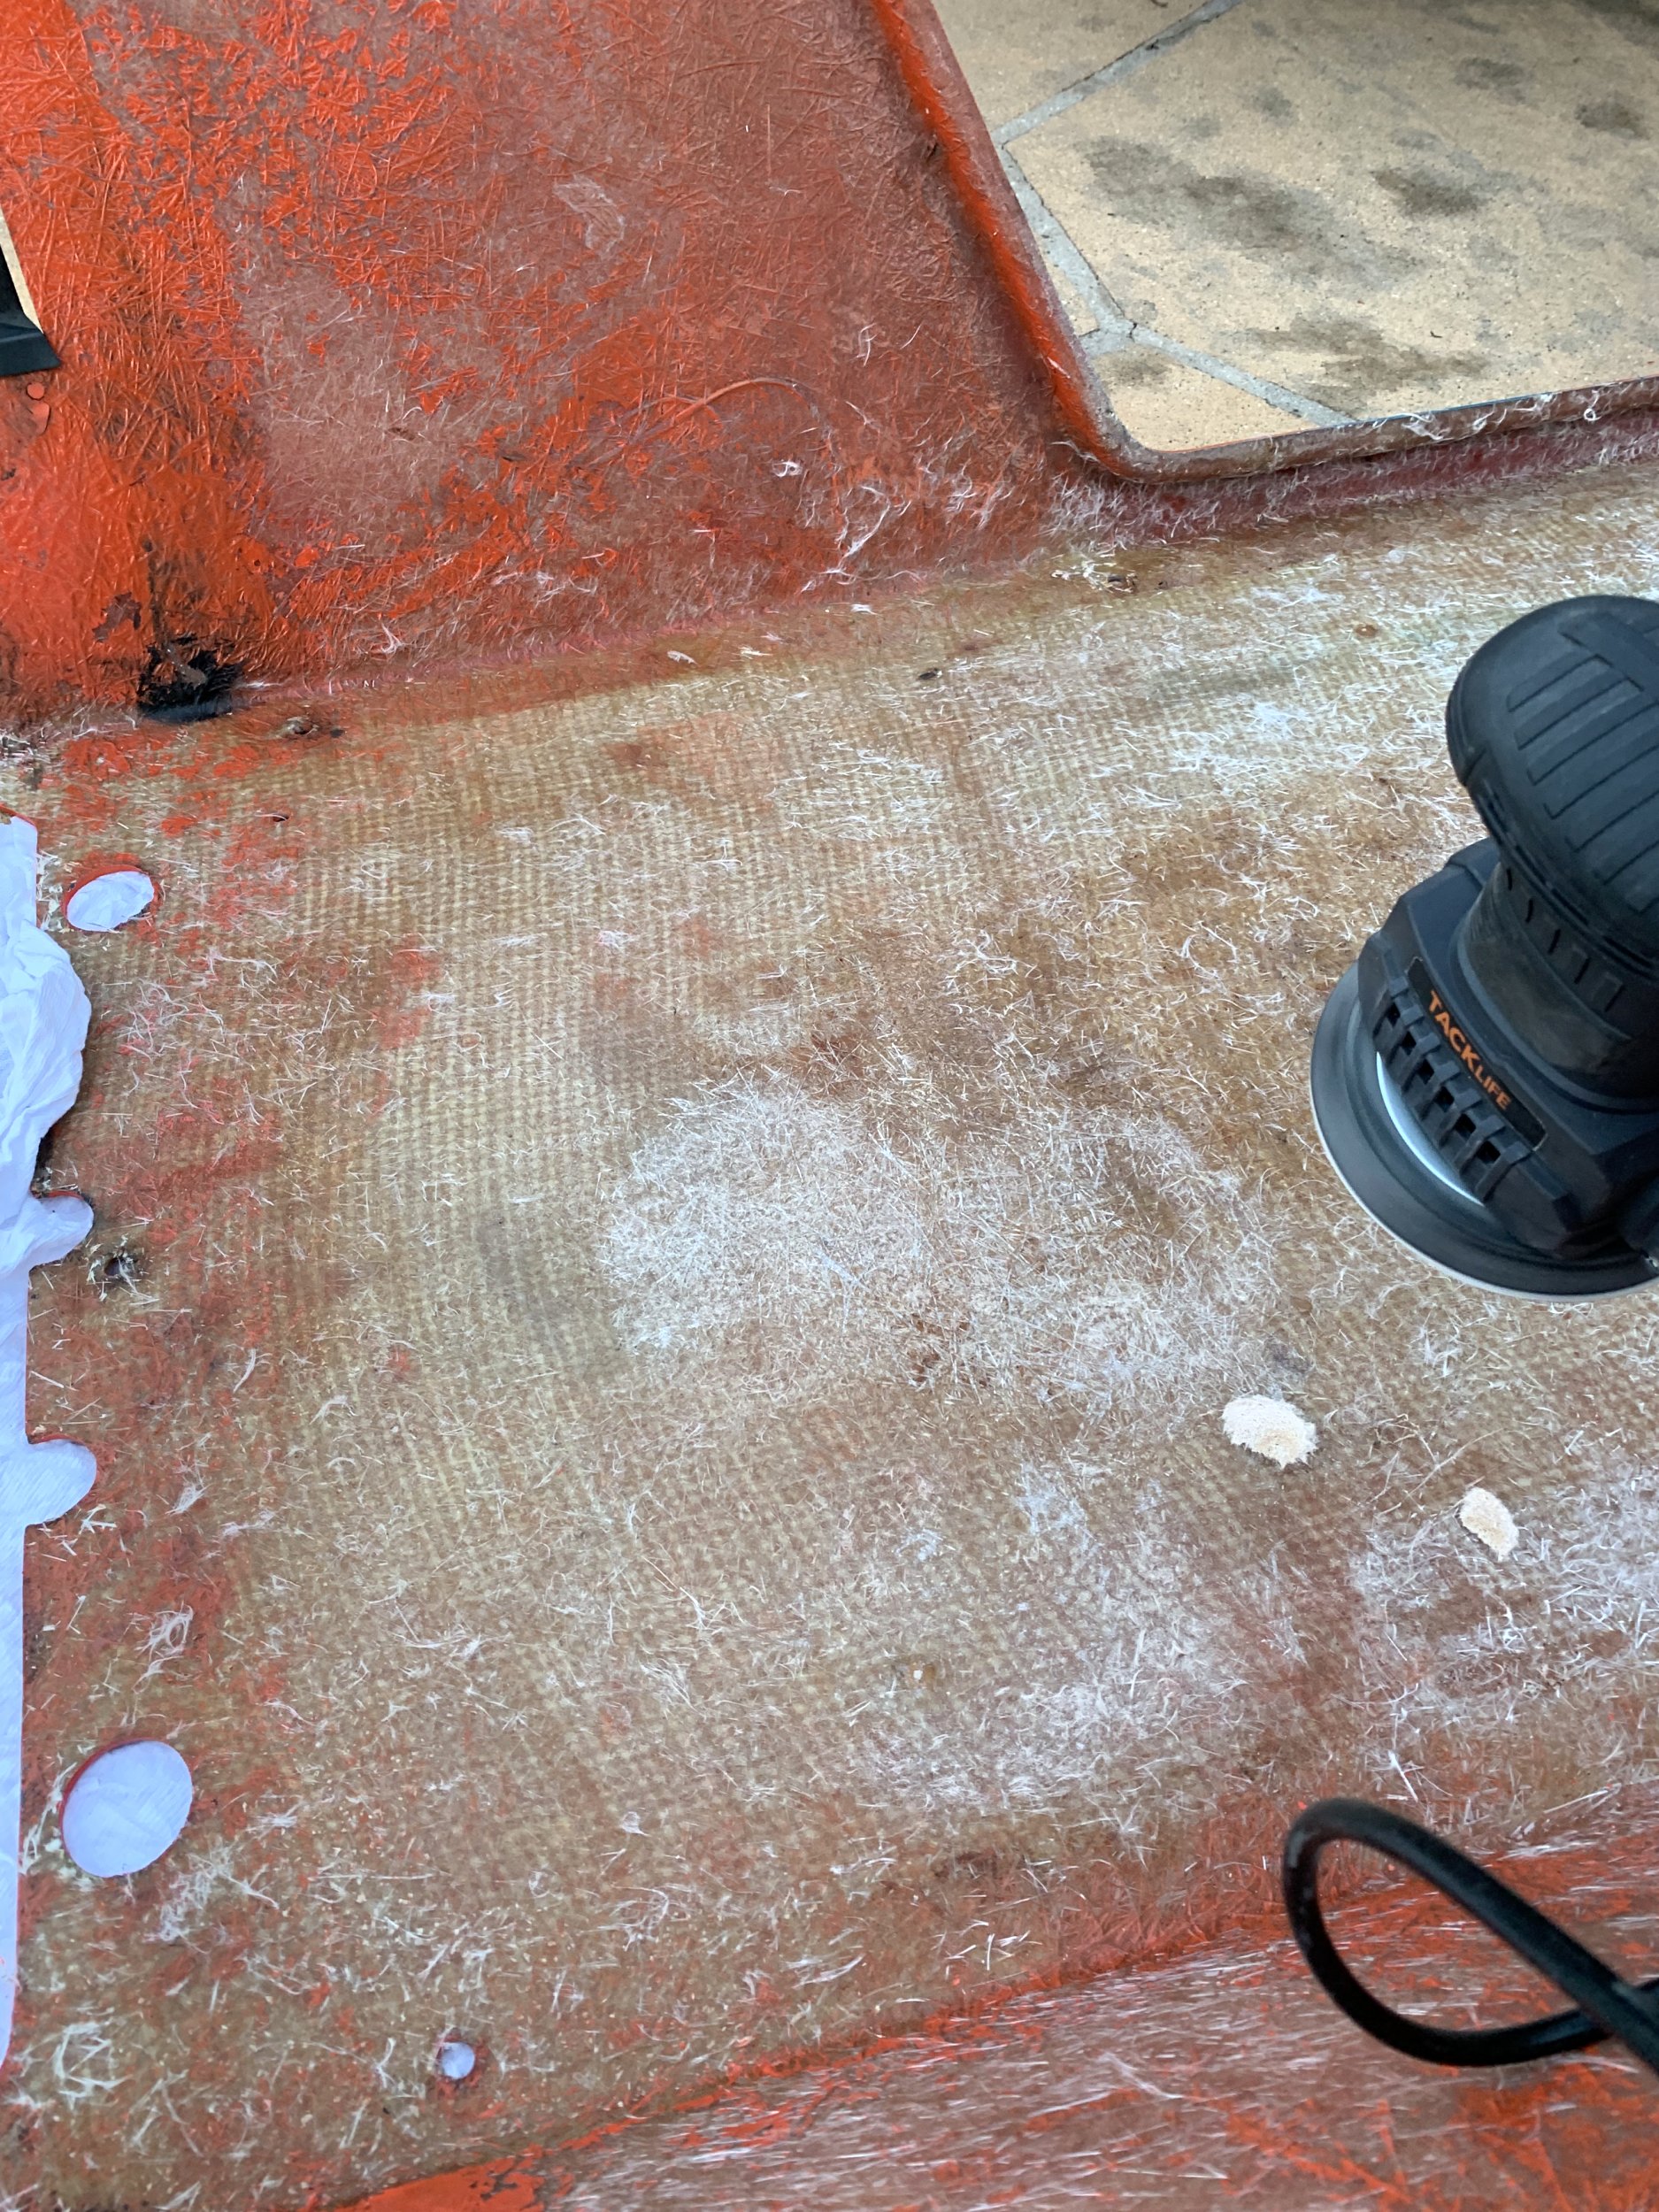
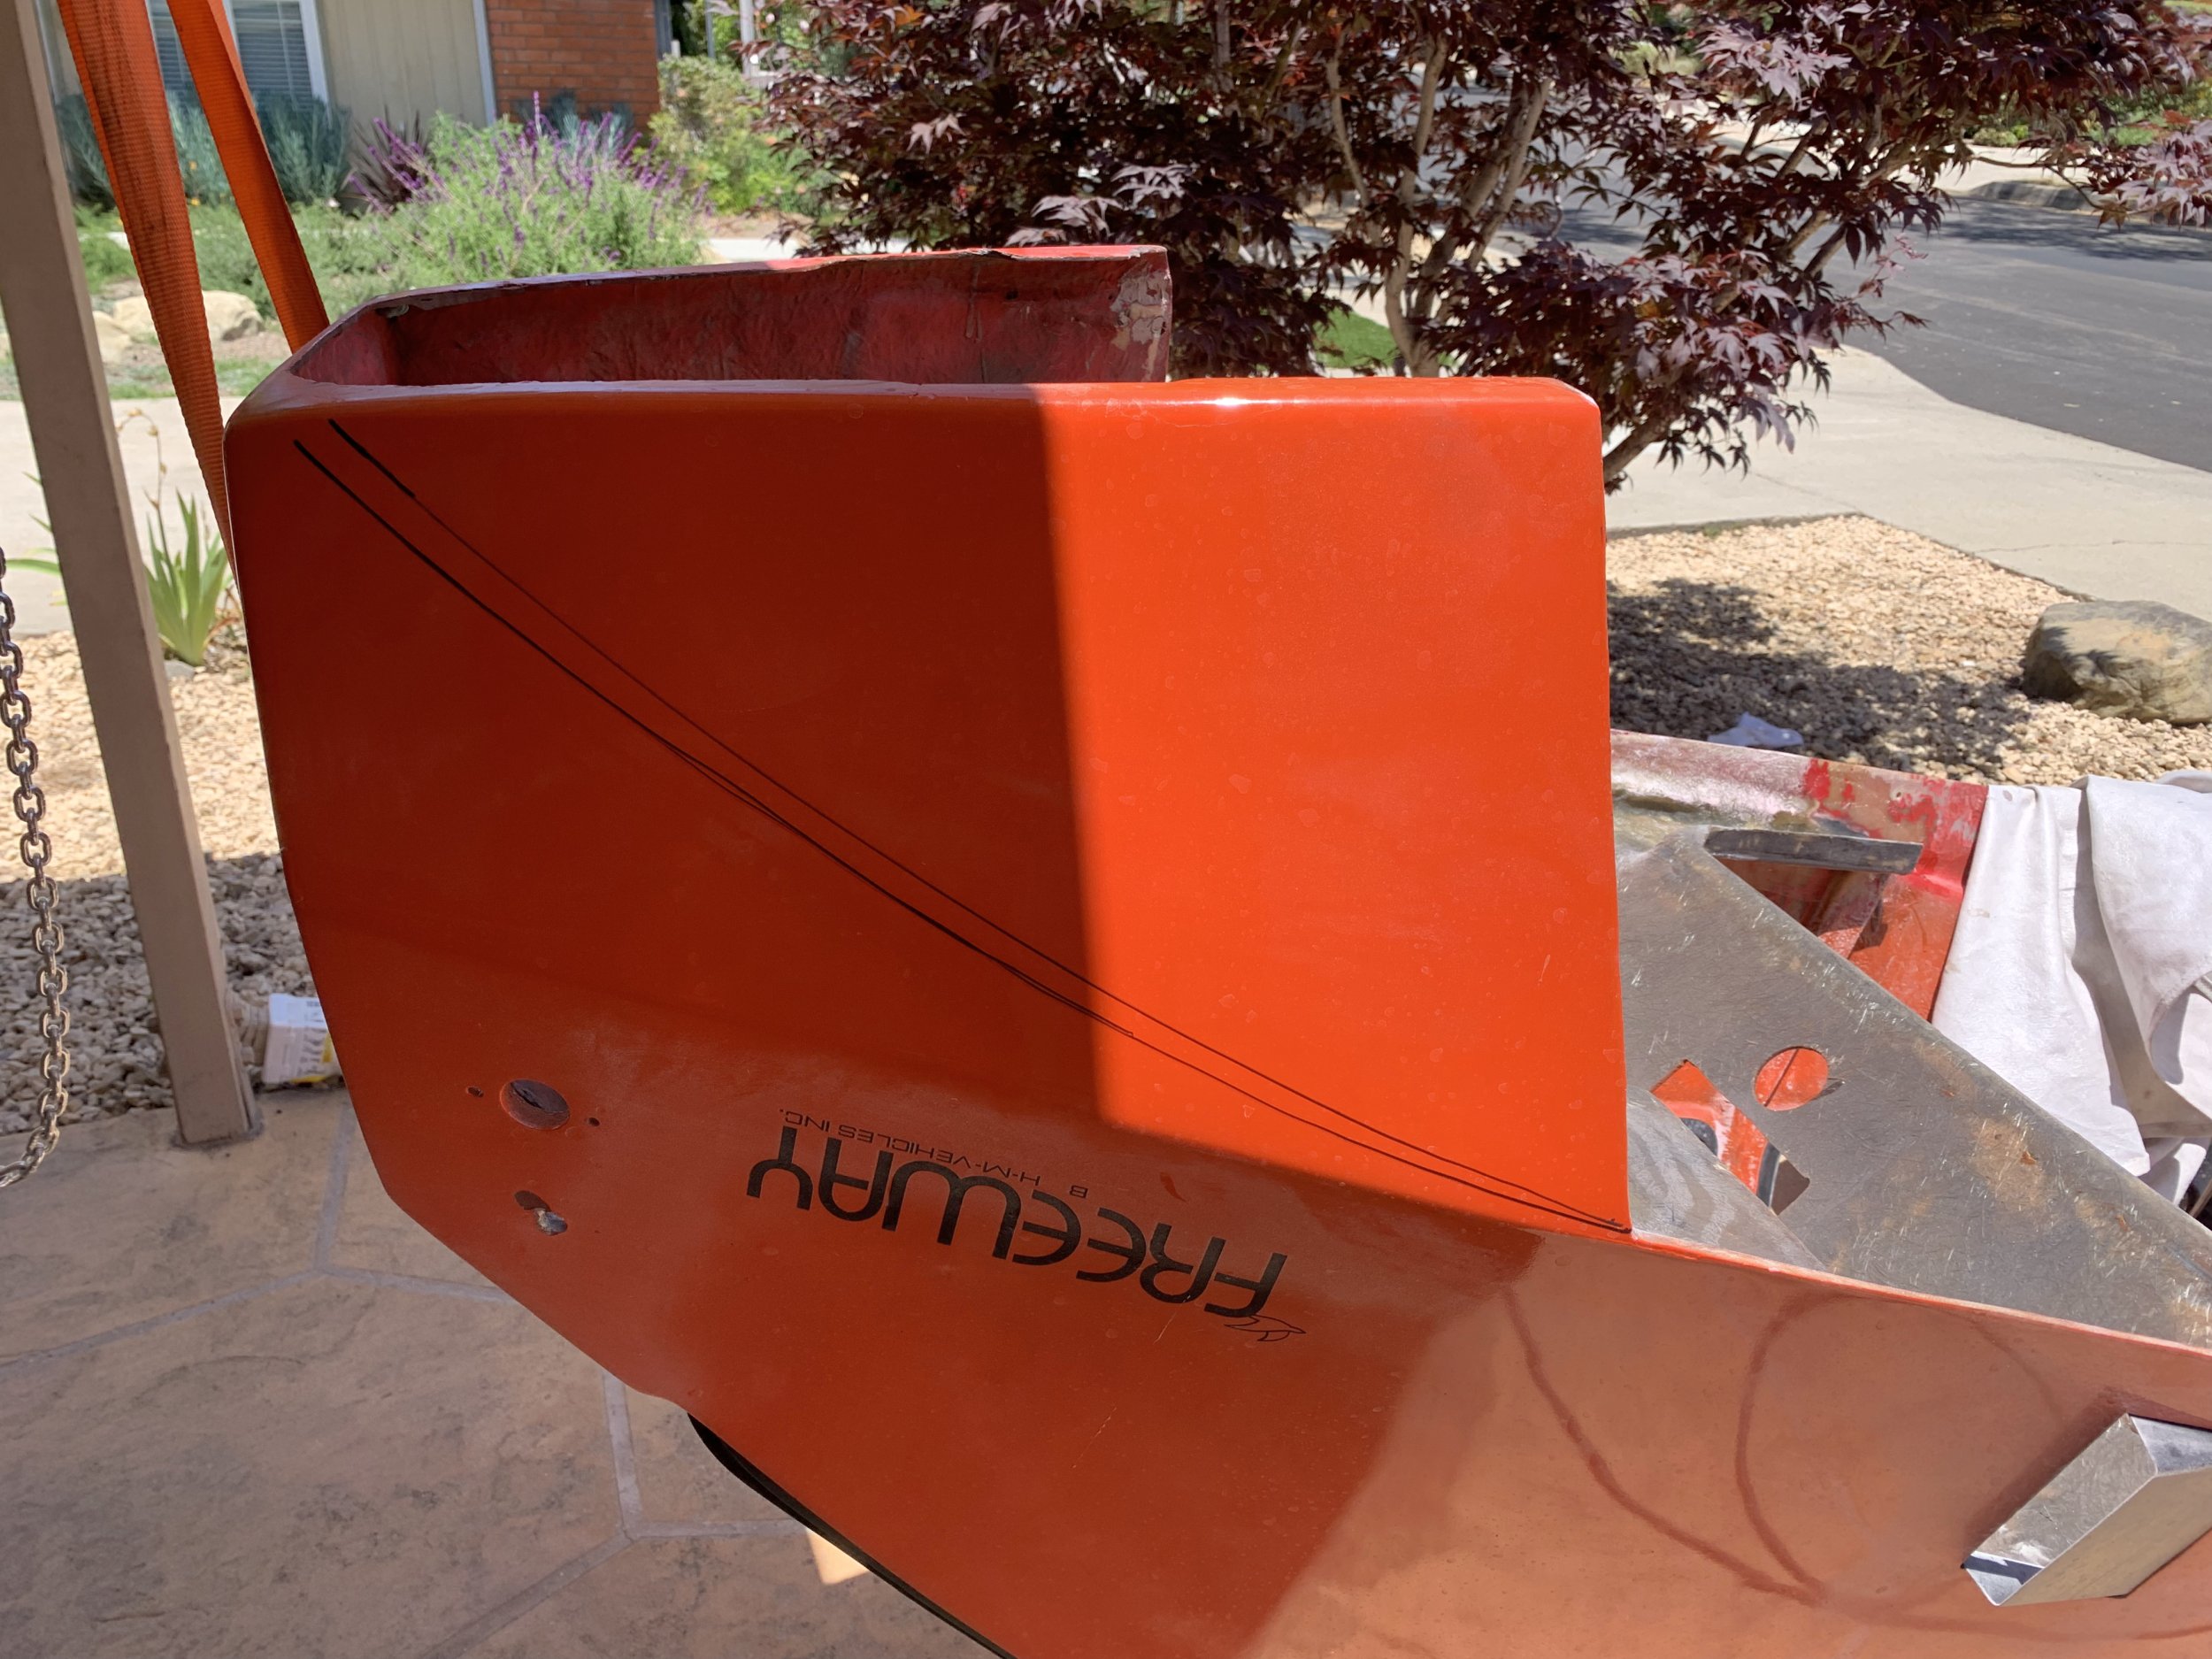
I spent a while sanding back the primer exposed when the paint came off, mostly because I could see a fair bit of filler, and was curious what it was hiding. Surprisingly, it appears that I believe this Freeway has been laid on it’s side in the past:

IMG_8340.jpg
IMG_8341.jpg

The right-hand side has a bunch of fairly deep scratches, though none substantial enough to be of any concern to the body’s structure. This is actually fairly encouraging, since it means the rebuild isn’t hiding a major problem. It also means this thing was robust enough to slide on it’s side a fair bit without just disentegrating, which says positive things about its (likely marginal) crash safety.

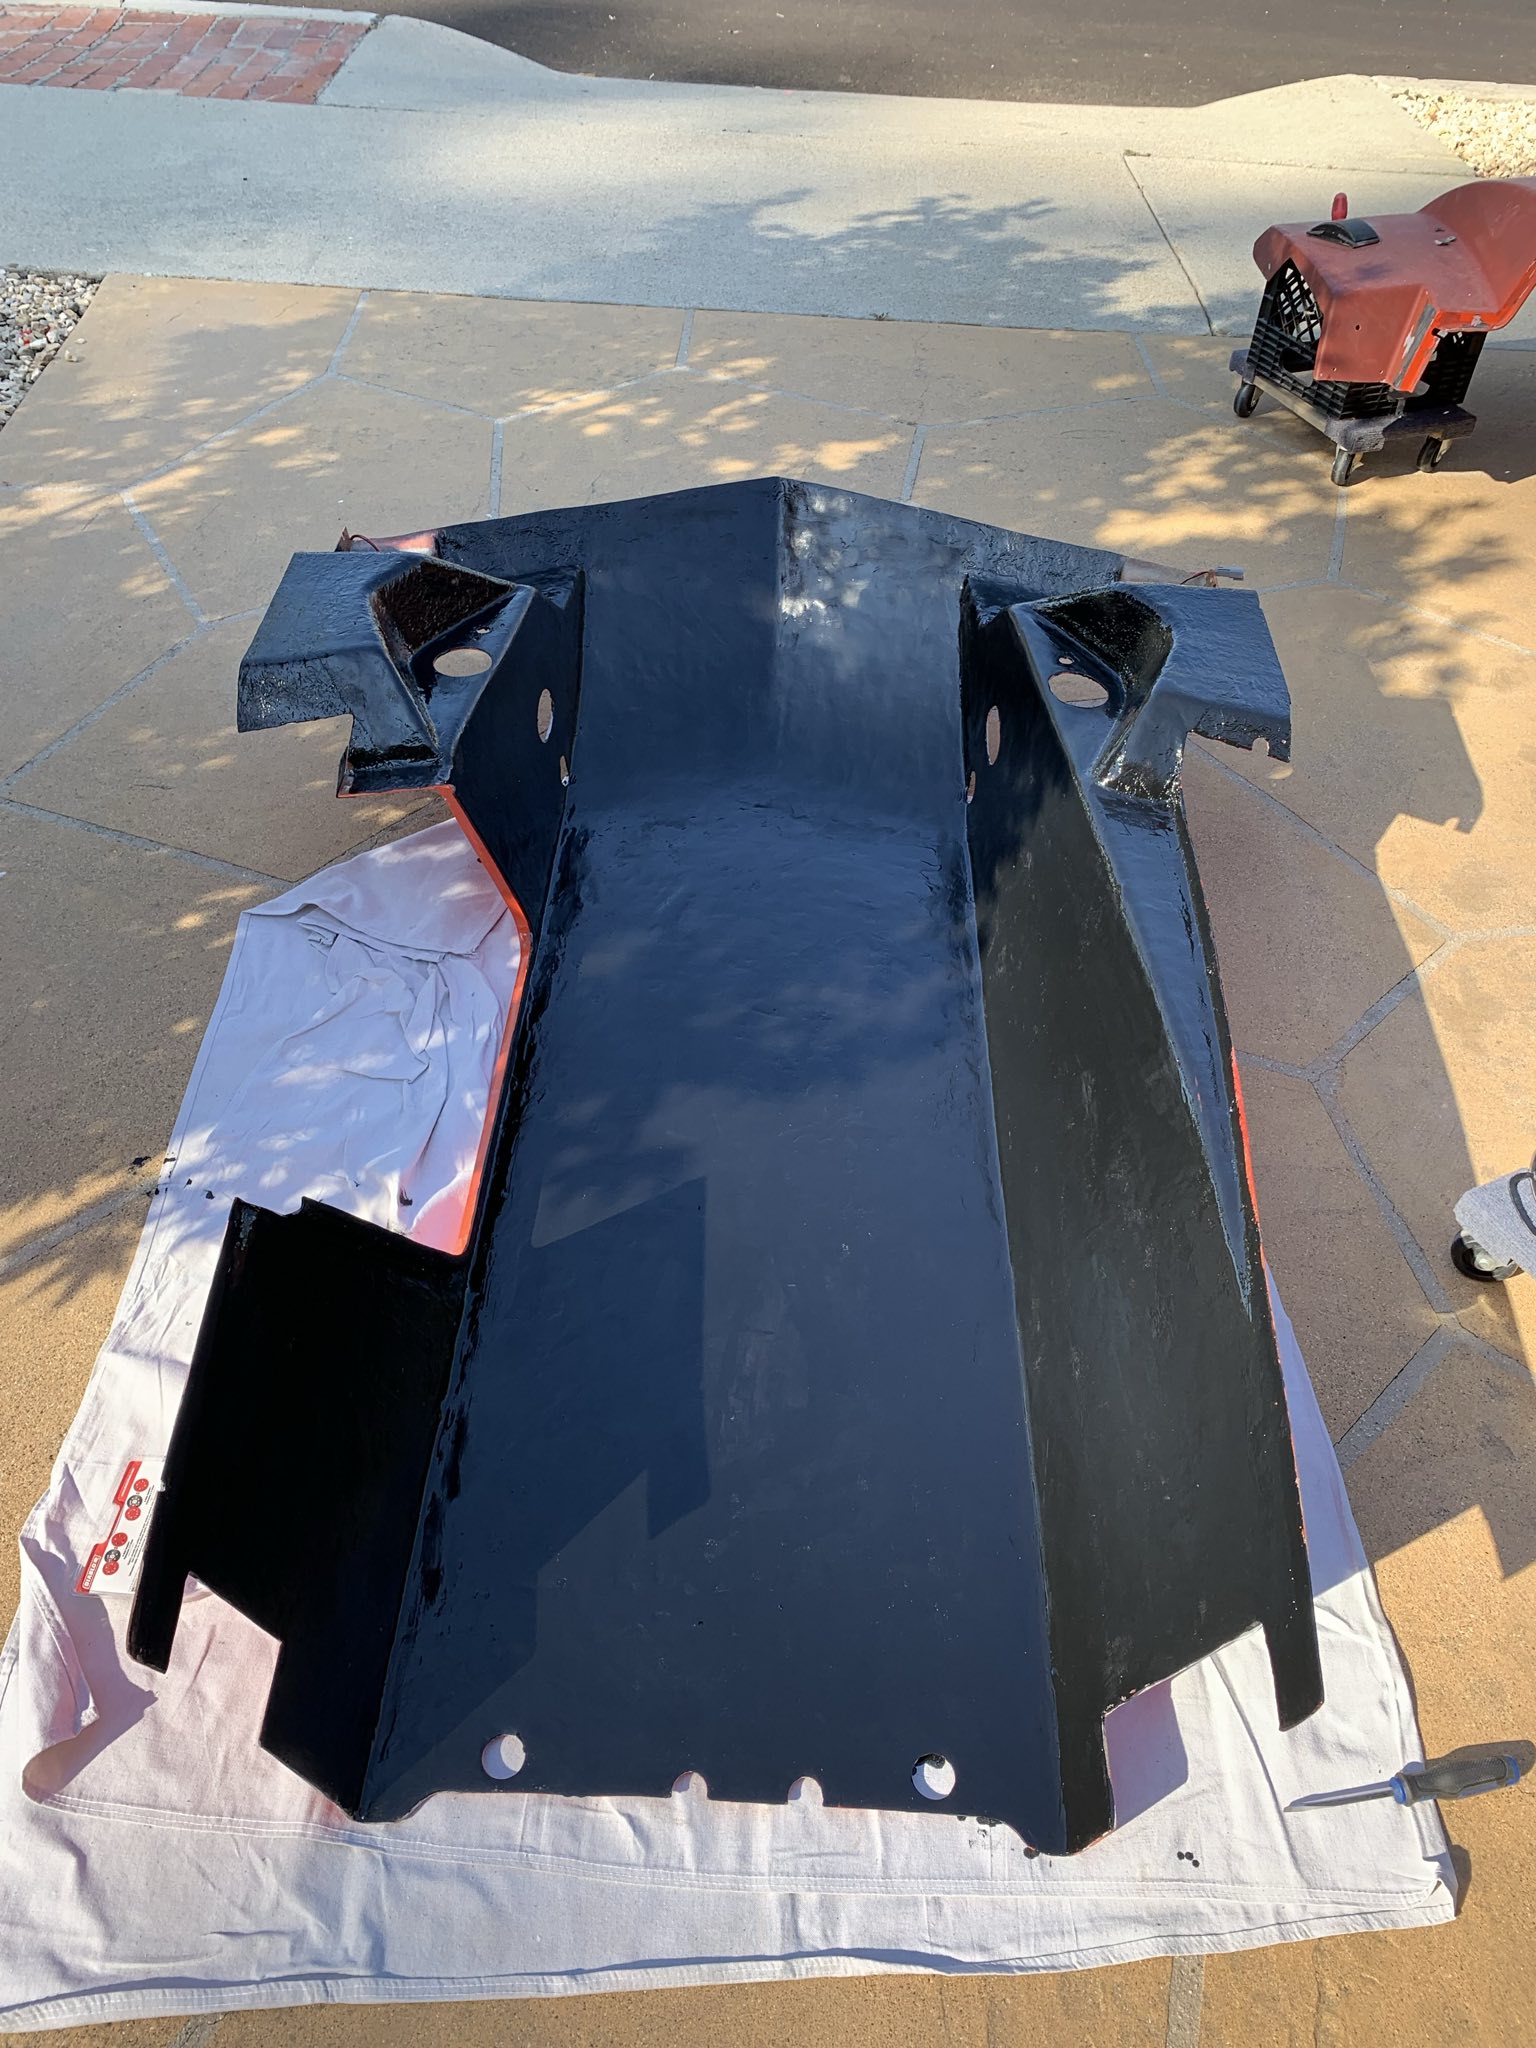
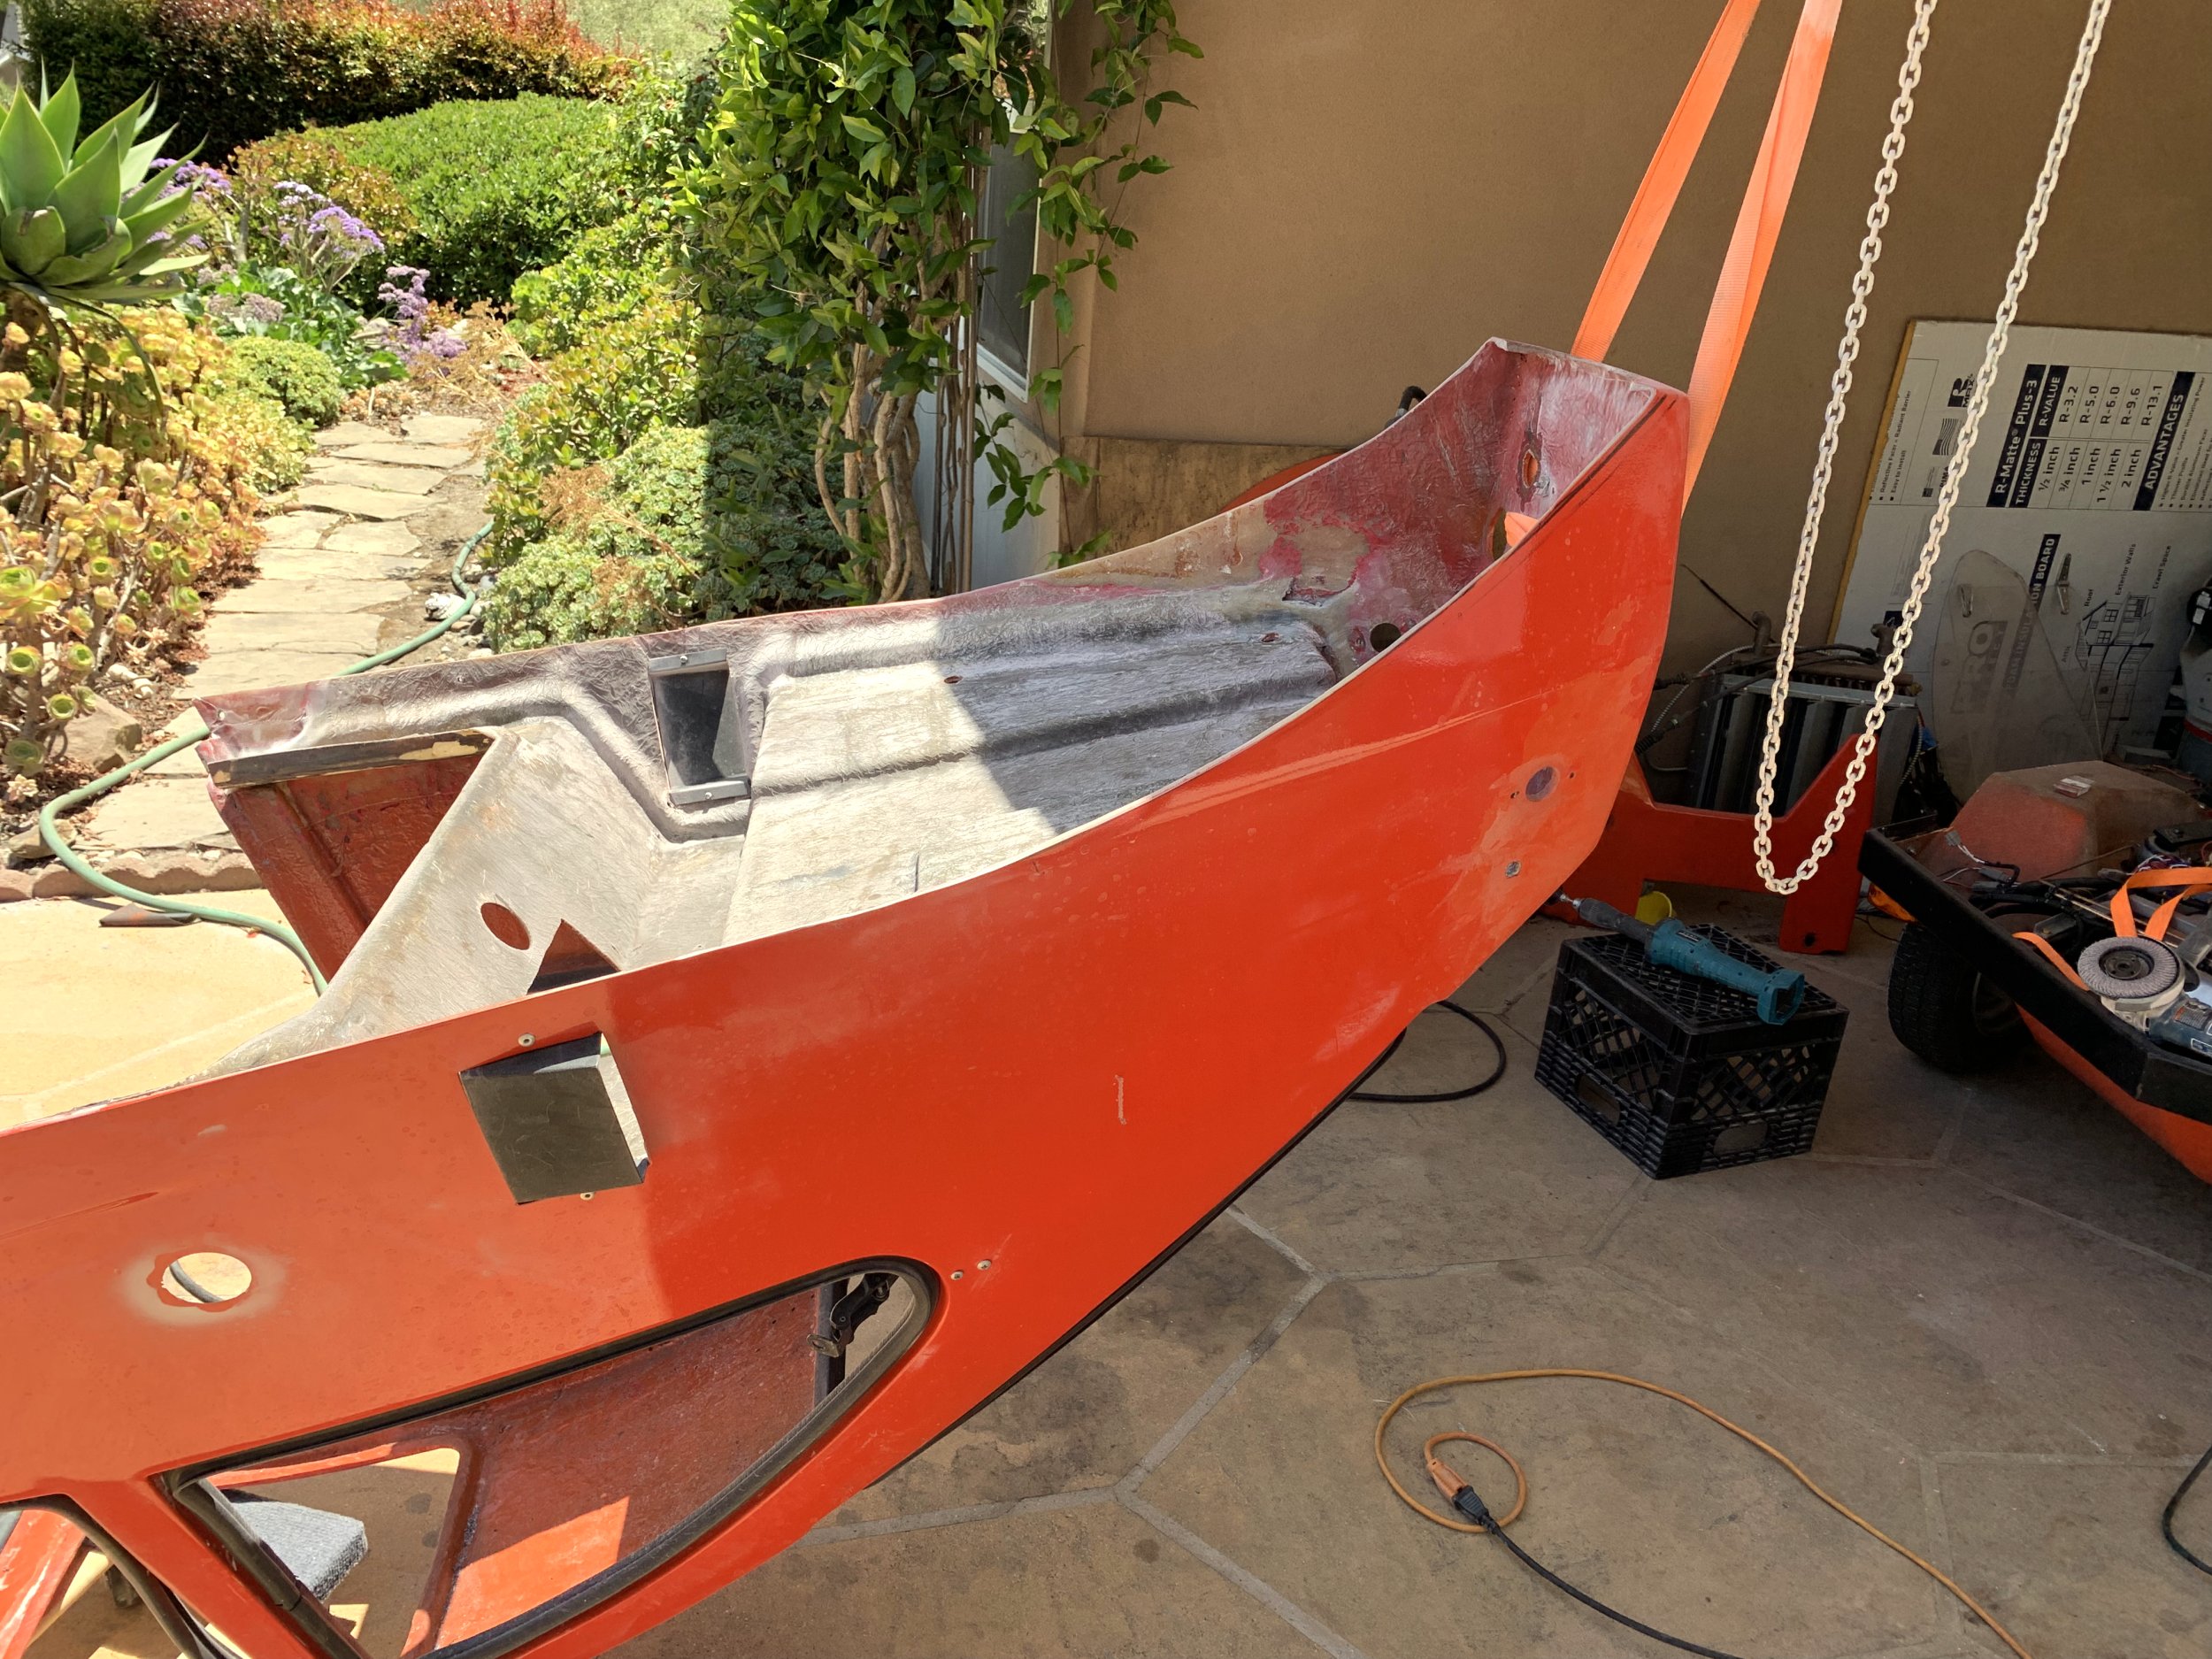
I also painted the interior of the lower body:

signal-2025-07-04-172513.jpeg

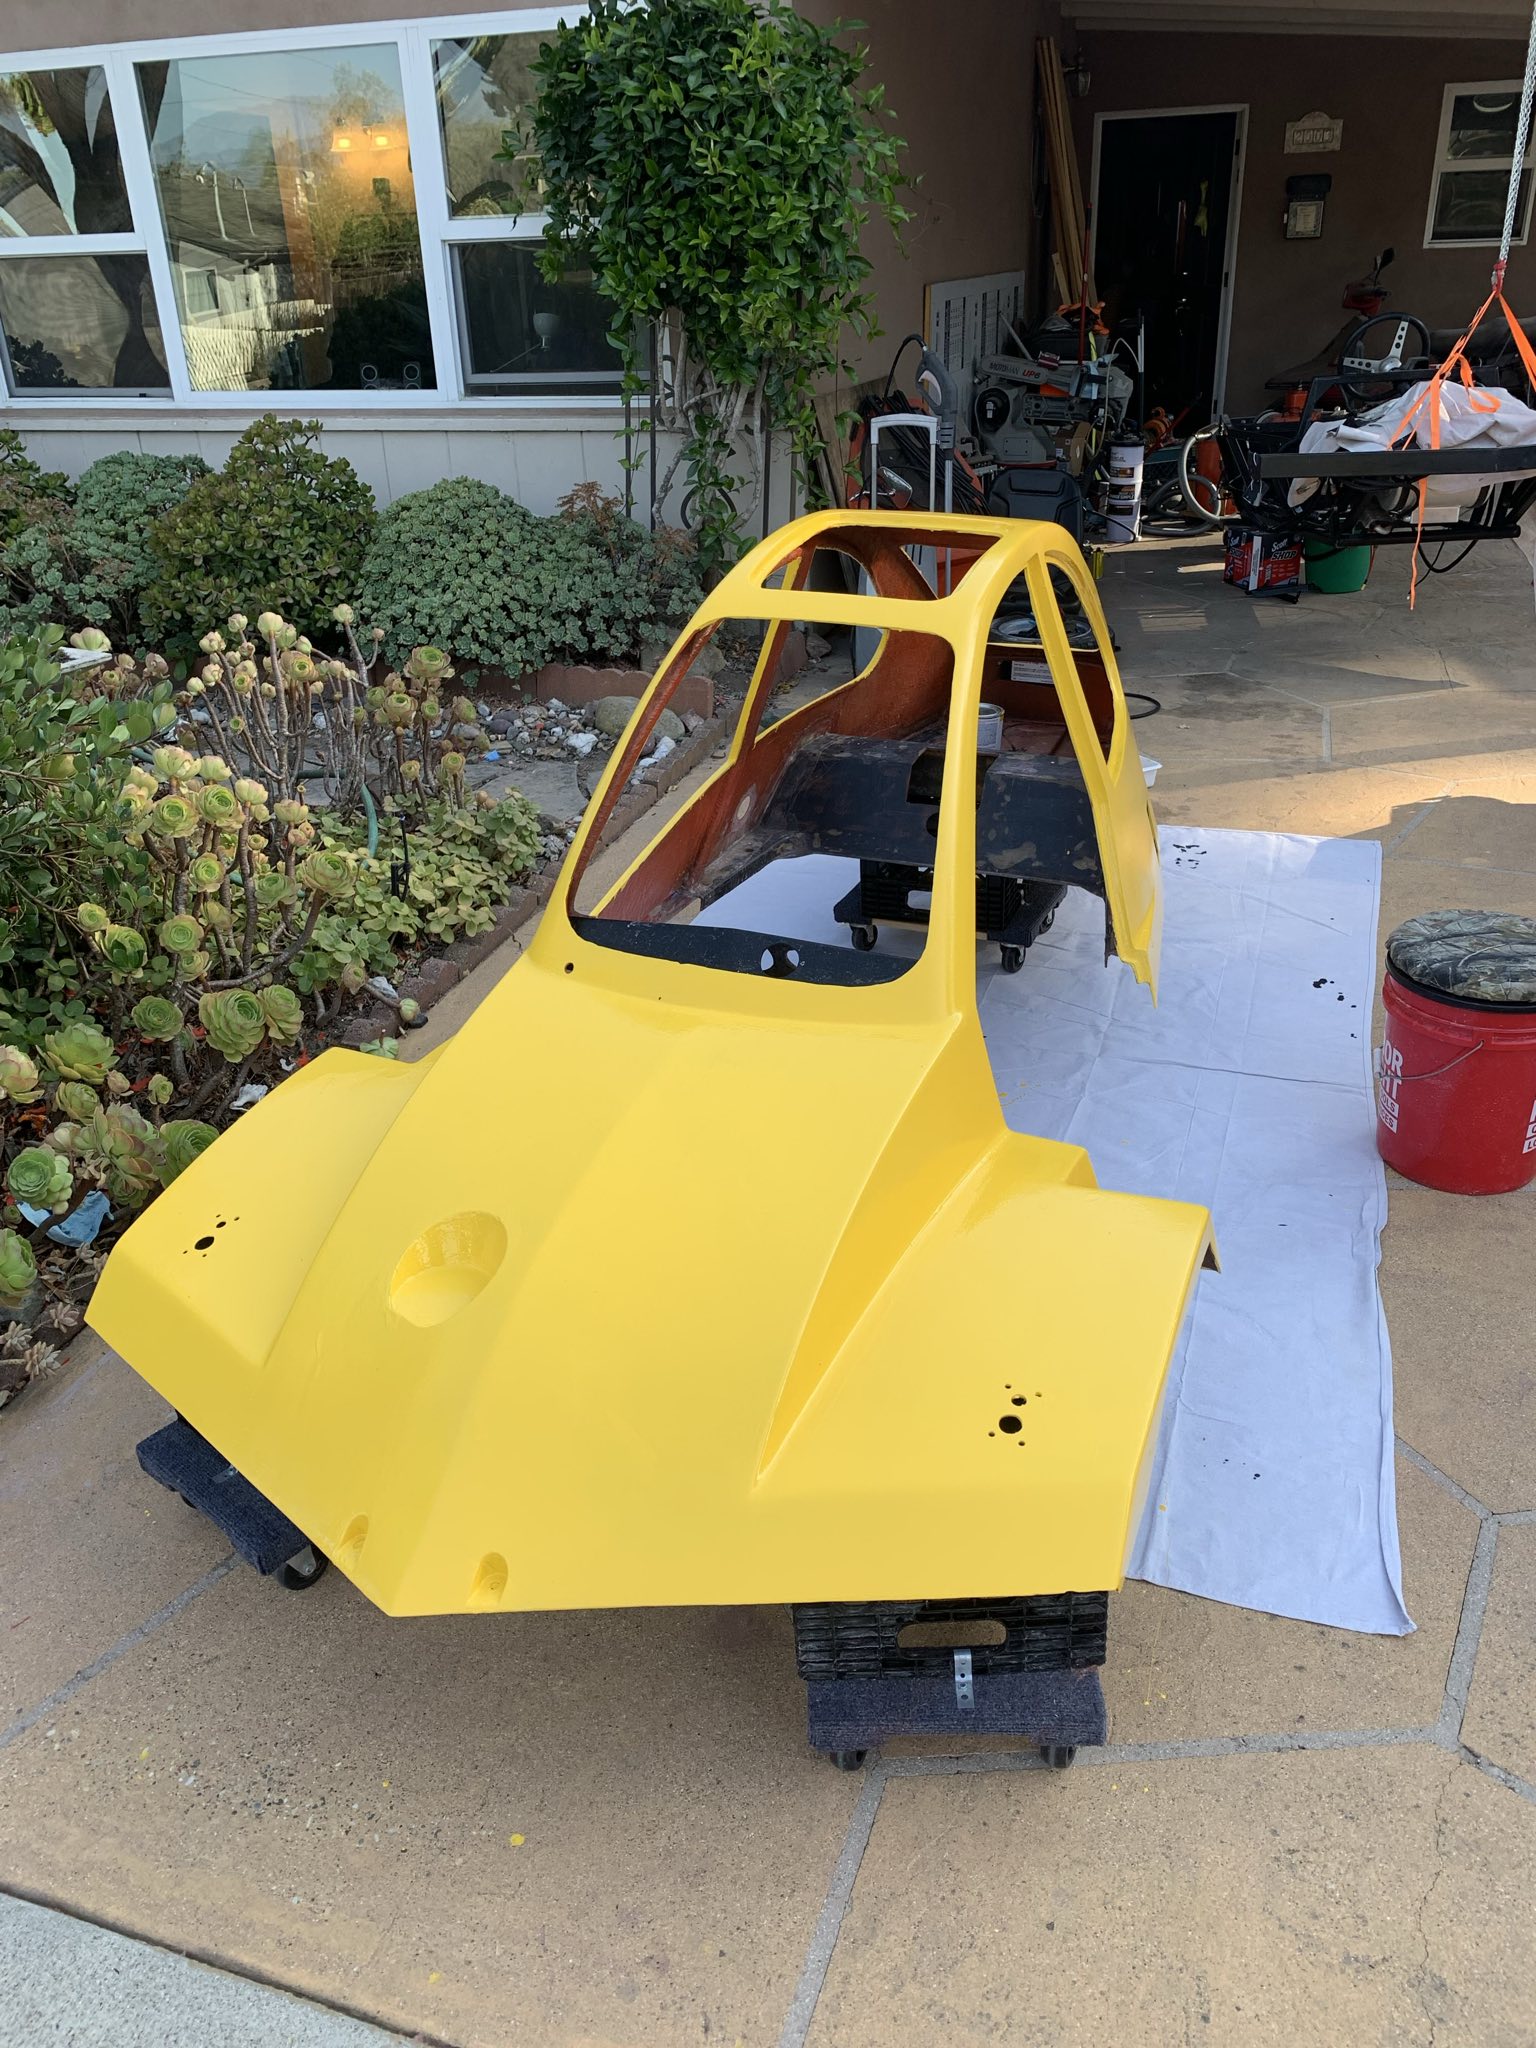
That came out well enough that I wound up just going “YOLO” and using the same paint (rustoleum) to do a roll-on paint-job for the top:

signal-2025-07-05-175812.jpeg

I’m less happy with this. It looks fine at 10 feet, but it’s not good up close. At the moment I’m living with it just because I want to drive the thing, but I definitely want to sand it off and have the thing properly painted in the future.

I also had to revisit a bunch of the bodywork I’ve done. The fuel-filler recess is just a bit located too low, causing the fuel cap neck and the tank neck to actually hit each other. It also needs to be moved rearward about a half-inch. So this means I needed to cut all the work I’d done out, and redo it.

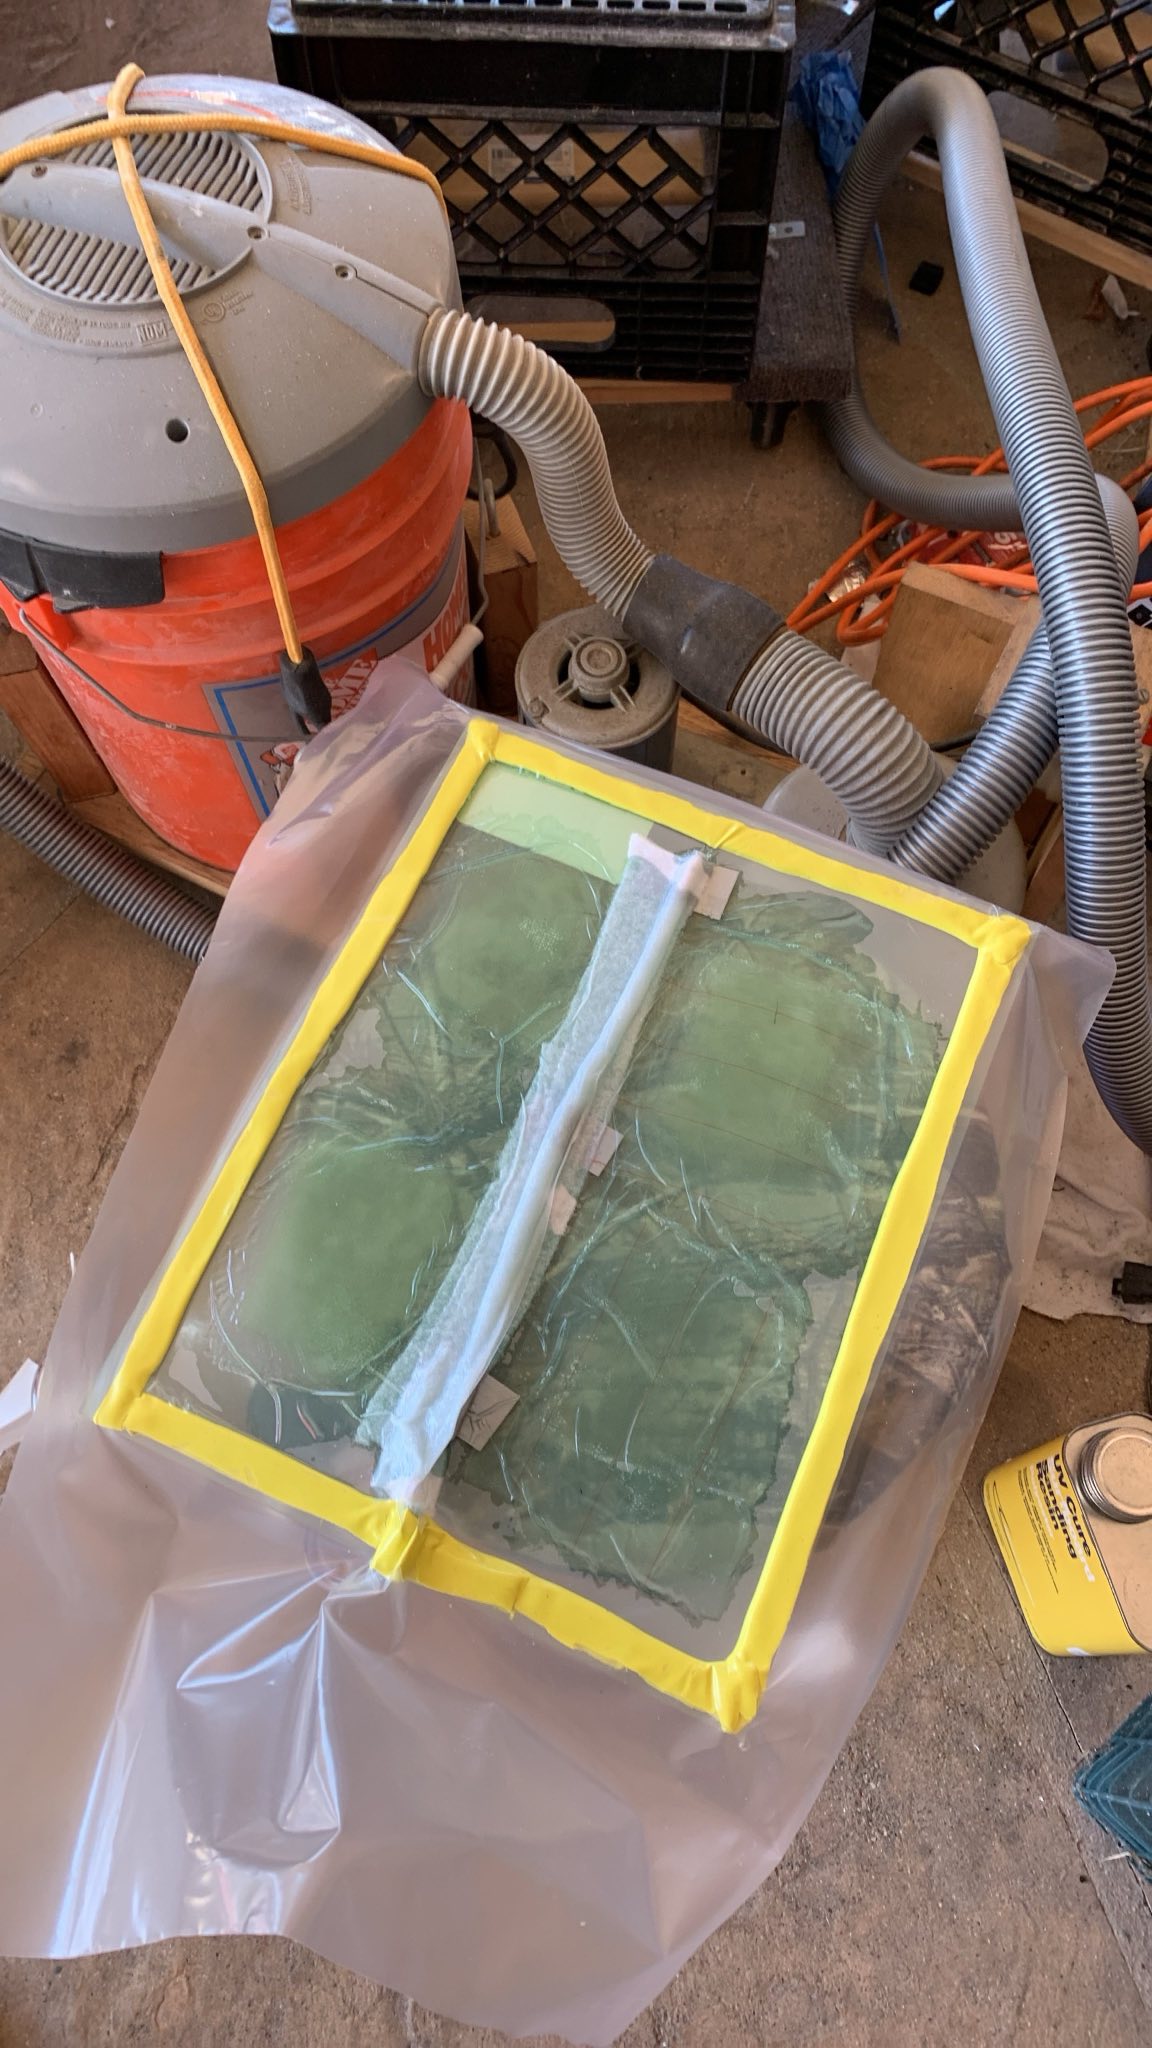
I also decided to experiment with vacuum bagging. I did a test piece, and it came out really well. I’m using a UV-catalyzed polyester resin here, and it is super convenient. I should have been using this the whole time!

signal-2025-08-08-130621.jpeg

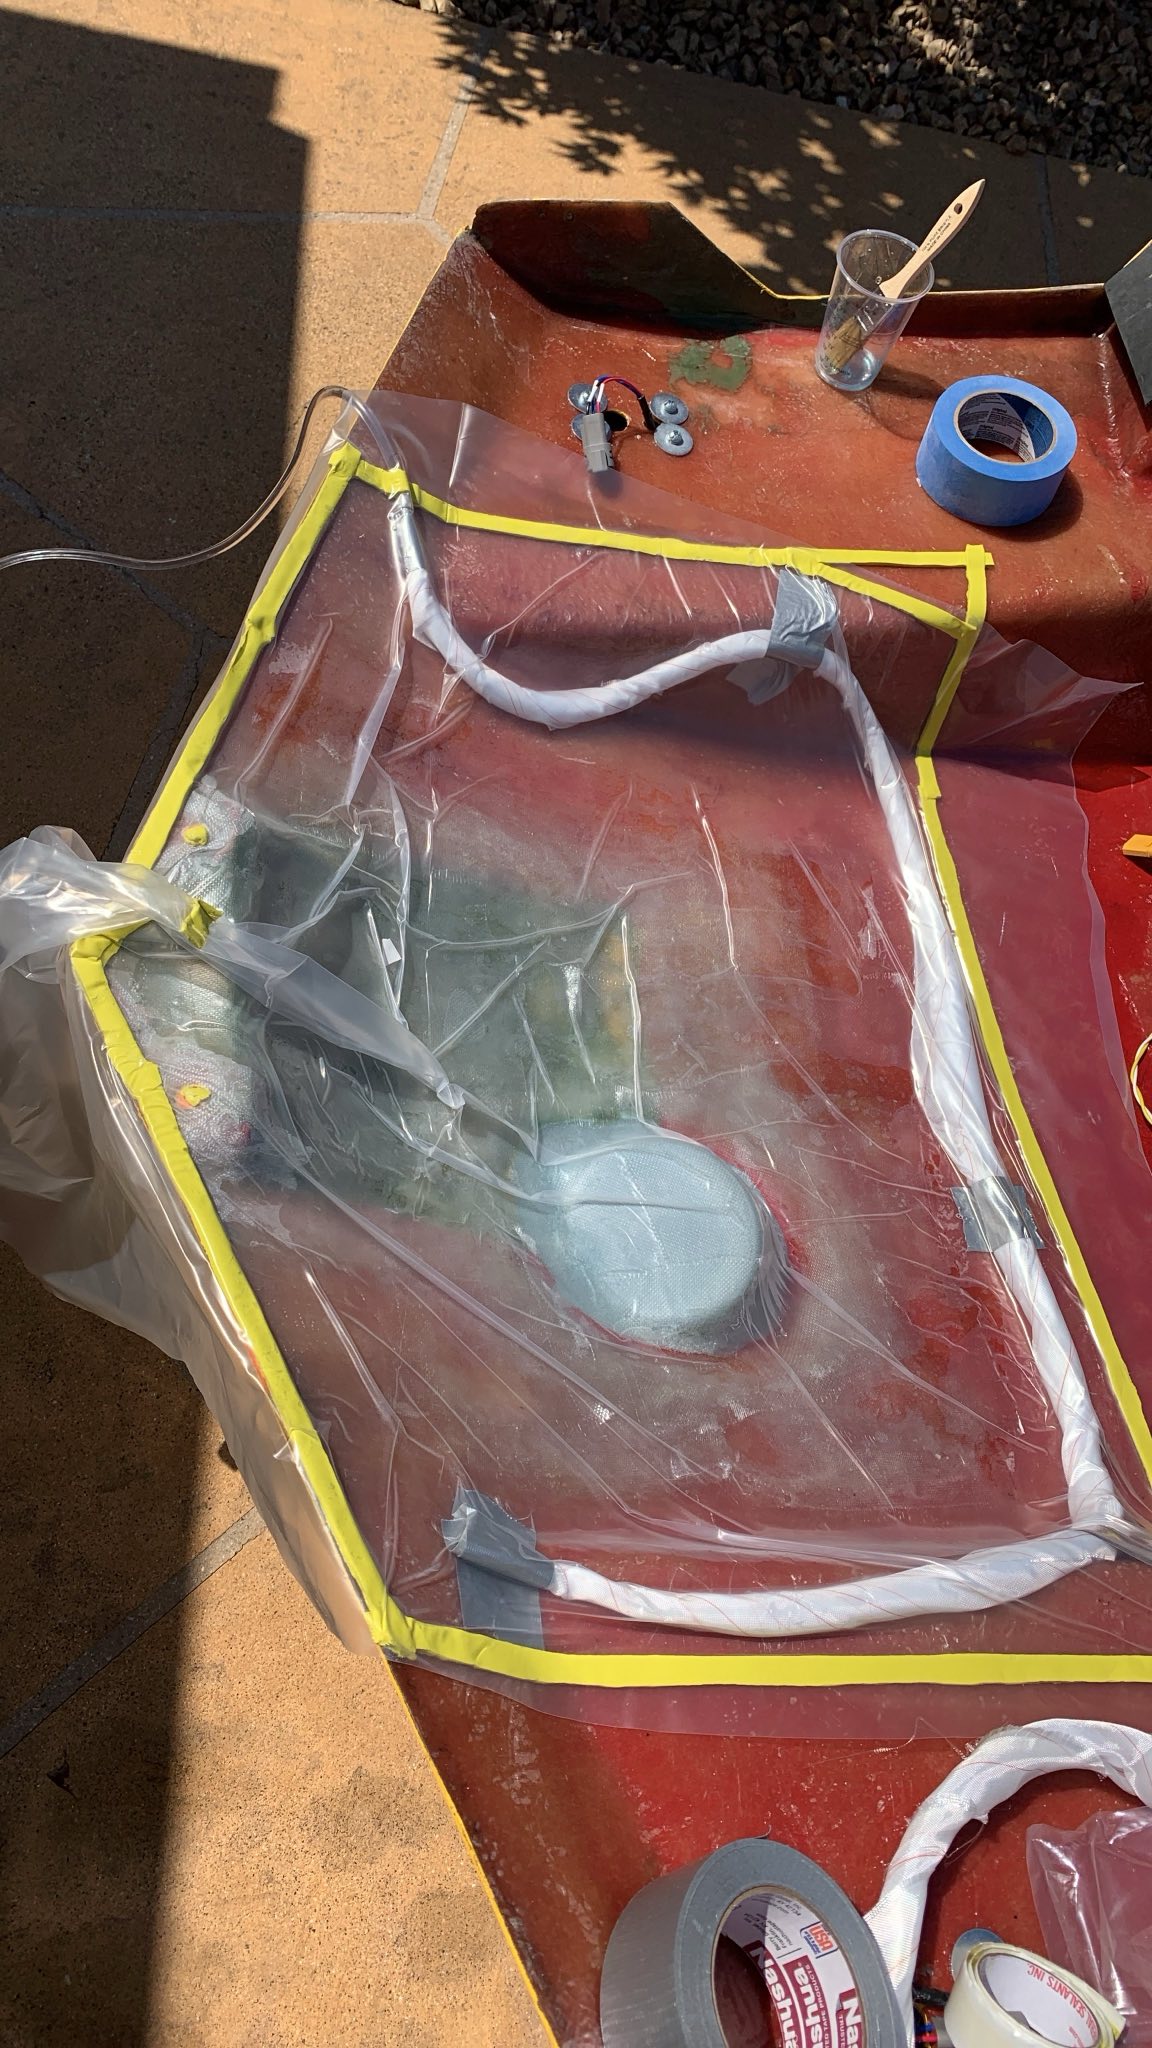
I was able to push the glass around in the bag pretty well, and it set nicely once I put it out in the sun.

signal-2025-08-08-150605.jpeg

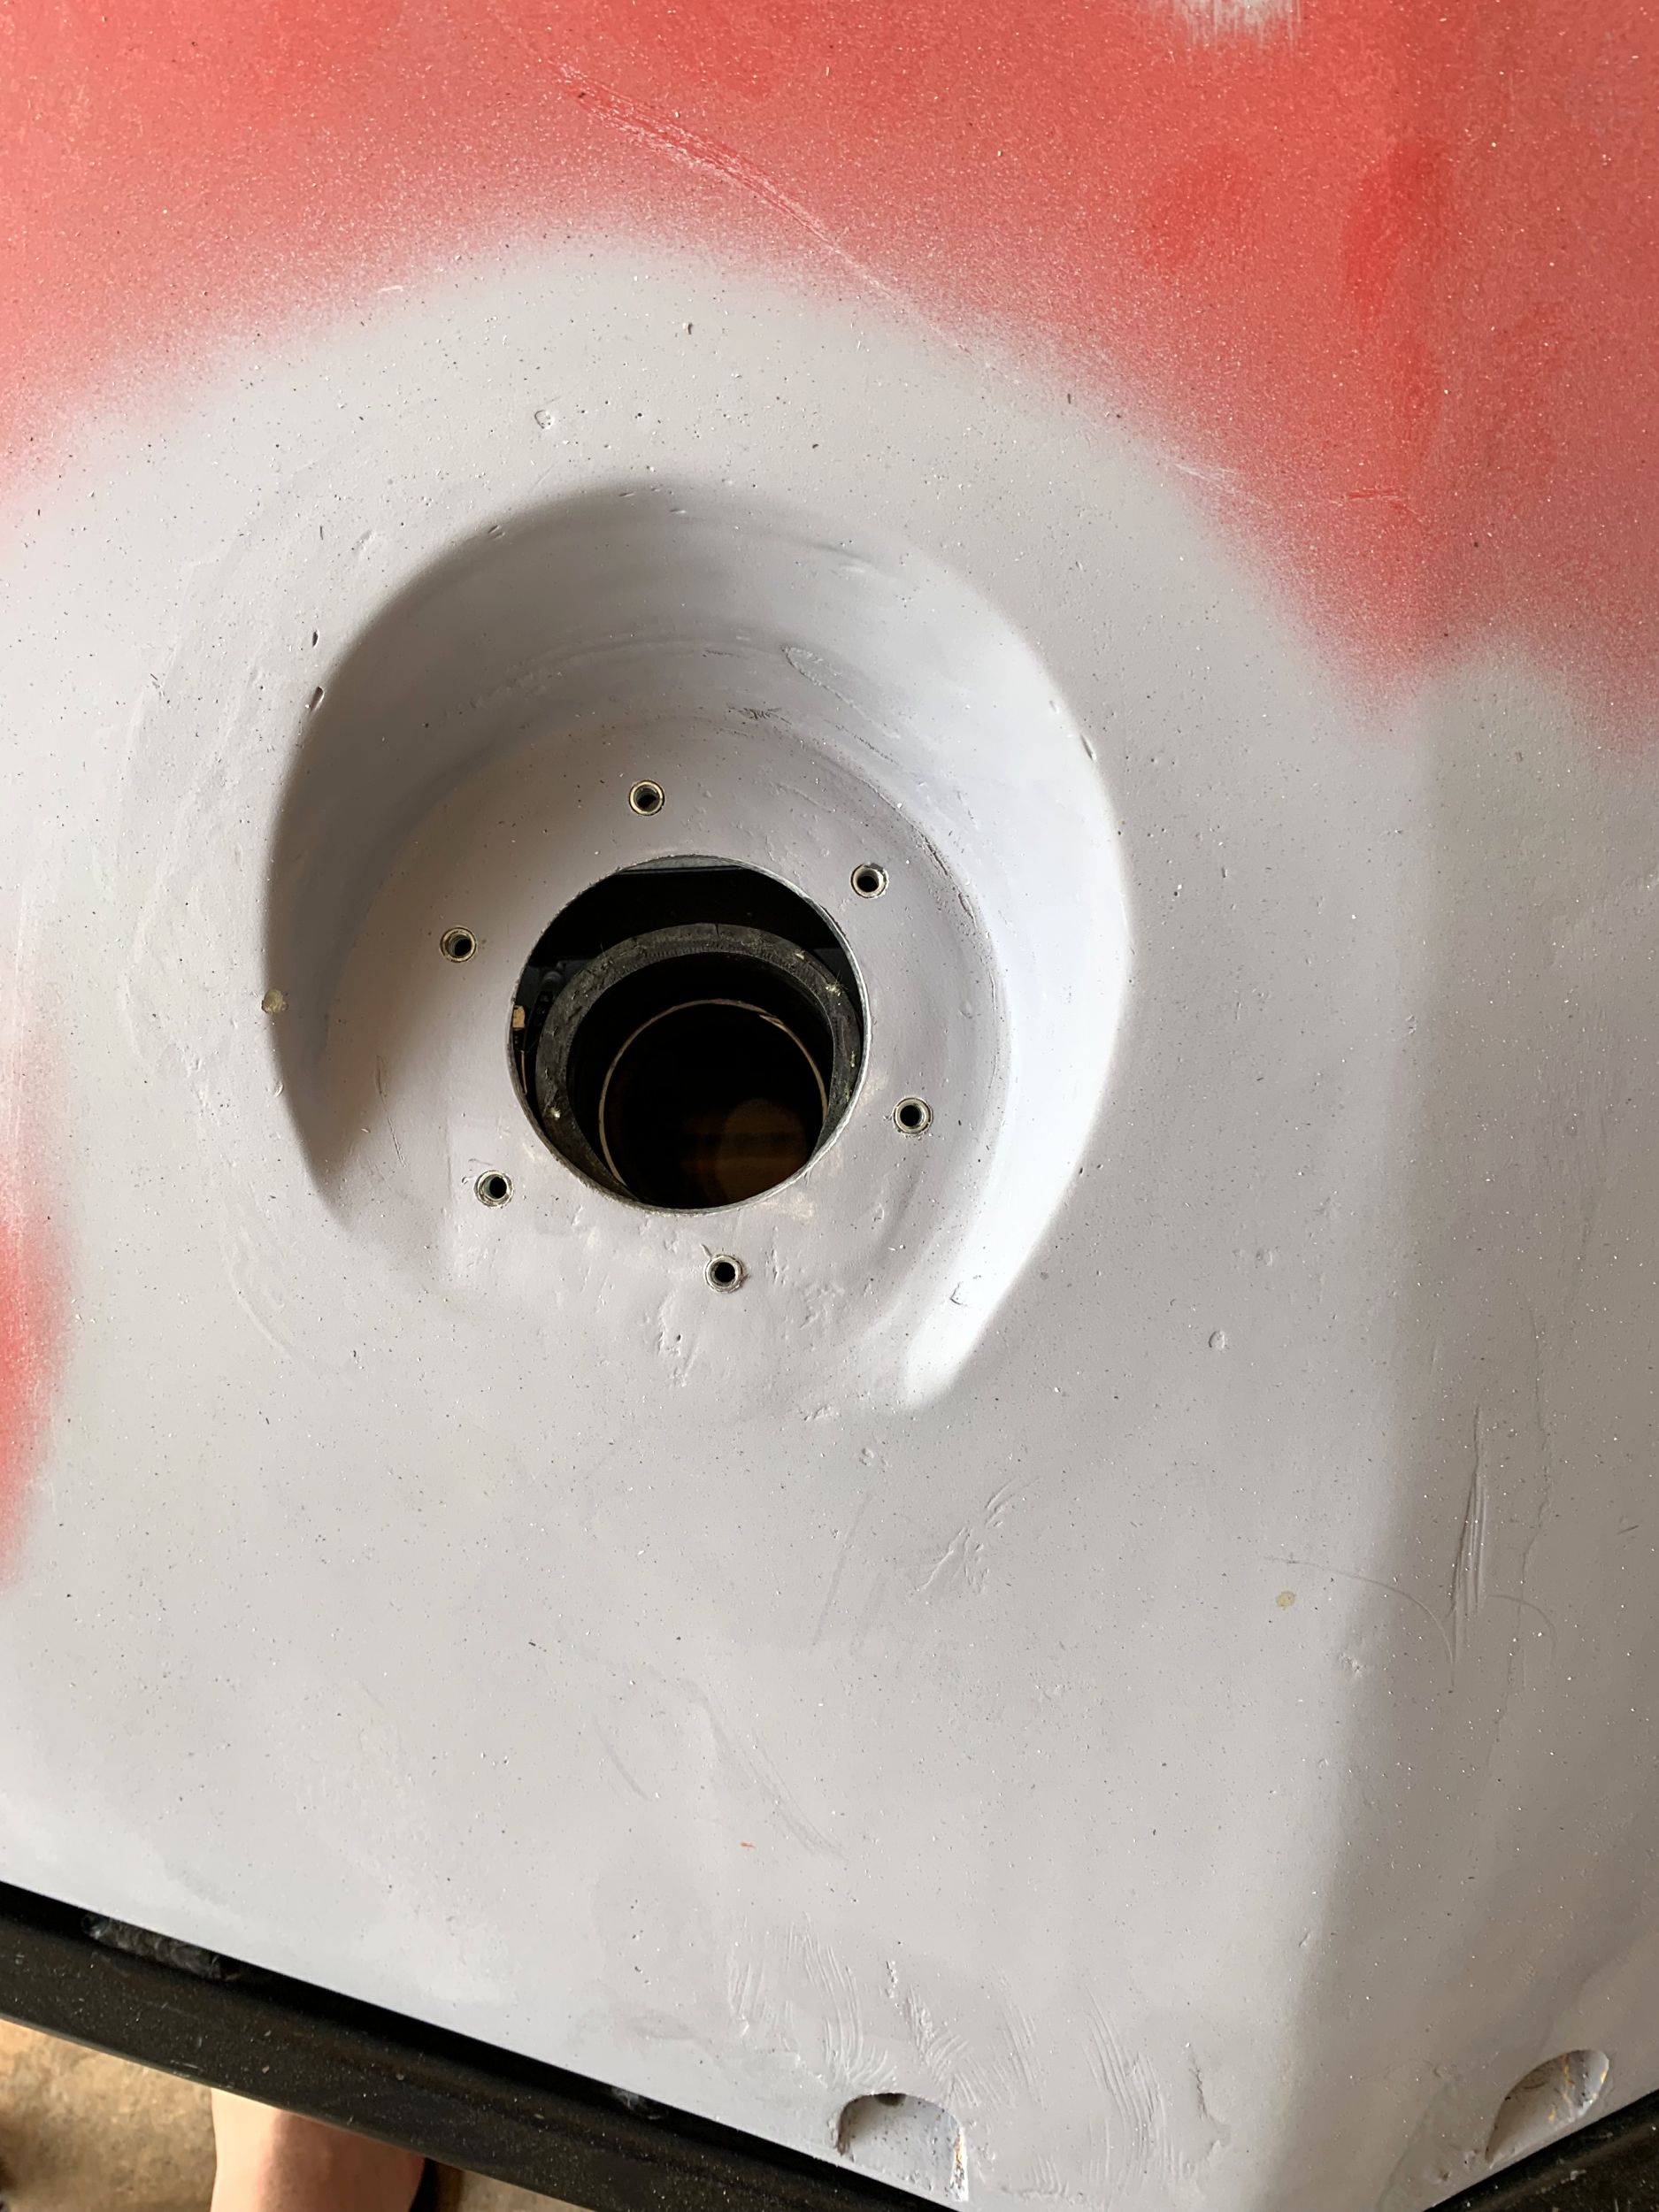
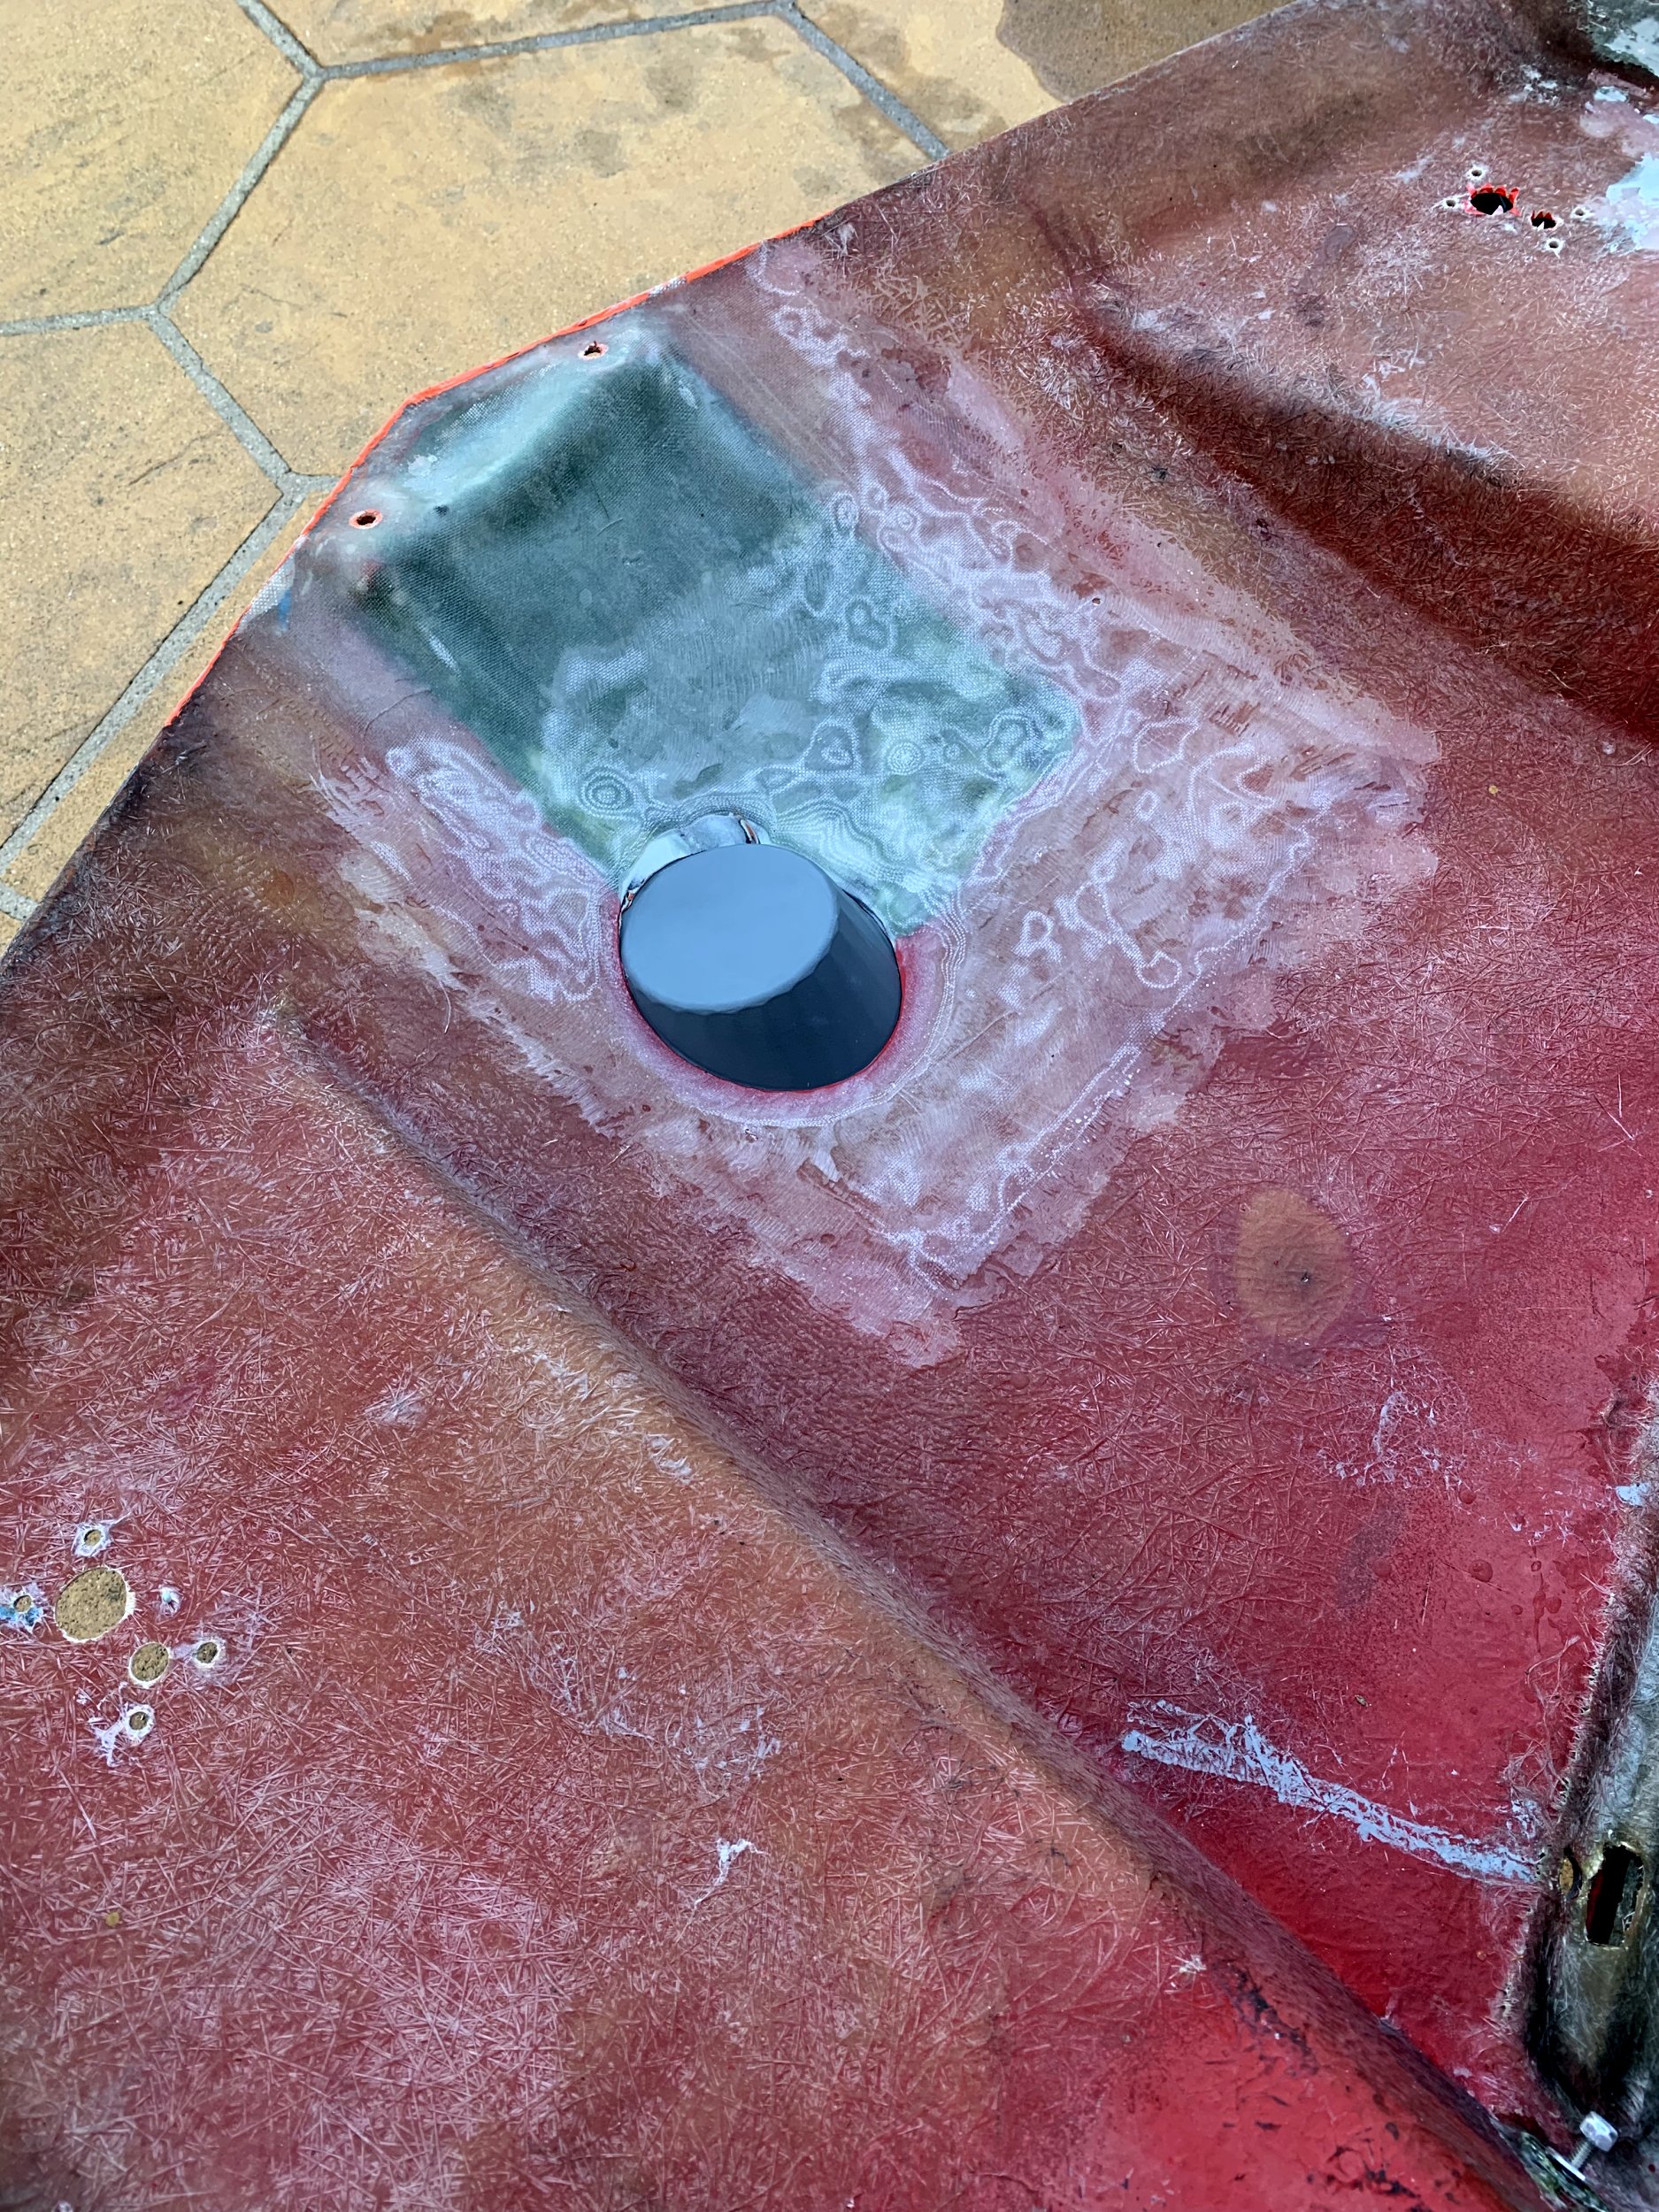
I then tried to do the real thing, and that didn’t go as well. I think I’ve mentioned before I’m working in my carport, because I do not have a garage. This causes issues here, because while I am in the shade, there was enough UV exposure there that the resin started gelling before I had finished the bagging, so the glass didn’t properly get pulled into the corner around the mould. I tried to throw everything together as fast as I could, but I still wound up with a poor result. Sanding it back to remove the sharp corners on the exterior face went all the way wound up going completely thru the body in a few places, so I re-prepped and added even more glass on the interior of the body to hold everything exactly where it needs to go. I also used short-strand reinforced bondo to reconstruct the filler neck shape on the exterior.

IMG_8402.jpg

It needs more work (sanding the interior of a conical profile is not easy), but I threw some primer on it so I can at least drive the thing. Really, the whole nose needs some more care.

Engine Maintenance

The engine in my Freeway has always been somewhat hard-starting. I assumed this was just because the engine was tired and worn out, but I set out to measure that. This means I needed to remove the head, and measure the bore.

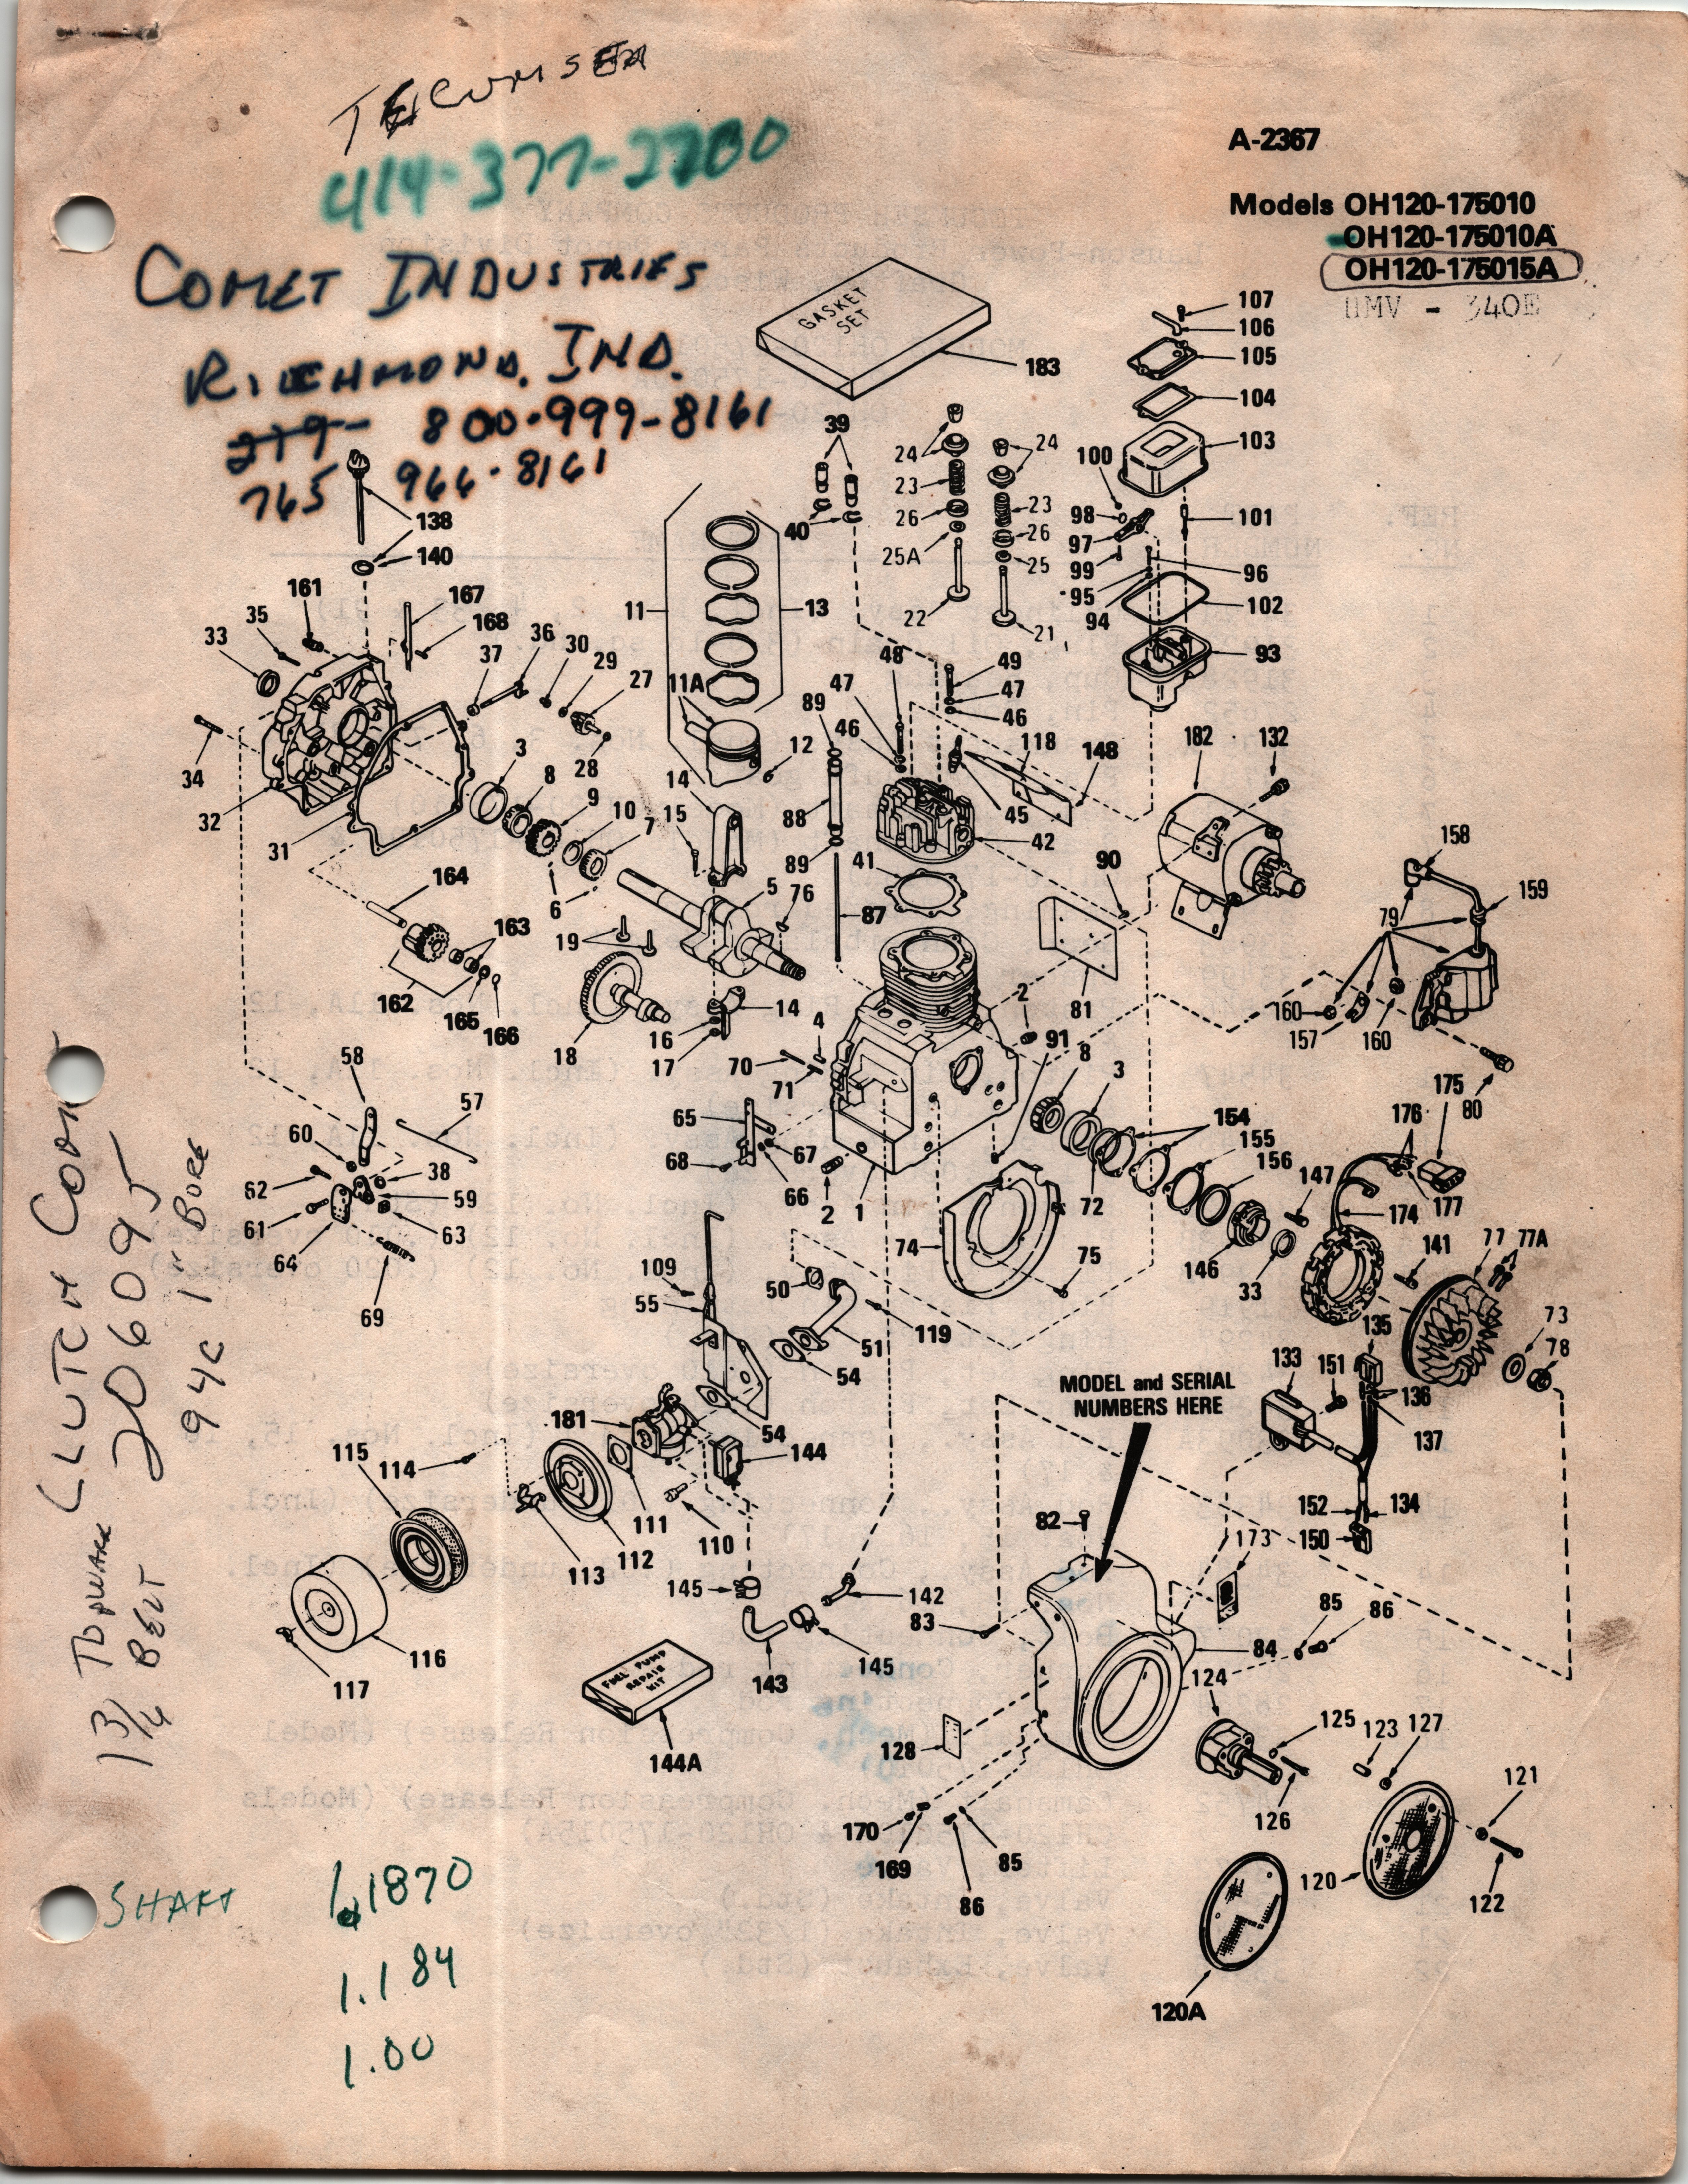
For this engine, this is way way more work then it should take. This is an overhead valve engine, and pretty obviously Tecumseh engineered it by just hacking pushrods + overhead values into an existing engine design. The valves are located in a valve box that is just bolted to the top of the engine, obscuring some of the head bolts.

Tecumseh-manual-0001.jpg

This means you have to remove the valve box to remove the head. To remove the valve box, you have to remove the valve springs. To remove the valve springs, you have to remove the rocker arms.

This is, to put it lightly, extremely annoying. It took me most of the afternoon to deal with all the annoying steps, figure out a janky valve spring compressor to let me remove the valve spring keepers, etc…

Once things were disassembled, I was able to use some snap gauges to determine the cylinder bore is about 0.004-0.005 oversize at the bottom. I also found a lot of carbon deposits that I cleaned out. The valves looked fine, though the exhaust valve was a bit loose in it’s guide. The cylinder was also pretty glazed, so it definitely needs work.

I then reversed the process, getting everything back together, torqueing things, etc.. I had it fully reassembled, put oil in the engine, etc..

And it wouldn’t start.

Considering I was pushing to get this together to go to a project vehicle meet at work, this was annoying to say the least.

After some debugging (and finding I had missed the engine-stop connection), I had spark, but the hall effect sensor I had added to give me a tachometer output was causing it to spark at the wrong time. That was easy enough to fix (remove the magnet, which was several inches from the CDI ignition pickup), but it would still barely turn over.

At this point, I suspected the starter, and amazon had a replacement for $50, so I ordered one in hope that would be the issue.

Aaaaand, it turns out the starter has probably been dying for longer then I had the Freeway. It ha always been kind of lound and made grinding noises, but I assumed this was just crappy lawn-mower engine parts. It turns out the starter was just dying the whole time.

It starts so much easier now, you don’t need to spend several minutes fiddling with the choke, and it just sounds like a motor now, not dying gears.

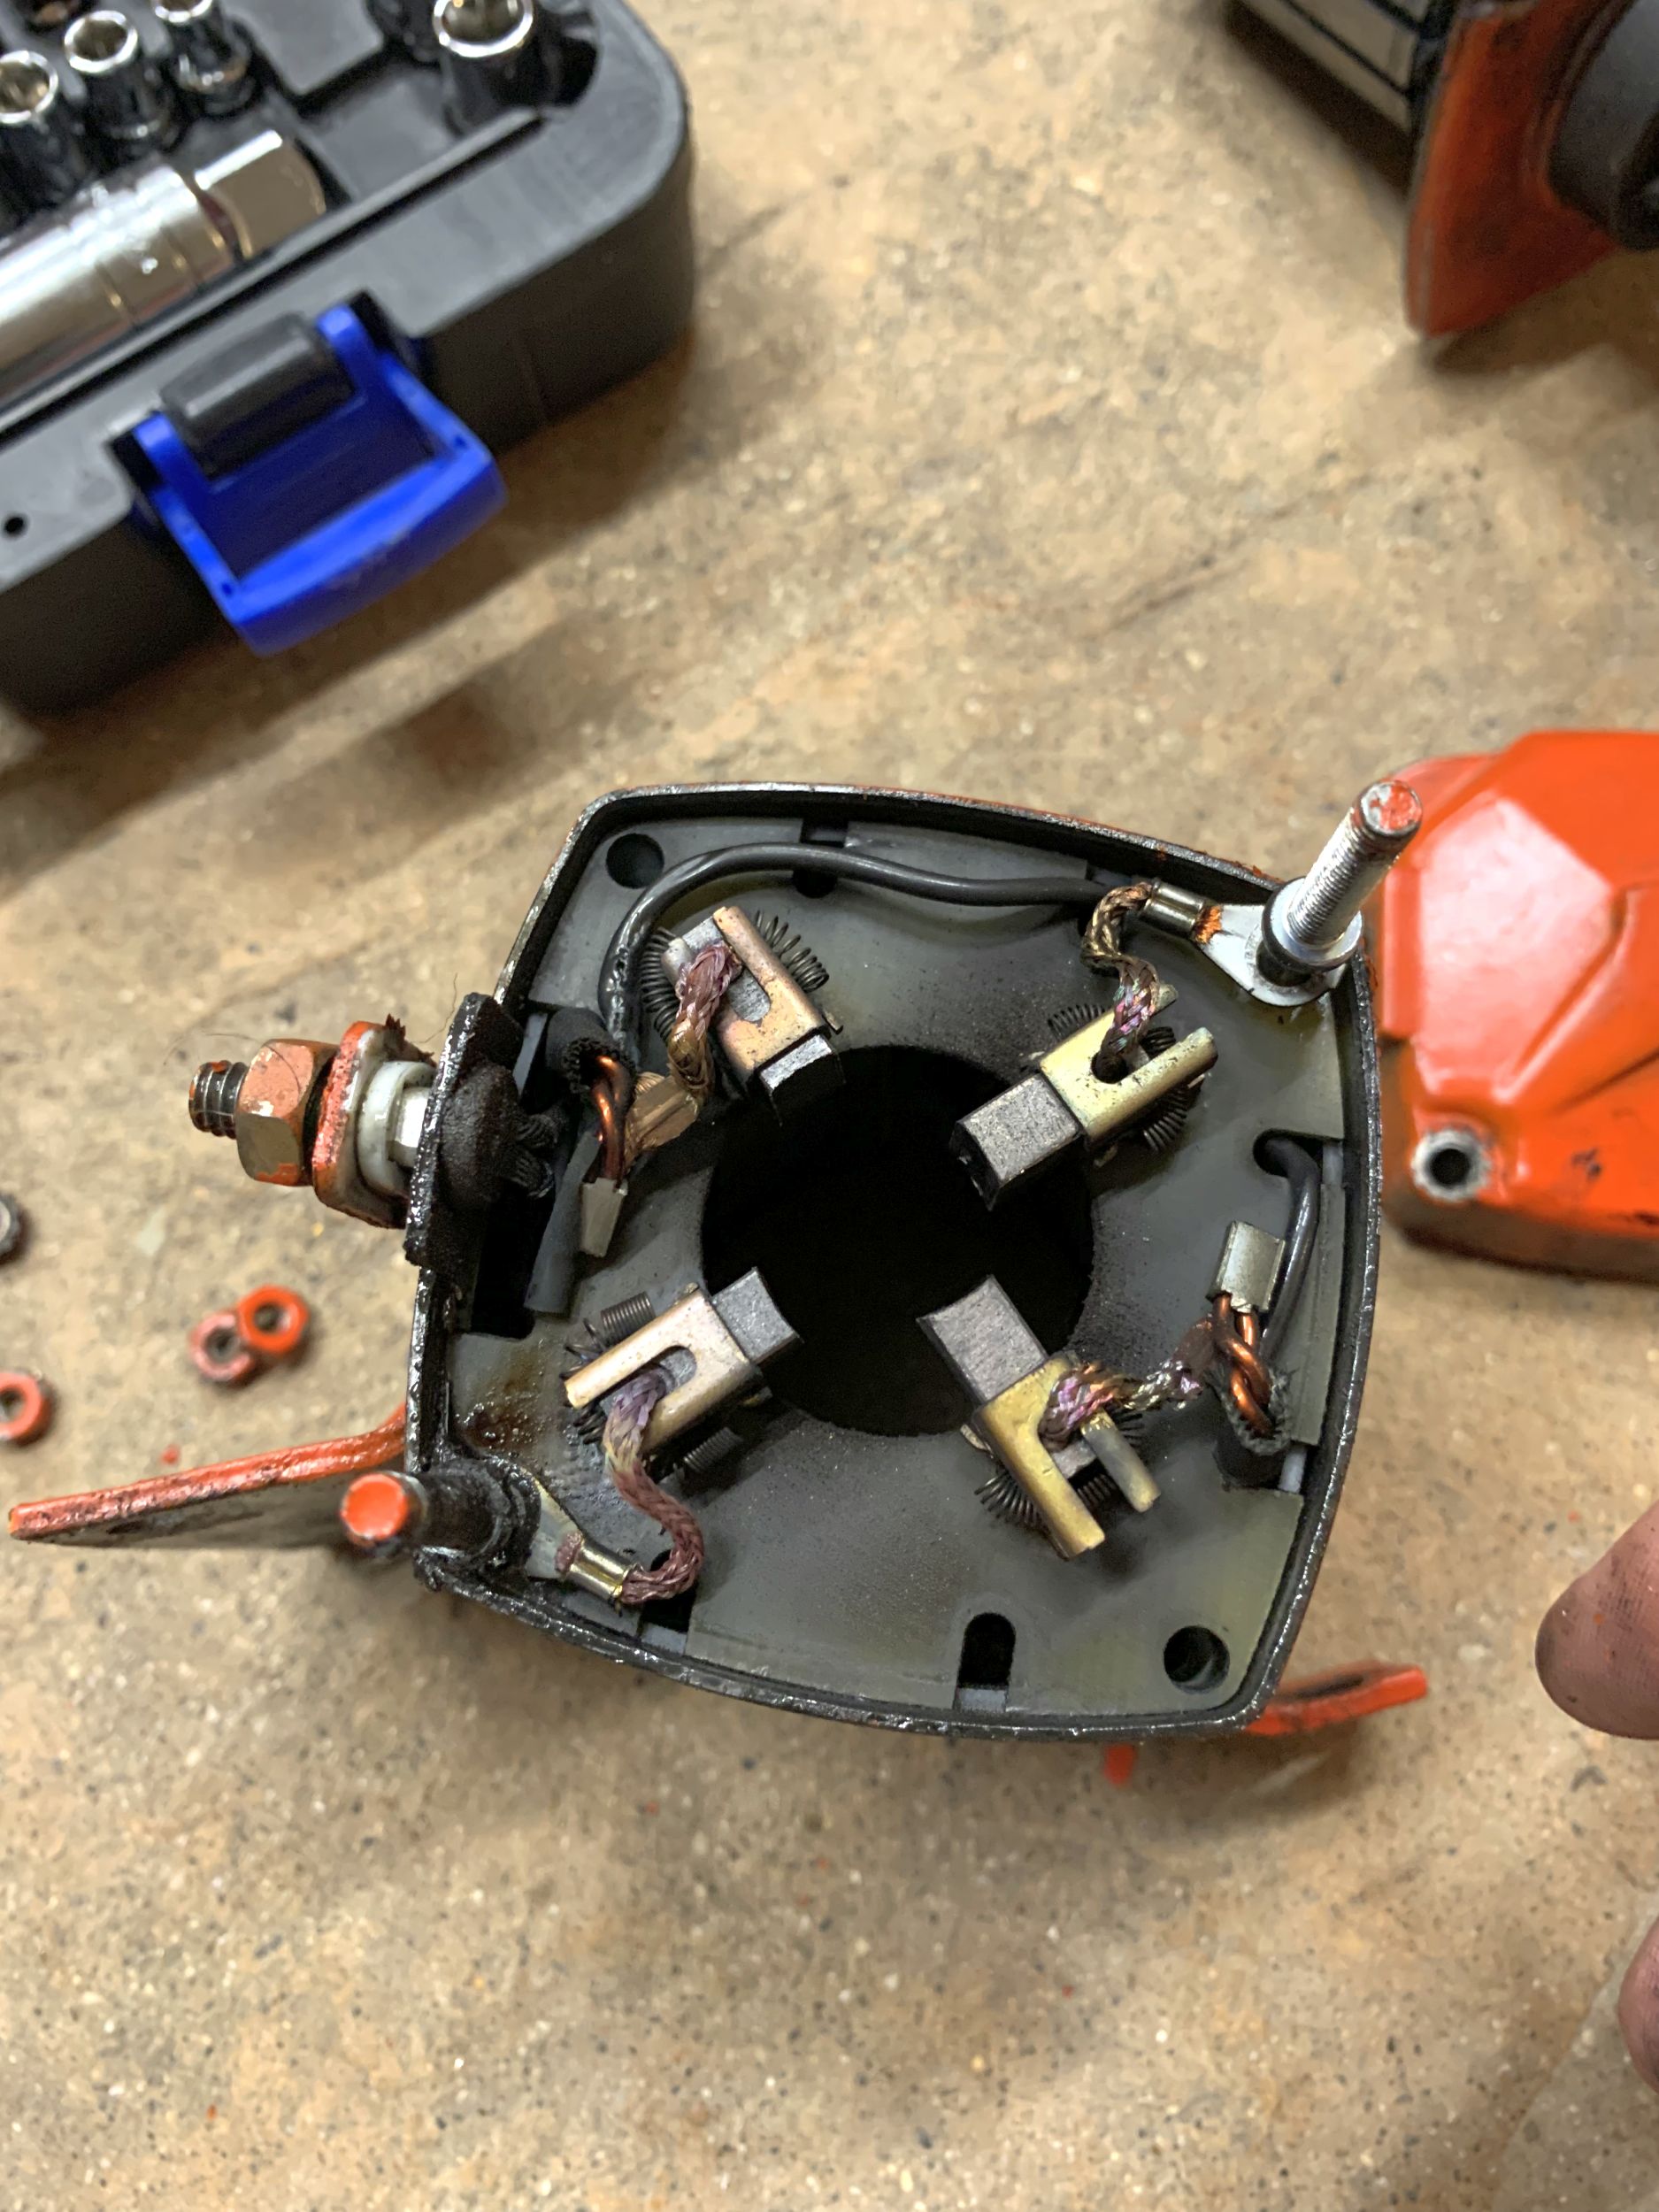
Out of curiosity, I disassembled the old starter:

IMG_8406.jpg

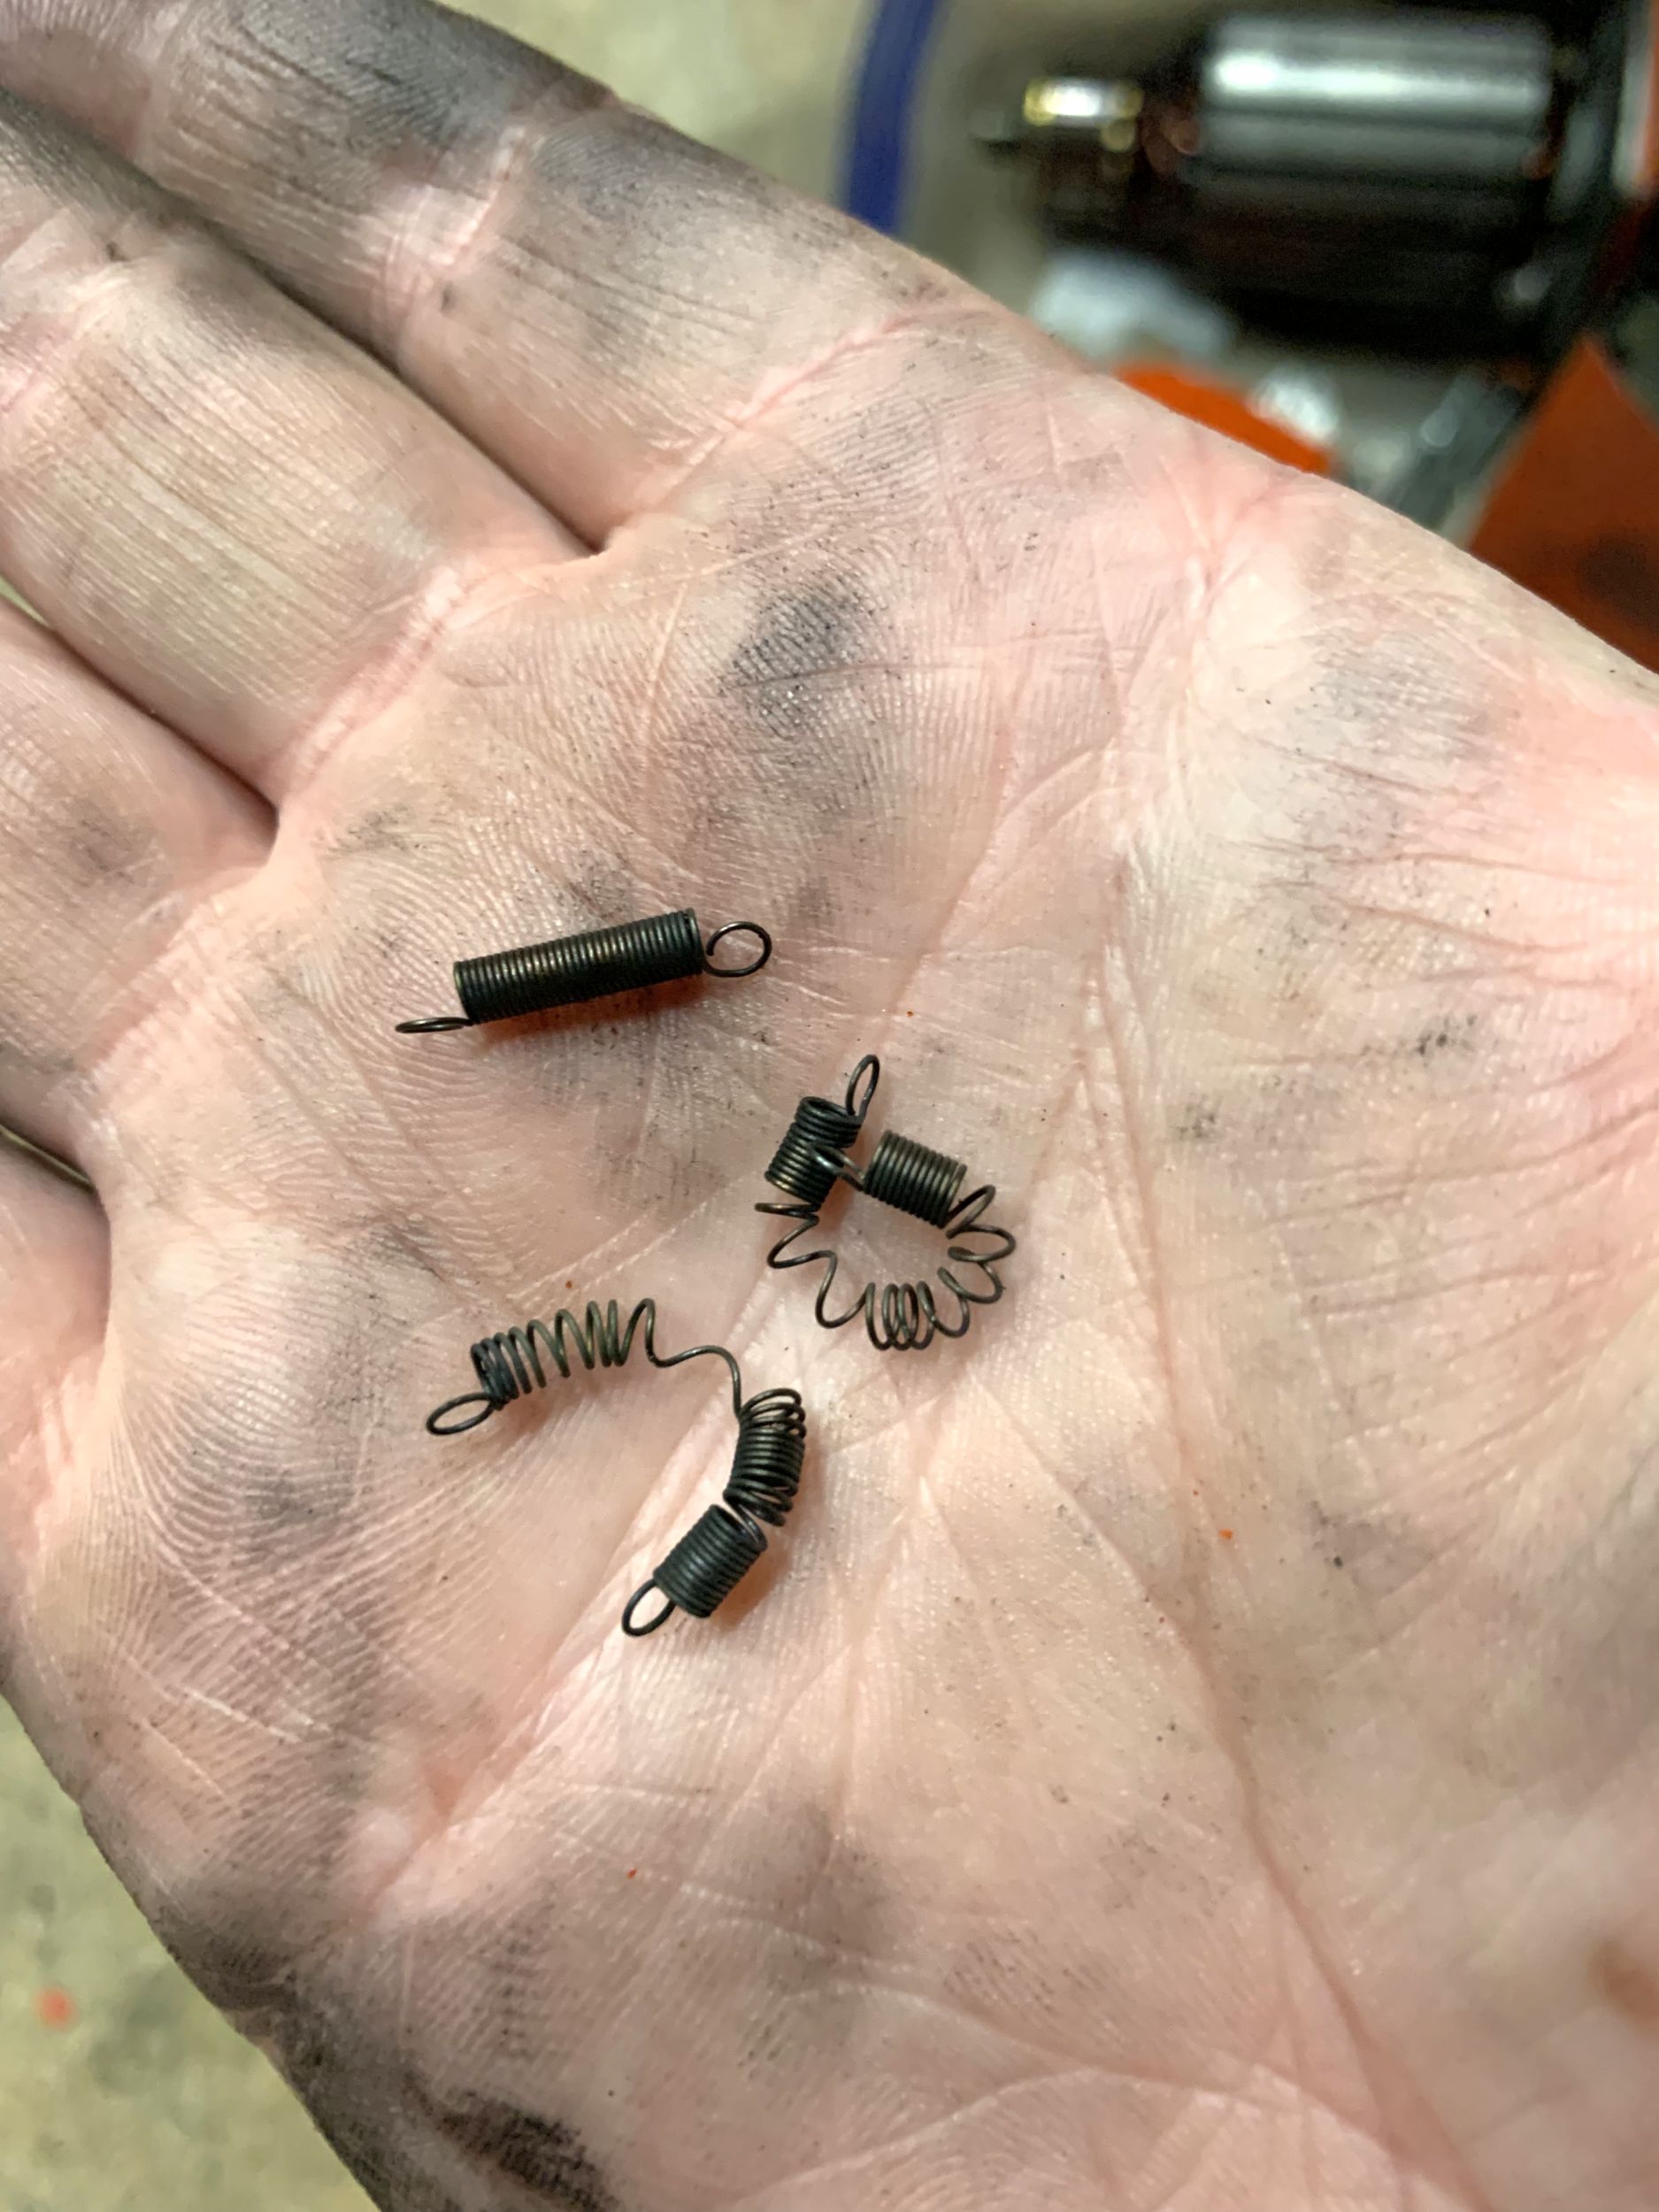
1 1/2 of the brushes appear to be dead. Specifically, the spring that provides force to push them against the commutator has completely lost their tension. I’m guessing that just the few bumps from handling the engine out of the chassis knocked the brushes back enough that they finally completely lost contact with the commutator.

IMG_8409.jpg

My assumption was it overheated at some point, and the springs got hot enough that they deformed and annealed enough to lose their springyness. One of the carbon brushes was stuck in it’s brass guide, and the two failed brush guides have pretty obvious temperature related discolouration.

……

On the other hand, Tecumseh made both 0.010” and 0.020 oversize pistons for this engine, and a 0.010” oversize new-old-stock piston with rings and wrist-pin on ebay was $50, so I now have new rings and a oversize piston to put in the engine. I just need to find a local engine machine shop that will humor my bizarre engine.

Ebay/Caramel nightmares.

So I’ve not been posting much recently, largely out of irritation. I can, however, say my HMV Freeway is now fully reassembled and I’ve put 100 miles on it so far.

So the long story short is I purchased this through ebay. Specifically, when you buy a car through ebay, it uses a subcontractor for ebay called “Caramel” (caramel. Get it?). They effectively function as a dealership, handling the title transfer and paperwork. They also charge you a lot for this.

They also, kind of, really suck.

I should be specific, I am pretty confident that the Freeway is a extremely oddball vehicle. Specifically, it has a non-standardized VIN. The laws for US VIN harmonization was passed in 1980, and didn’t require compliance until 1982. However, basically every manufacturer pre-emptively started using harmonized VINs in 1981.

Do you think HMV used a harmonized VIN in 1981? Lolrite. They had planned out these VINs and probably had the stickers printed earlier. You think they would waste that?

So then, a bunch of services, like both ebay and caramel then looked at the vehicles they had seen, and went and wrote a bunch of software (like the ebay website) that (incorrectly) requires all post-1980 vehicles to have a specific VIN format.

So the end result is that basically EVERY step of the purchase process involved me having to call caramel, things would get a bit unstuck, and then things would get a bit further, get stuck again, I’d call again, repeat. I think by the time they actually processed things to the point where I was ready to pick the thing up, I had called them 12+ times.

Then, they started asking for weird crap. My Freeway was previously registered in California, I’m in california, so this should be a straightforward transfer. And they were telling me I needed to do a VIN verification at the DMV.

So I let things sit. Hoping something at their end would eventually go “this hasn’t moved in {time period}. Maybe check if something is wrong”. Did this happen? No.

The Freeway was in pieces in my carport, so I couldn’t exactly drive it anyways, so I wasn’t in a hurry.

So ~4 months passed. With no communication.

Eventually, I had returned the thing to a state where it was drivable again, and drove it to the DMV for the verification.

The very nice fellow at the DMV was completely confused about why I was even there, since the VIN verification is not needed for a intra-california transfer, but he went along and filled out the paperwork himself. There were issues, since whoever restored this thing previously removed the VIN tag from the engine, and damaged the one on the front-area. So there is one readable VIN sticker on the thing. And the paint job on the engine made the engine number nigh unreadable. I wound up with some more information and a verification paper that said I would need to make an appointment with the CHP (California highway patrol) for a more detailed inspection.

At this point, I emailed the verification paperwork to caramel, and they responded telling me I needed to go deal with the CHP.

I responded asking what the hell was going on, since the DMV person said none of this should be needed.

They then finally told me they had lost the title. In the mail from the original seller.

4 months before I dragged this fact out of them.

Caramel provides the mailing label for the title to the person selling the vehicle, so apparently they couldn’t be bothered to even pay for insurance on the title. To handle this, they had applied for a replacement tile. From West Virginia (this explains the process they were trying to get me to do: it’s what you have to do to transfer a car into California. It was originally from WVA). They were trying to get me to do all this extra crap without letting me know it was all because of their error.

At this point, I was absolutely apoplectic.

I basically responded to Caramel, telling them that they could either resolve this with the DMV themselves, or have an agent on their part come and deal with getting things handled at the CHP.

They then took a week, and then called me (whyyyy) and told me they hand it handled, and the license plate was in the mail, and they had gotten a proper, CA title.

Anyways, a week or so later, I had the plate and registration. I have no idea what they did, but the registration has the incorrect engine number on it. They have images of the original title which definitely has the correct engine-number, but they used the value from the vin verification paperwork for some reason.

At this point, I don’t care. The VIN is correct, and I have current and valid registration stickers for the plate. I plan to change the engine anyways, and it’s not exactly valuable, so it is what it is.

Monday, June 30, 2025

Fiberglass ughhhhhhhhh

So I think the original workmanship on the HMV Freeway is intentionally trying to make me suffer at this point.

I had determined that the only place the remaining fuel odor could be coming from is dirt and other refuse stuck in the gaps between the steel frame and the fiberglass lower body. I know I certainly spilled a couple tablespoons of gas when removing the tank, mostly out of idiocy and the fuel tank hose having a bit of gas left in it, and it drizzling that fuel all over the floor of the freeway when I accidentally knocked it down from my (inadequate) attempt to prop it up.

So. This means I get to have another adventure: removing the entire front suspension arrangement, because it goes through the body bottom half.

The main challenge here was I wasn’t sure how the main cross-body suspension member worked. I thought it was a torsion member (like a sway bar) to help reduce body-roll, but it appears it’s effectively just two separate arms with a through-bolt to hold them in. There’s no real lower-arm bearing, just a tube rotating in another tube. At least they have a grease zerk to allow you to force grease in between them.

IMG_8322.jpg

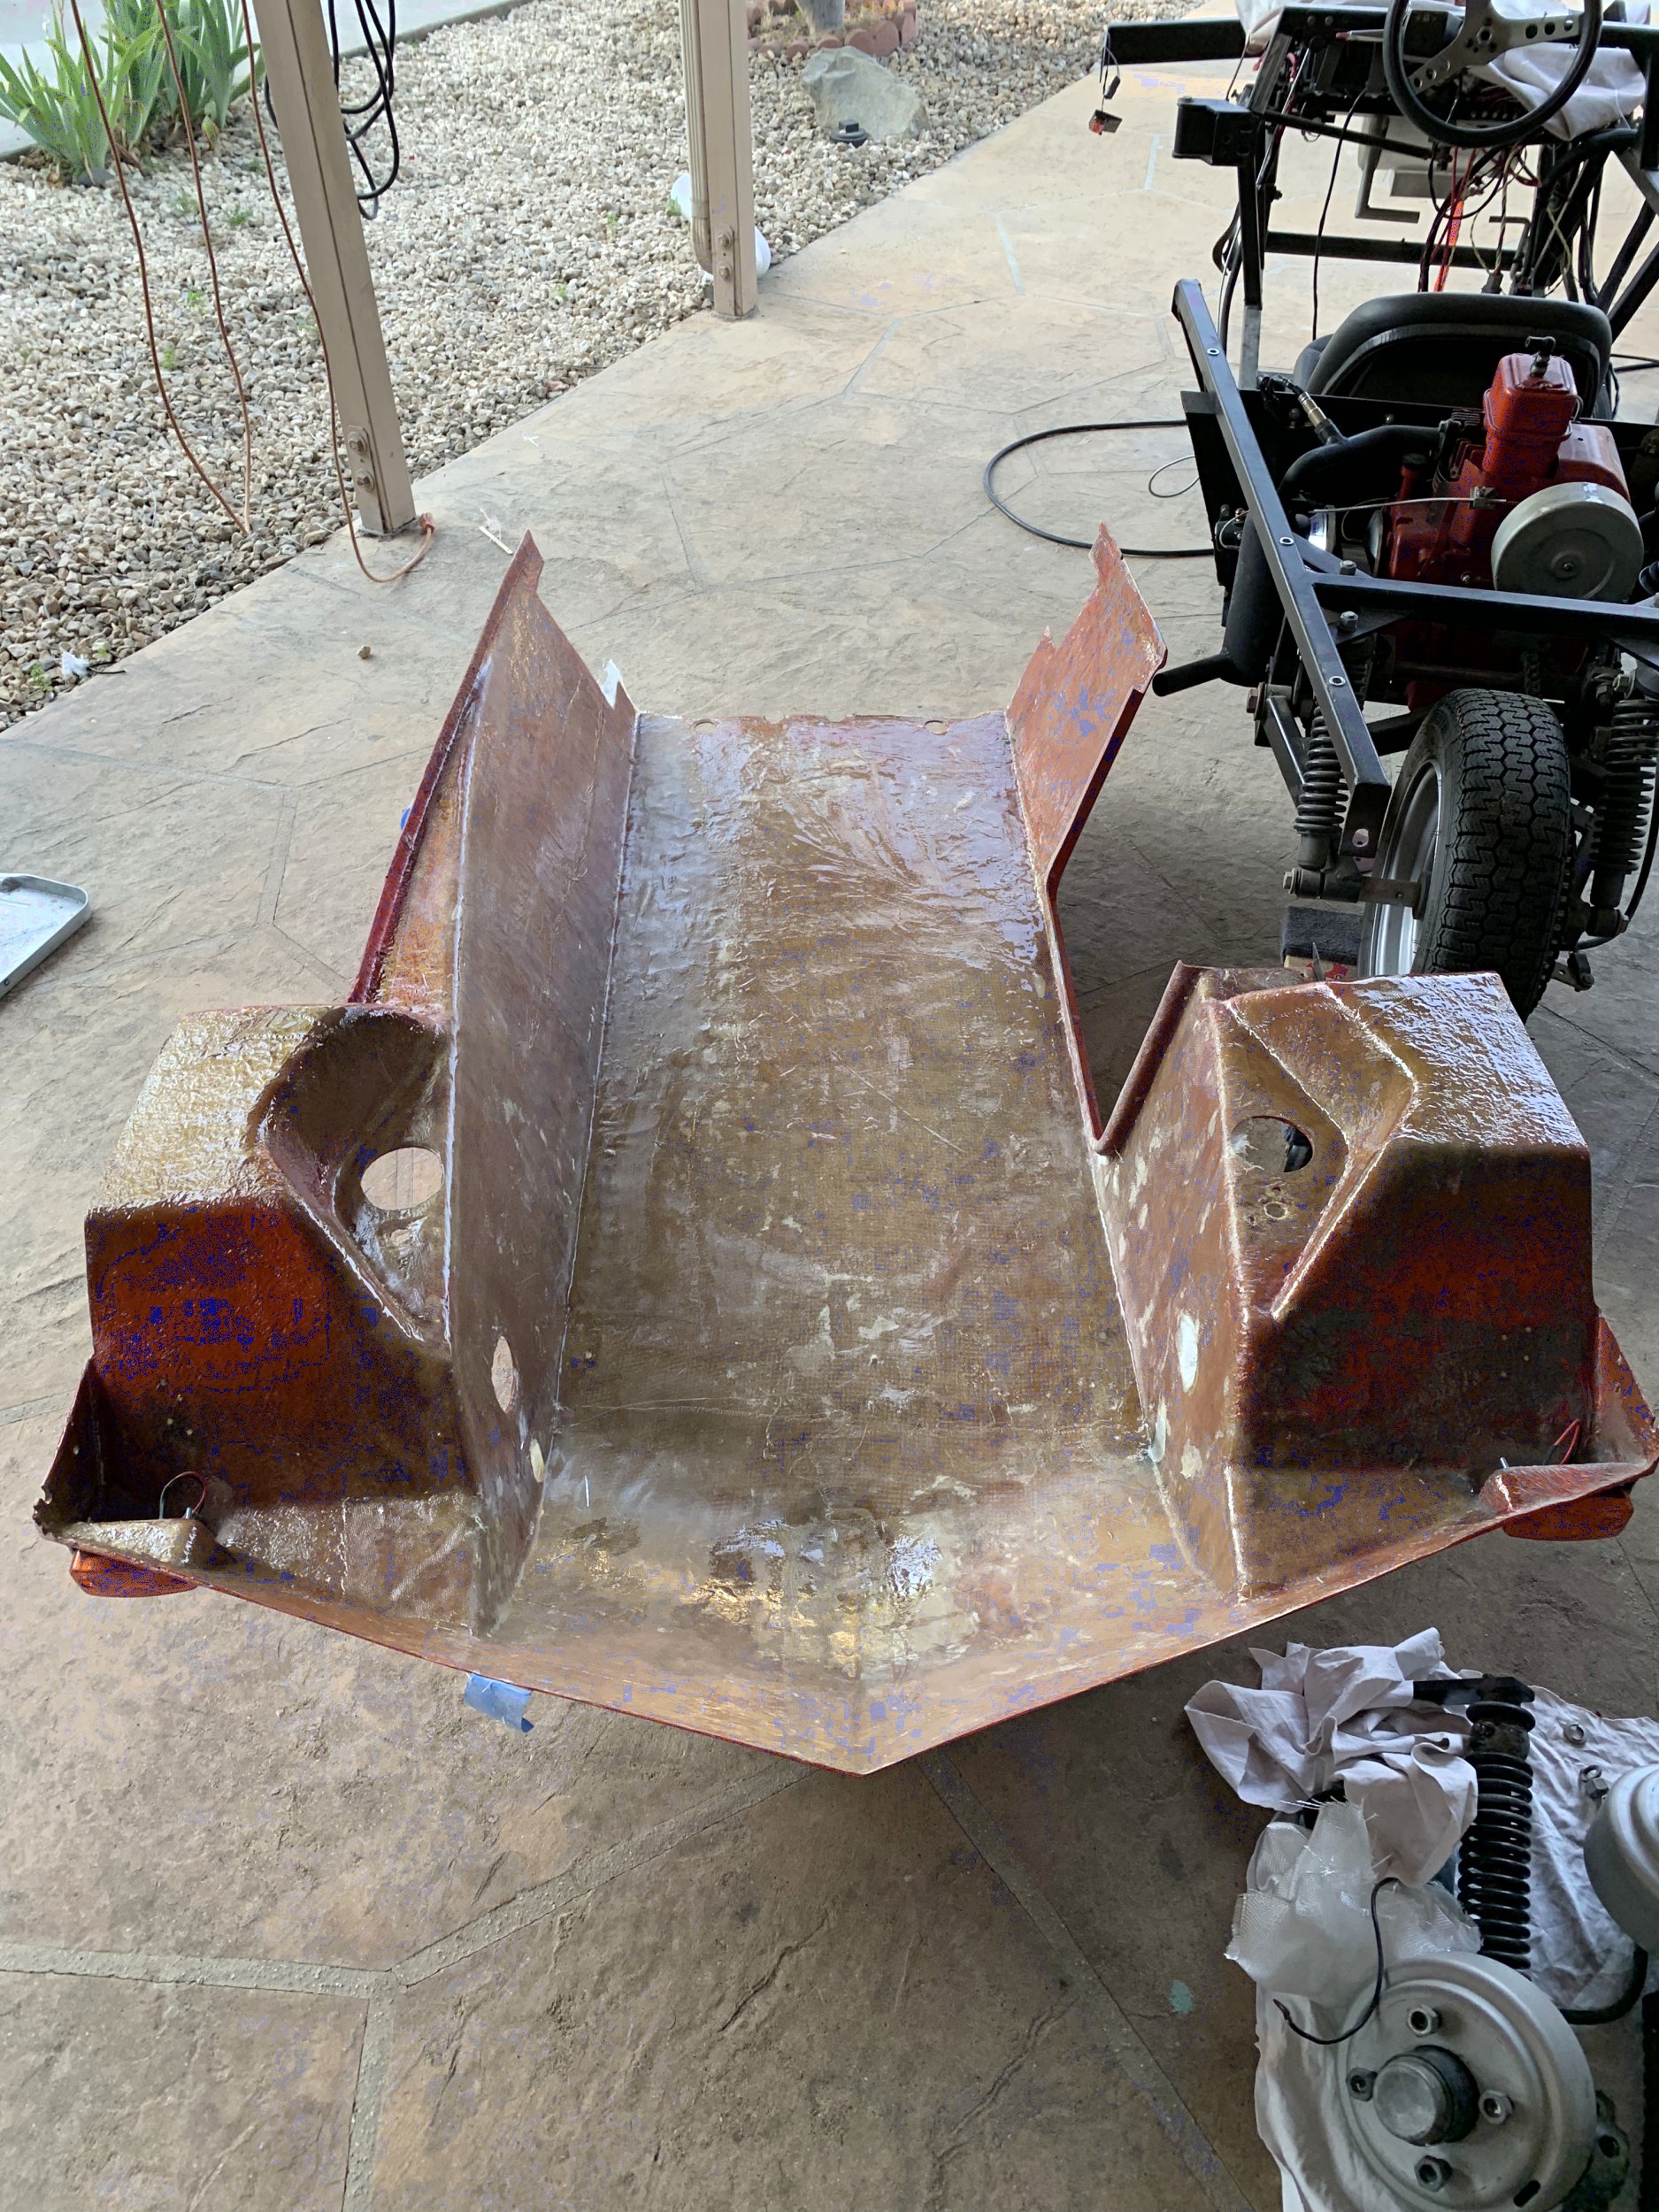
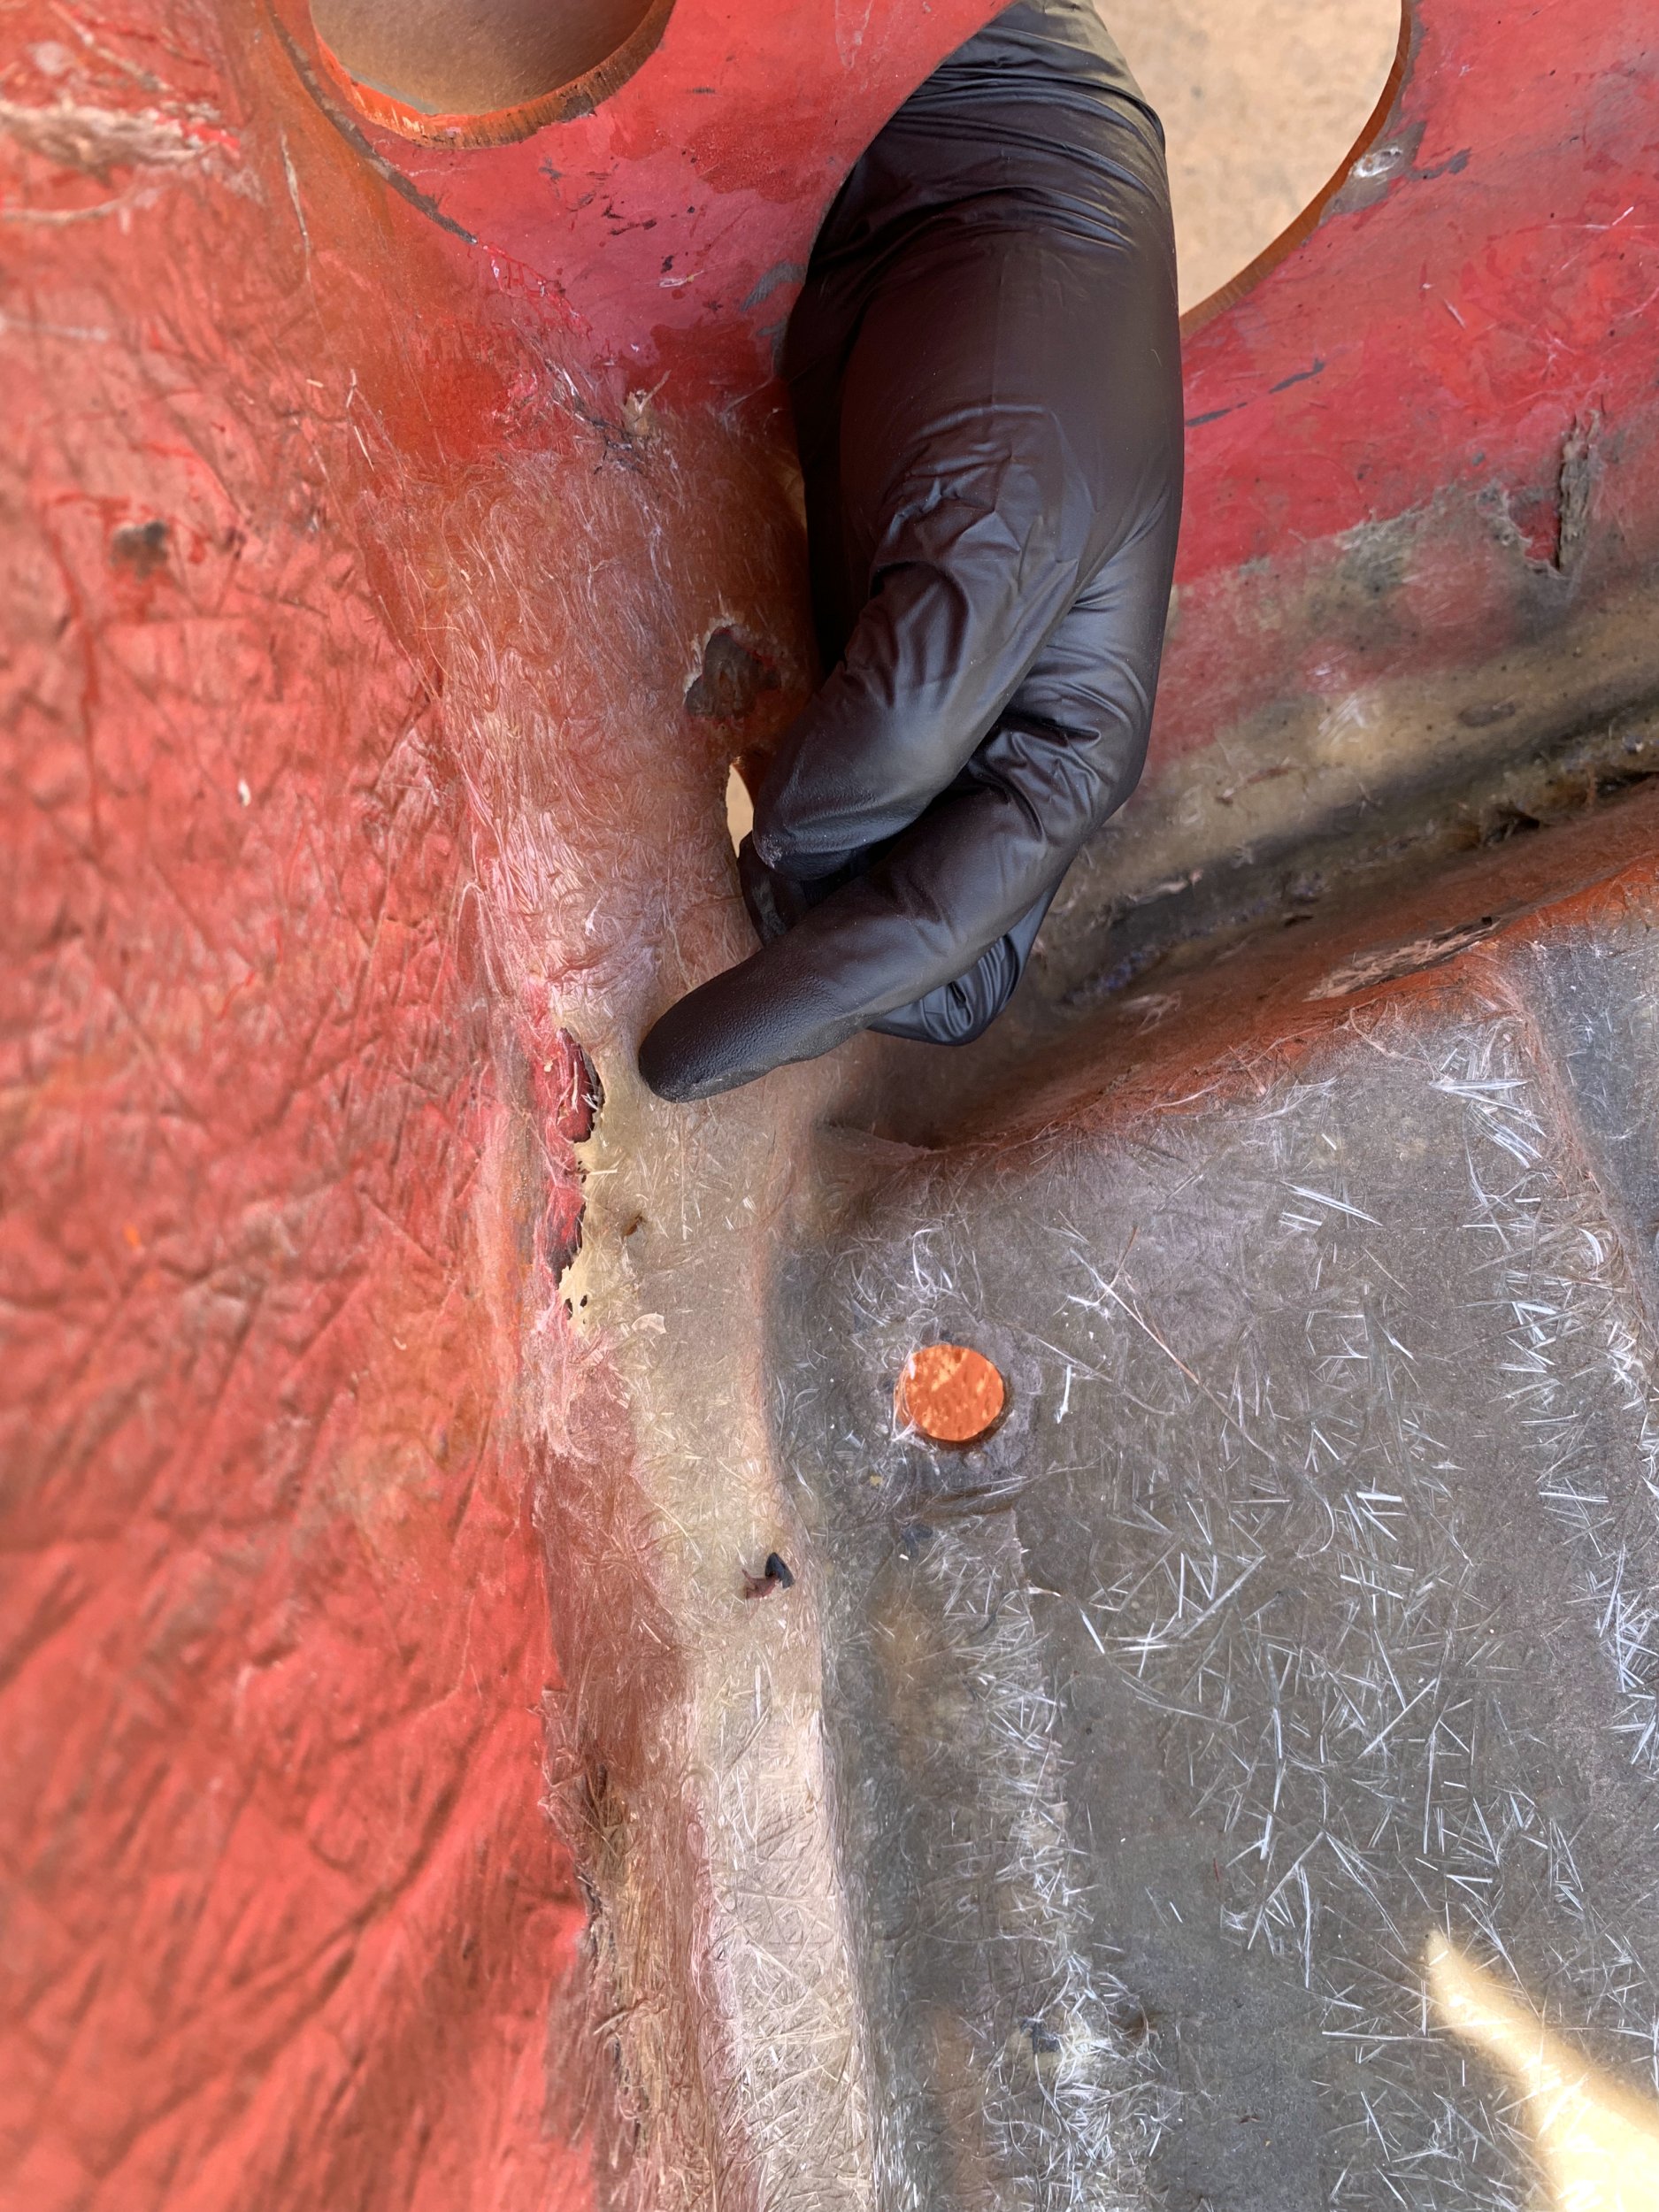
The real problem came once I had the bottom off and had power washed it. The original manufacturer didn’t put a top coat or any sort of sealing coat on the body inside, and loose strand fiberglass was somewhat exposed and starting to break away. Basically, I needed to re-seal the entire body interior.

As usual with a lot of stuff on this project the fact that I had to do a bunch of work on it means I wanted to take the opportunity to improve things a bit.

You can also see an existing (old) patch someone did on the nose here. I’m guessing they hit something (a curb?), and dented the lower nose a bit, and then did a (really poor) job adding glass on top of it to try to fix it. I imagine I’d find a bunch of body filler on the other side if I went looking (I don’t want to go looking). I’m also taking the opportunity to substantially improve that repair too.

IMG_8324.jpg

So, first step here was sanding out the entire body interior to give a good key for resin to bond to.

IMG_8326.jpg

Next up, I have a giant roll of fiberglass fabric courtesy of a housemate who had purchased it for a project a long time ago, that he no longer wanted:

IMG_8327.jpg

What you see here are 2 layers of fabric laid out to build up the interior of the body. Is this needed? No. Will it absolutely seal the existing glass? Yes.

I’m in part doing this because the lower body half is effectively the floor of the cabin, and I can notice it flex when I put weight on the interior surface. I think this is normal, but I’m not going to skip a chance to reinforce it a bit since I’m already doing a bunch of work here.

Not shown: I then spent about the next 4 hours mixing resin, and piecemeal wetting out the fabric. This is a large, rather fiddly surface to be coating, and it’s really not a project only one person should be doing, let alone directly in the hot sun. I had a number of issues that boiled down to areas gelling and hardening before I had a change to properly wet them out fully. I also ran out of resin 3/4 of the way through (even after buying a additional quart of resin before hand), and had to run out and buy more.

There are still a few bubbles I really should sand out and re-glass, but it’s been such an affair so far I think I’ll just ignore them. This is all extra, probably unneeded work already, and other then me, I don’t think anyone will really care.

IMG_8328.jpg

I then took some remaining resin and basically painted out the entire interior surface, to seal everything even in areas where I didn’t add fabric.

Remaining: I have to drill out the mounting holes (I just glassed right over them), and then actually clean the underside of the metal rails before reattaching everything.

At least I’ve managed to not completely knock the paint off the lower half (so far).

Tuesday, June 24, 2025

Paint Disaster, more bodywork

So, one of the conclusions I arrived at after my previous attempt at mounting the fuel filler neck in the front of the freeway was that I needed to rework how the fiberglass is laid out so the filler mount is horizontal. Basically, I need to inset a pocket into the fiberglass nose which it can sit down into.

So, I’ve got a fairly well understood process for matching the weird surface curves at this point.

  • Spray with 3d scanning spray.
  • Put a object of known size in the frame
  • Wave my phone slowly around and take a video
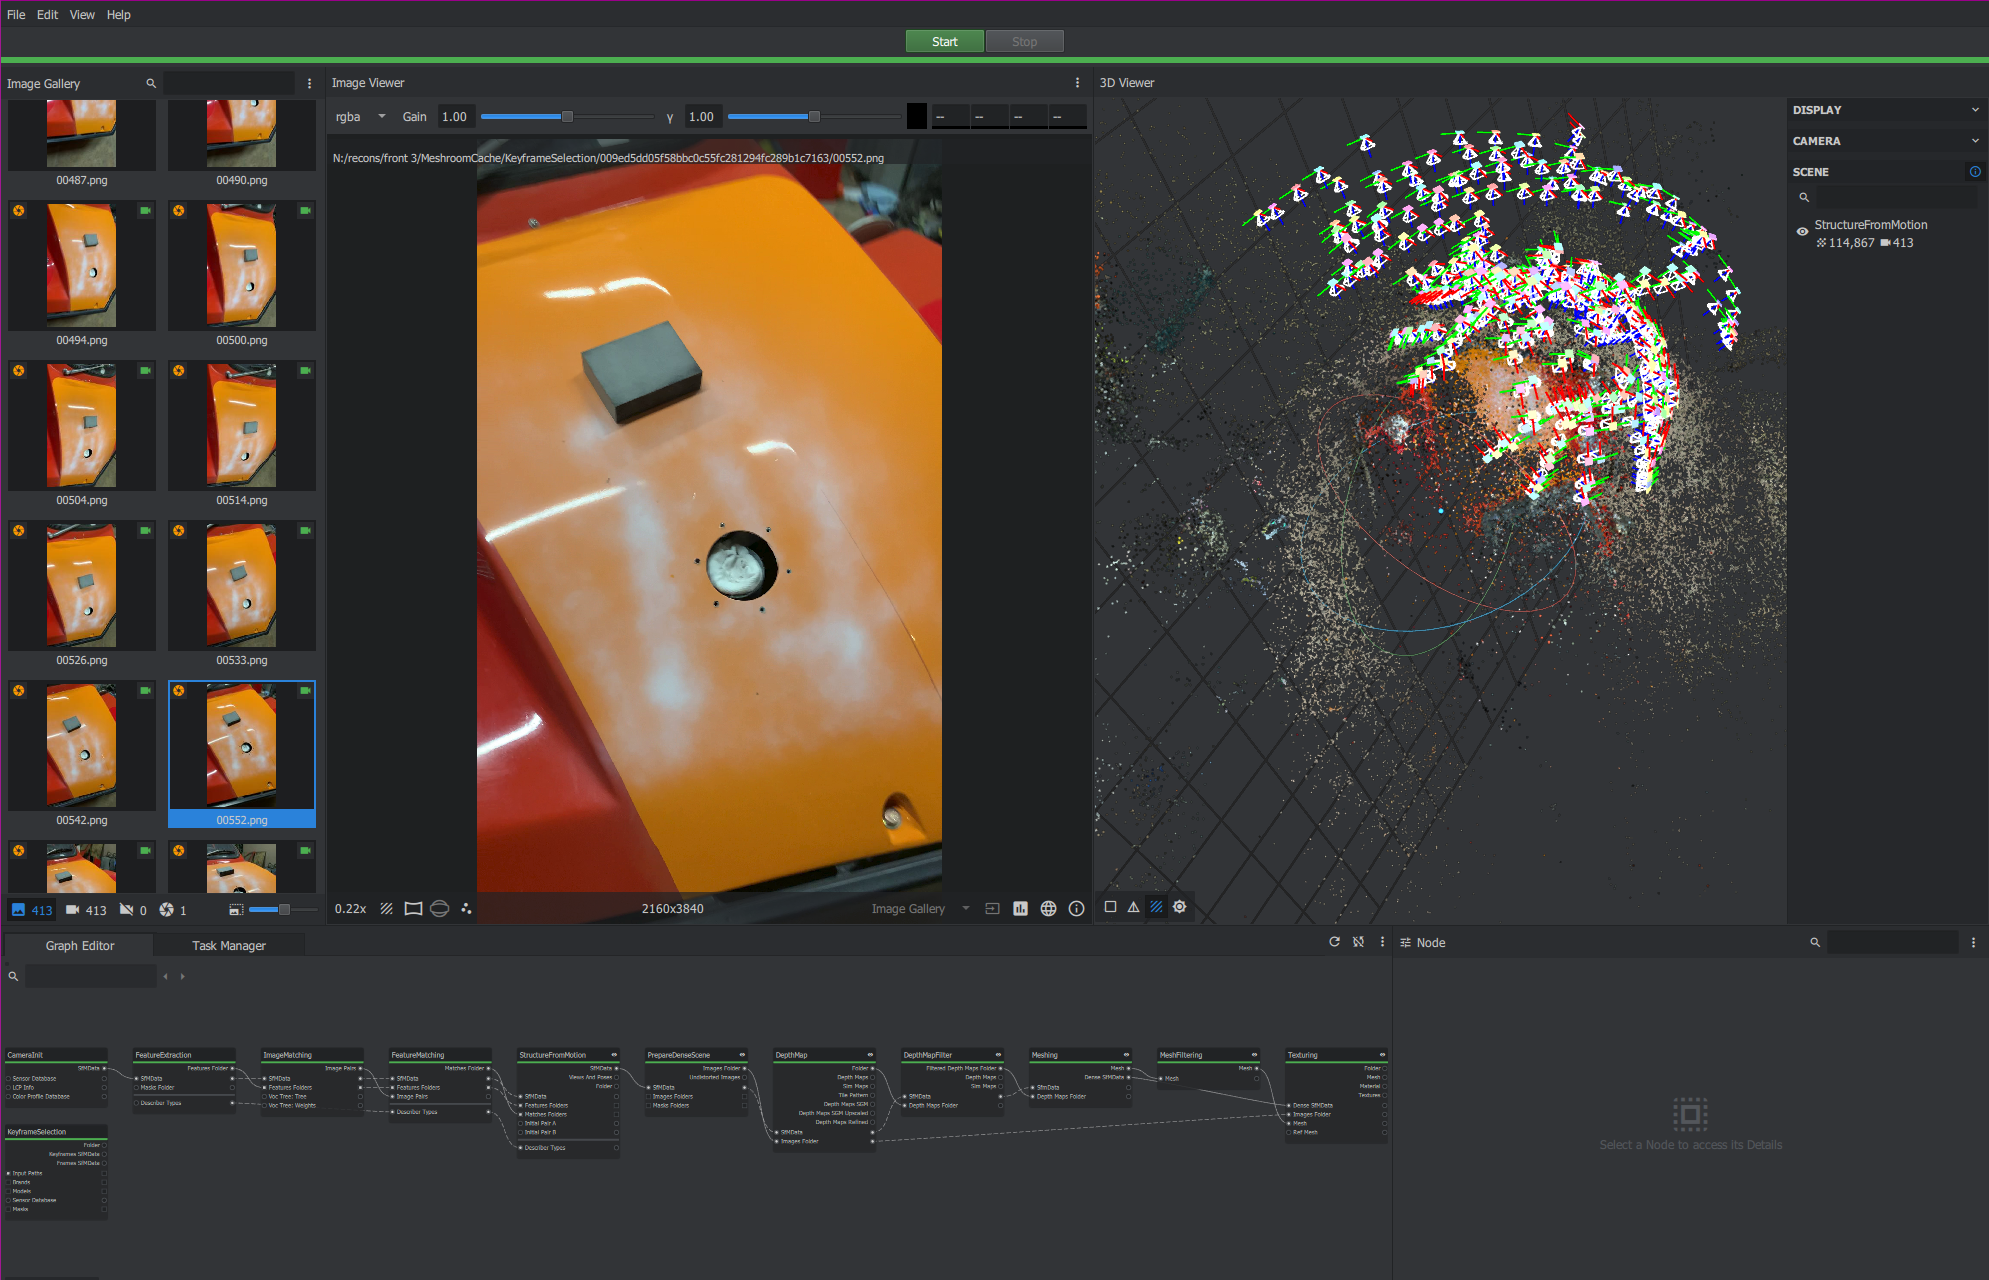
  • Shove into meshroom. Extract frames from the video, and run the default mesh pipeline
  • Bring geometry into Fusion 360. Fit a surface to the (rough) mesh.
  • Design a negative of the new body shape. Also design a template that will key off existing geometry to figure out where to cut
  • 3D print the mold
  • Paint + wax the mold
  • Fiberglass!
mesh_3.png

I took the body off, and expanded the fuel filler hole to fit the new geometry.

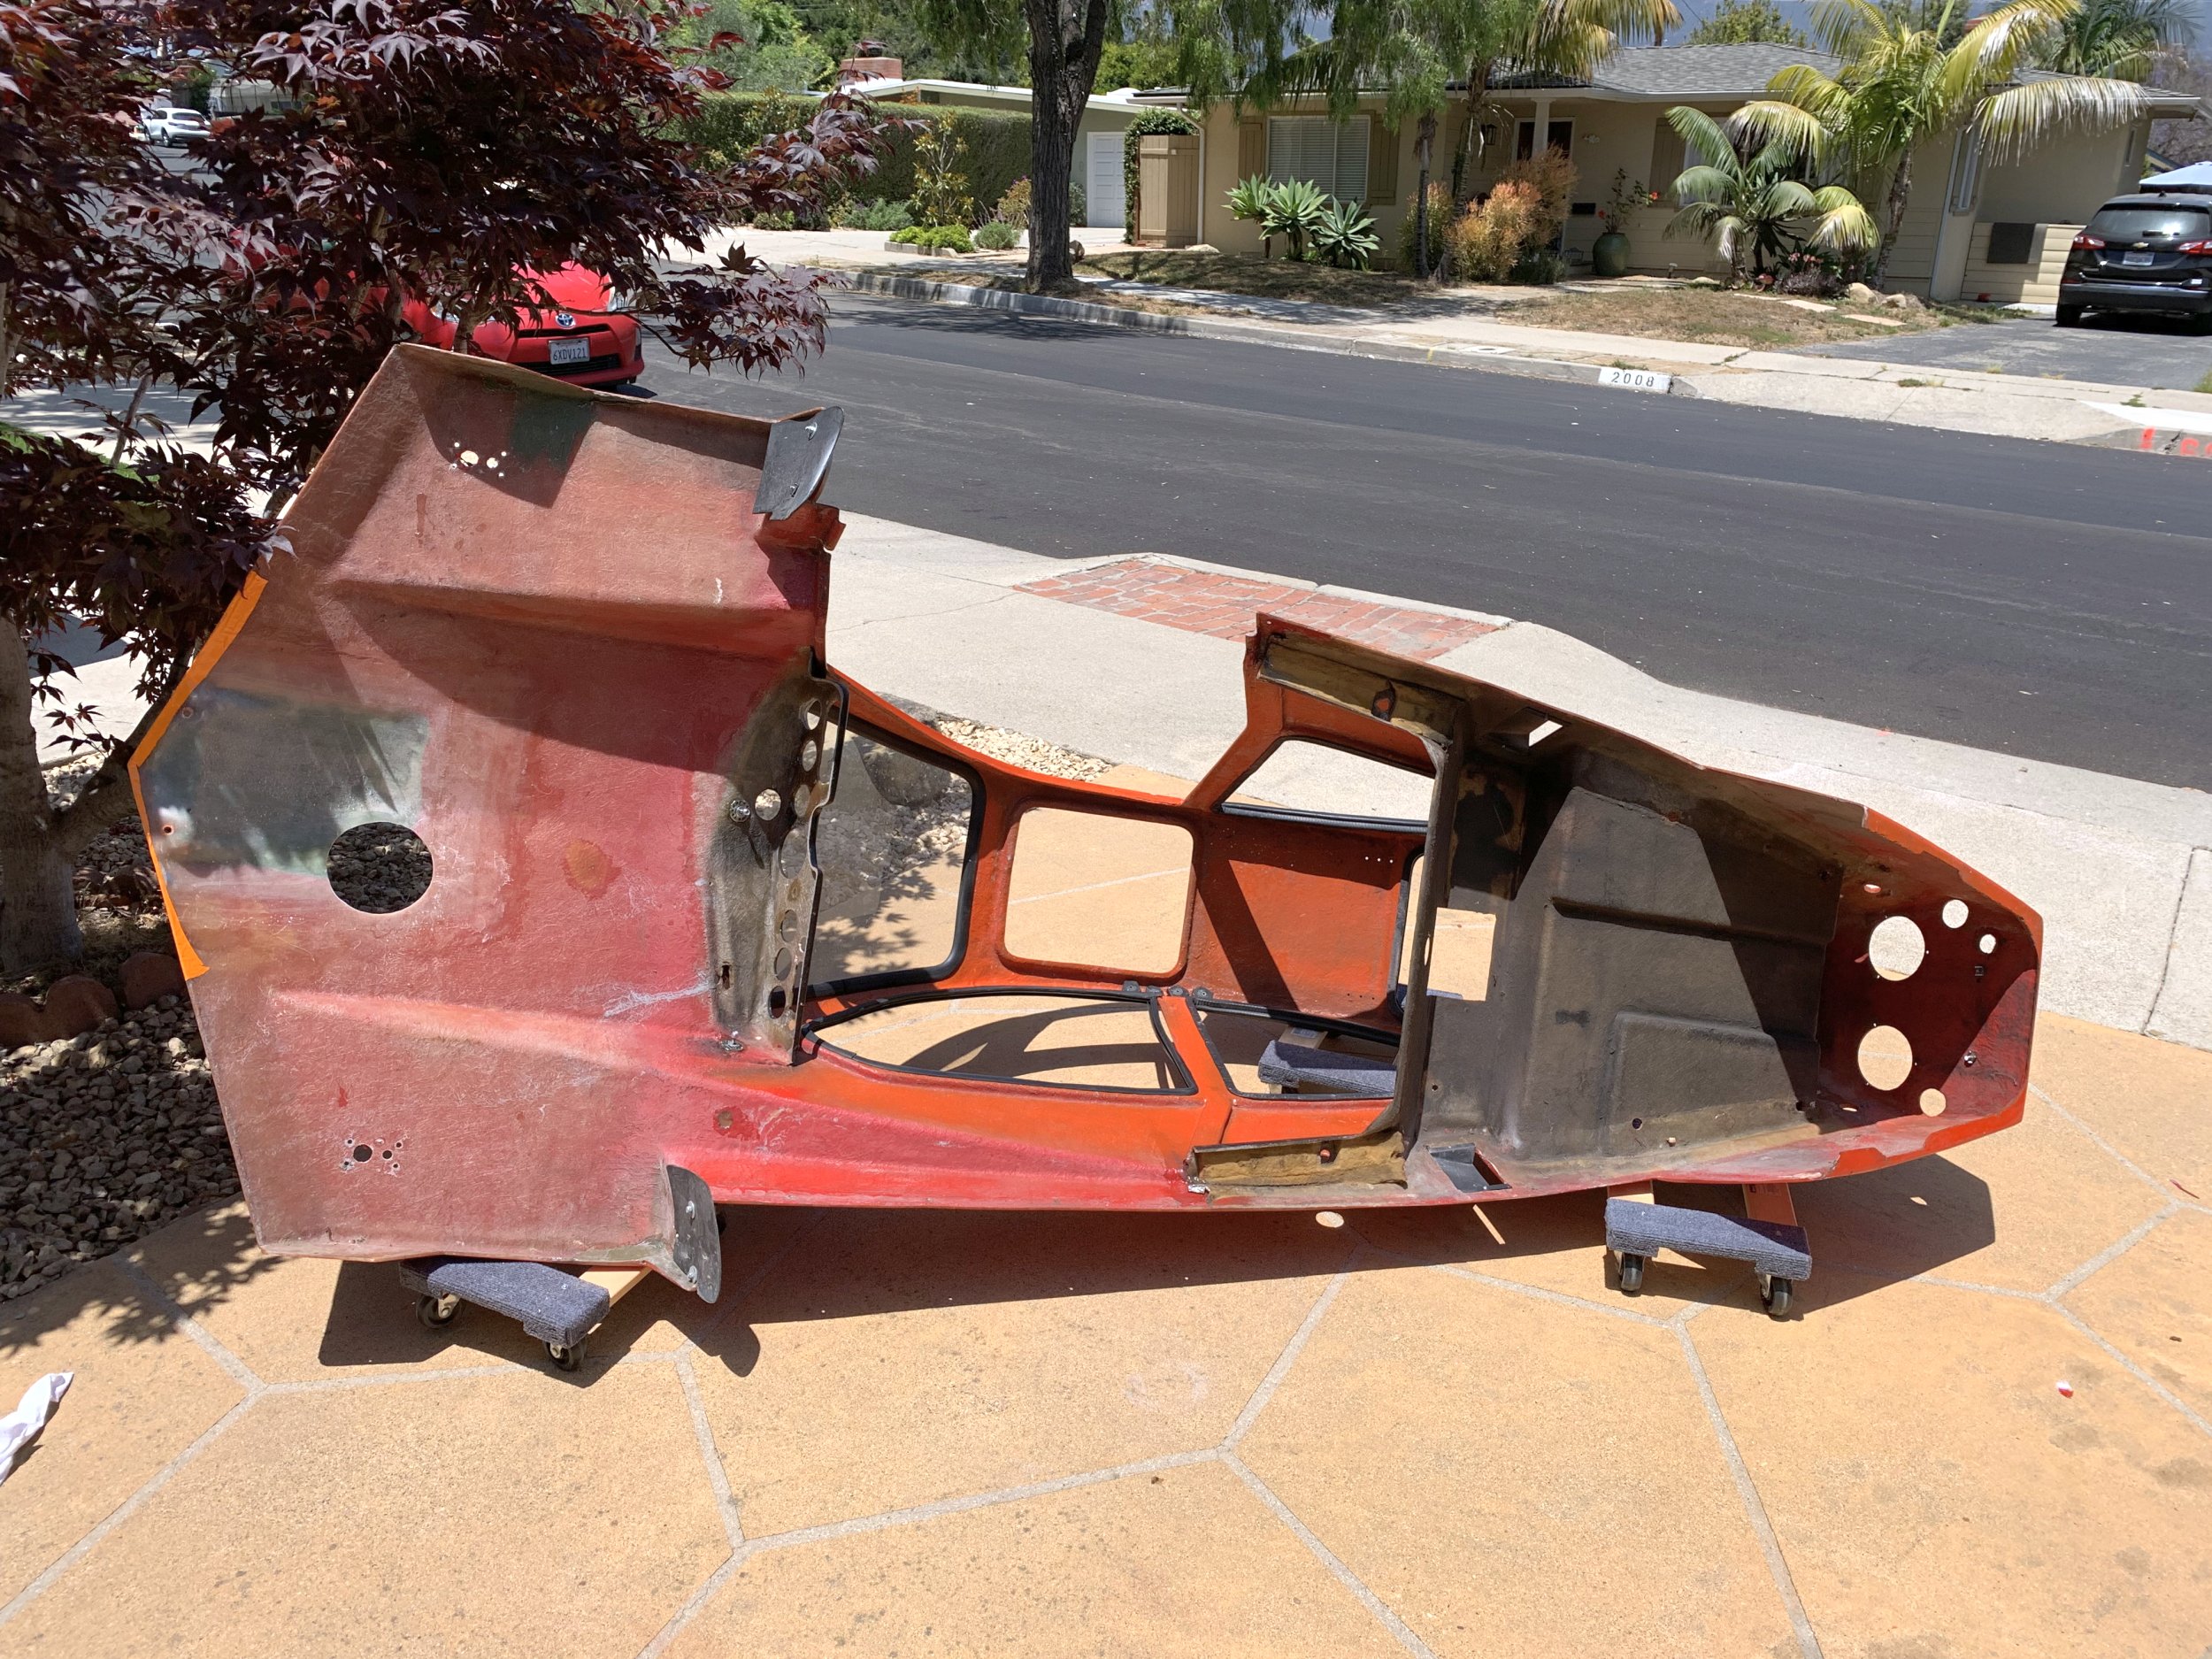
Since I had the body off, I also took the opportunity to finally powerwash the underside of the top-half. In particular, the rear area over the engine had a light film of oil and road-grime that had been annoying me.

IMG_8299.jpg

I then sanded out the existing fiberglass to give a proper surface finish for the newly added glass to properly adhere. I also feathered the fiberglass around the mold (grey lump) in the below image to make things join more cleanly.

IMG_8300.jpg

I also went around with a smaller sanding pad and cleaned up a bunch of areas on the underside where there was crappy fiberglass work from the manufacturer:

IMG_8303.jpg

When HMV was bonding the engine cover section into the overall body, they really half-assed the fiberglass mat in the tail section. While this is really not a actual issue with the body from a structural perspective, the poor workmanship bothered me, so I sanded these back as well and patched them in with small bits of fiberglass cloth.

IMG_8305.jpg

One thing I think is pretty clear at this point is that while I appreciate the Freeway for what it is, I’m not at all precious about it being “original” or anything. One part I particularly dislike is the rear engine/wheel cowling area. It both looks pretty terrible (in my opinion) and the fiberglass in that area is also very thin and starting to fail.

The shape of it also makes installing/removing the body top a lot more annoying.

I took this opportunity to cut a bunch of it away entirely.

IMG_8306.jpg

I think this improves the body-lines a lot, and also will make access to the rear wheel and engine area a lot more convenient. I also feathered the fiberglass edges around the original fuel filler neck hole, so I can patch that in the future.

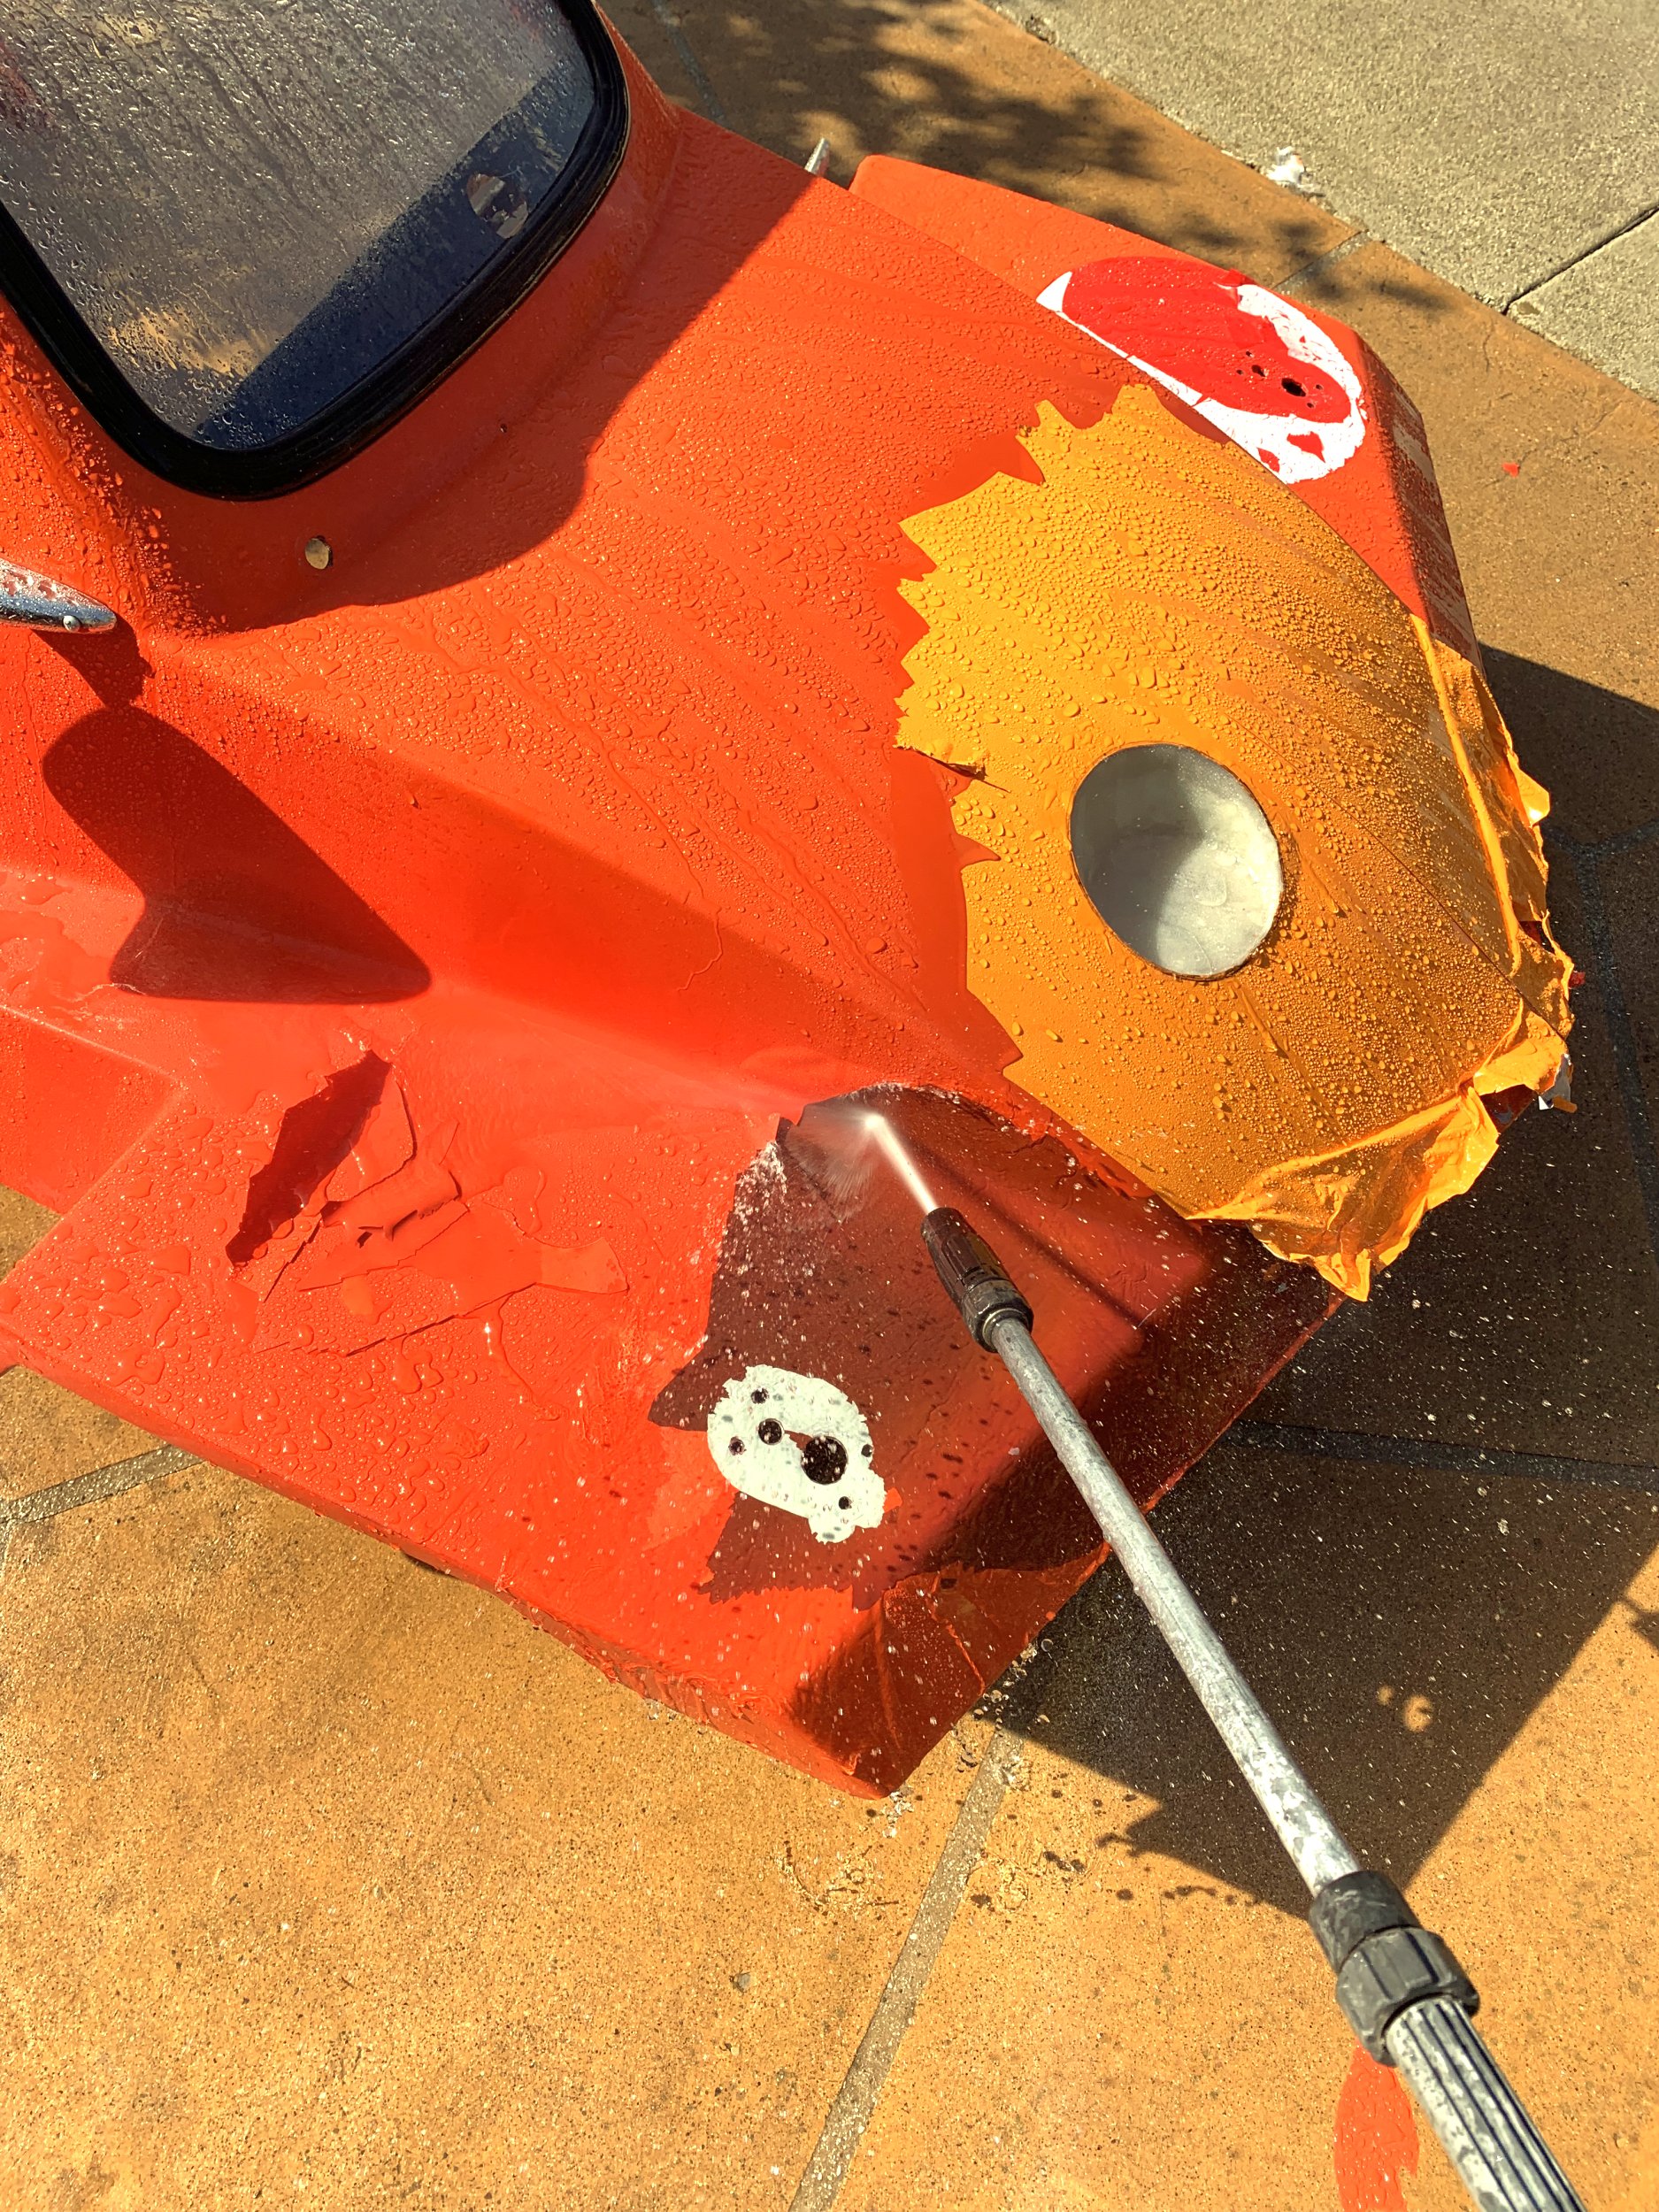
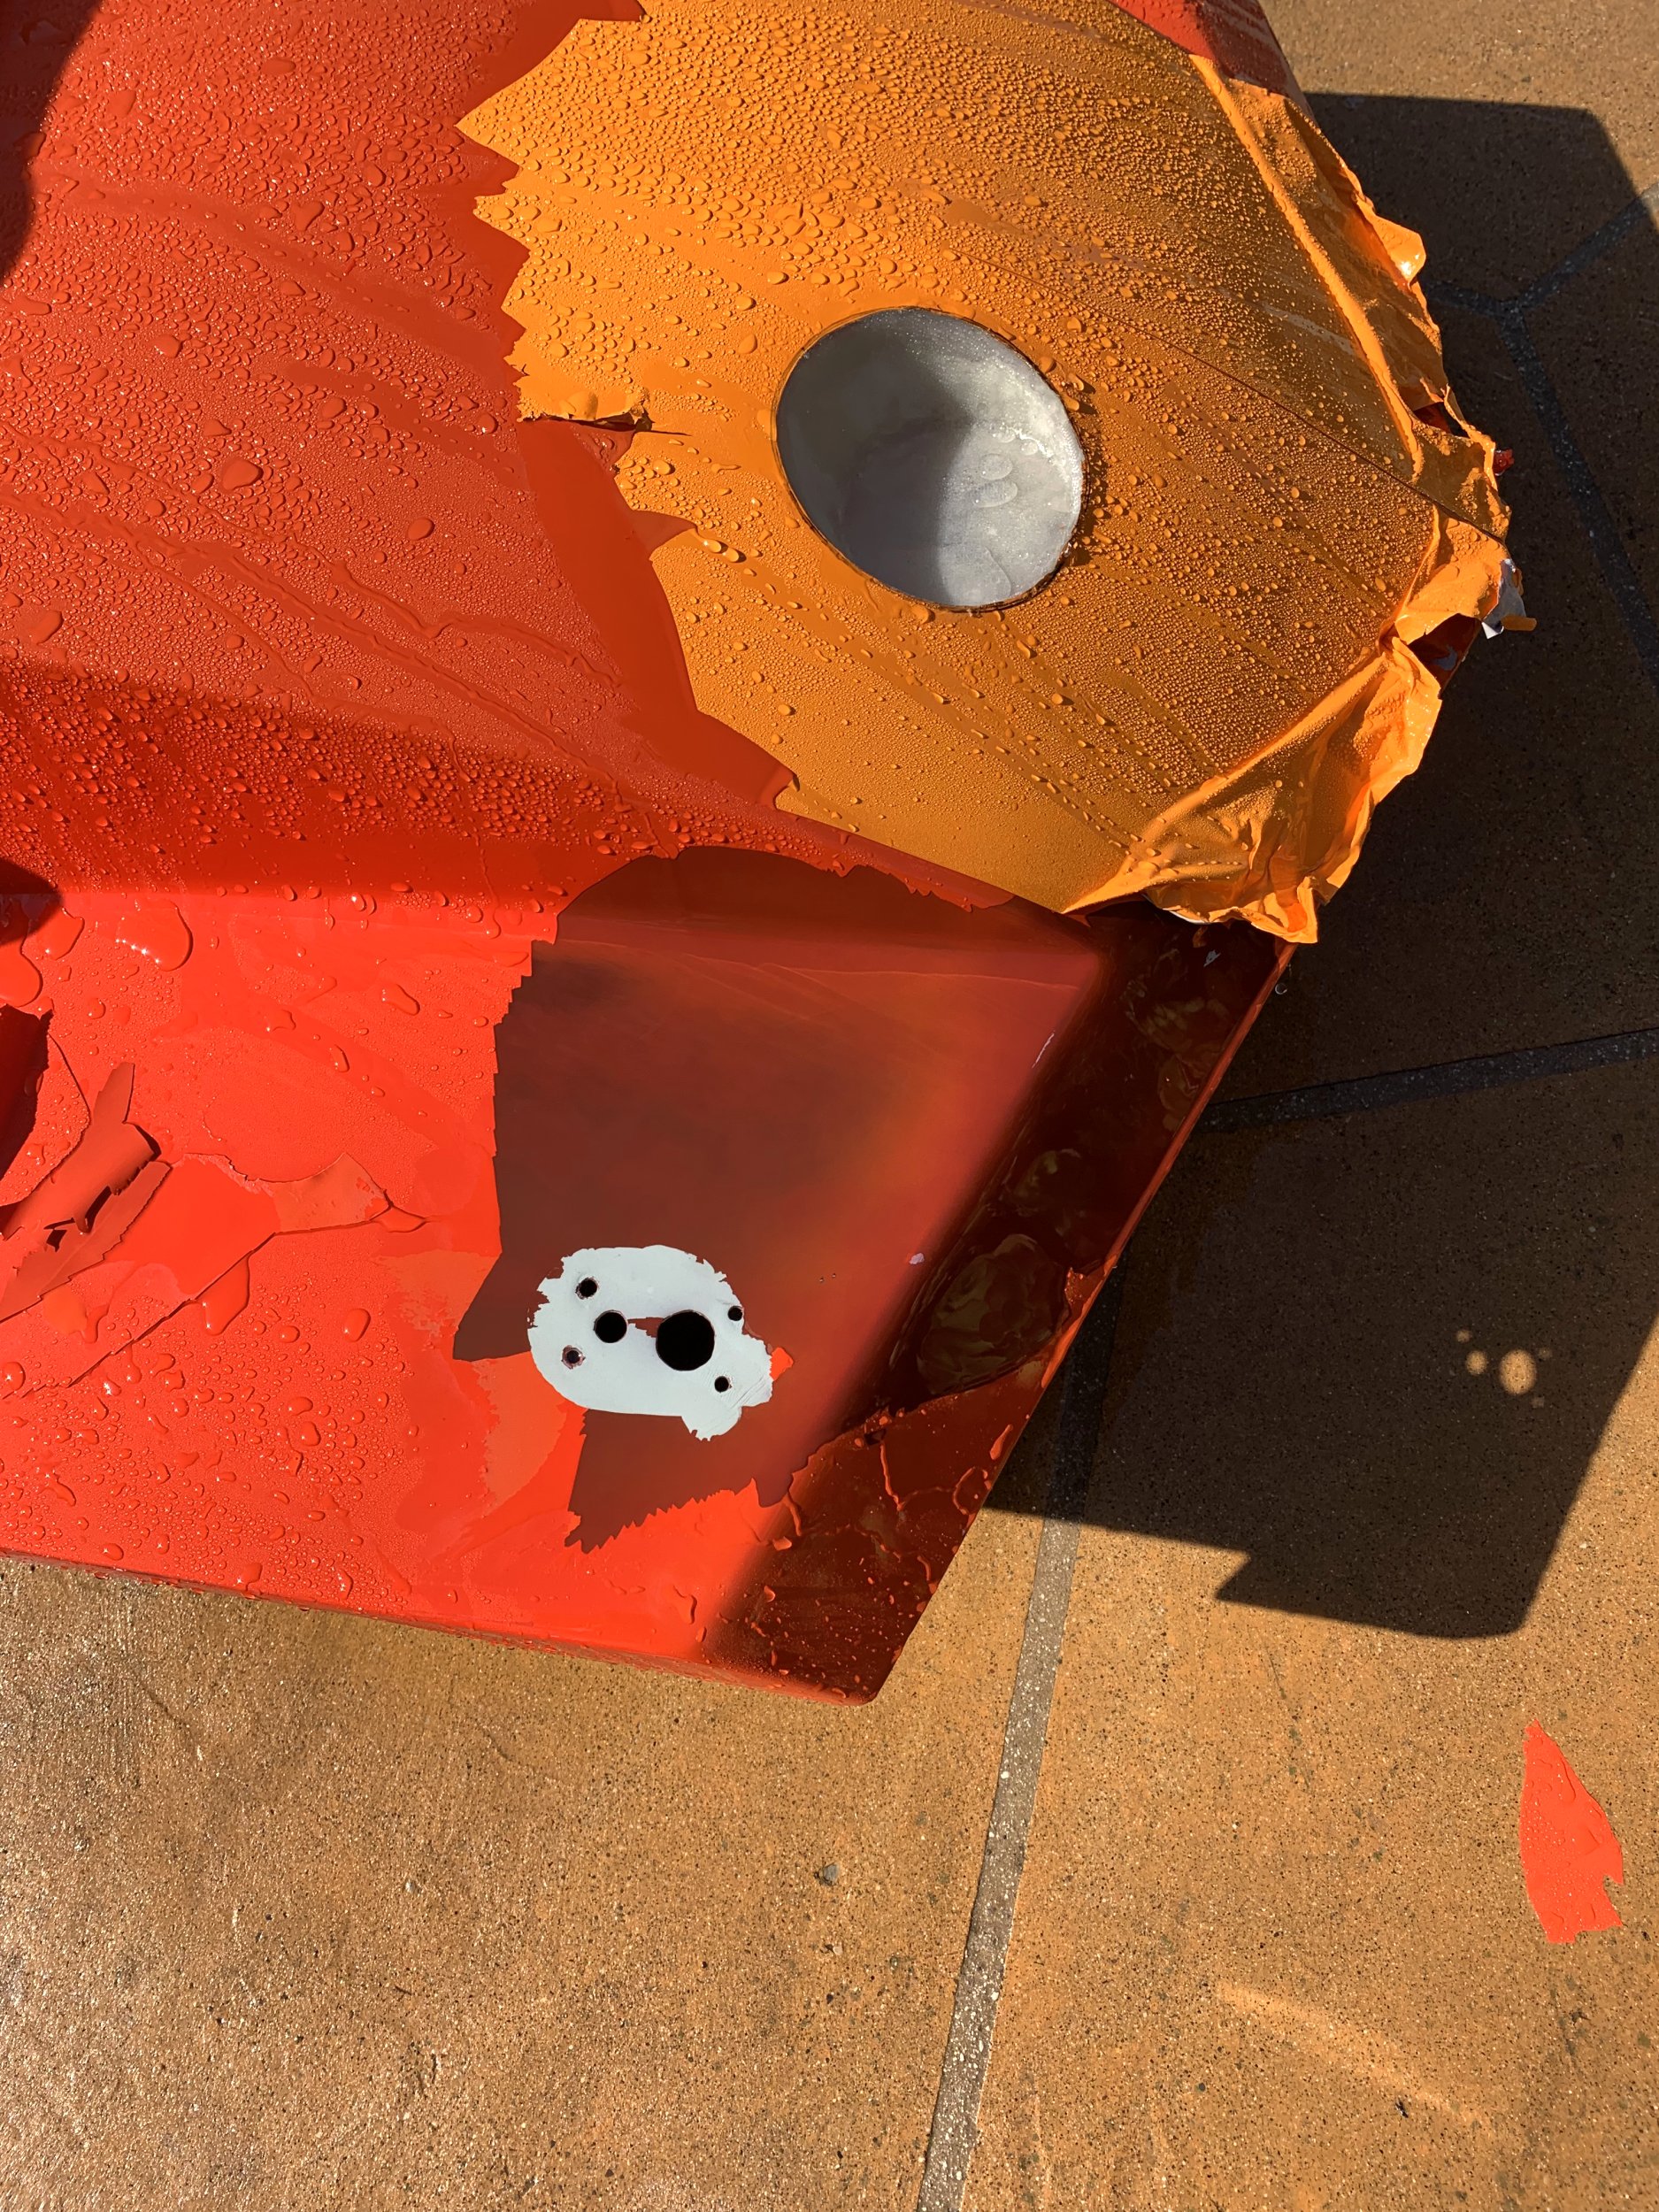
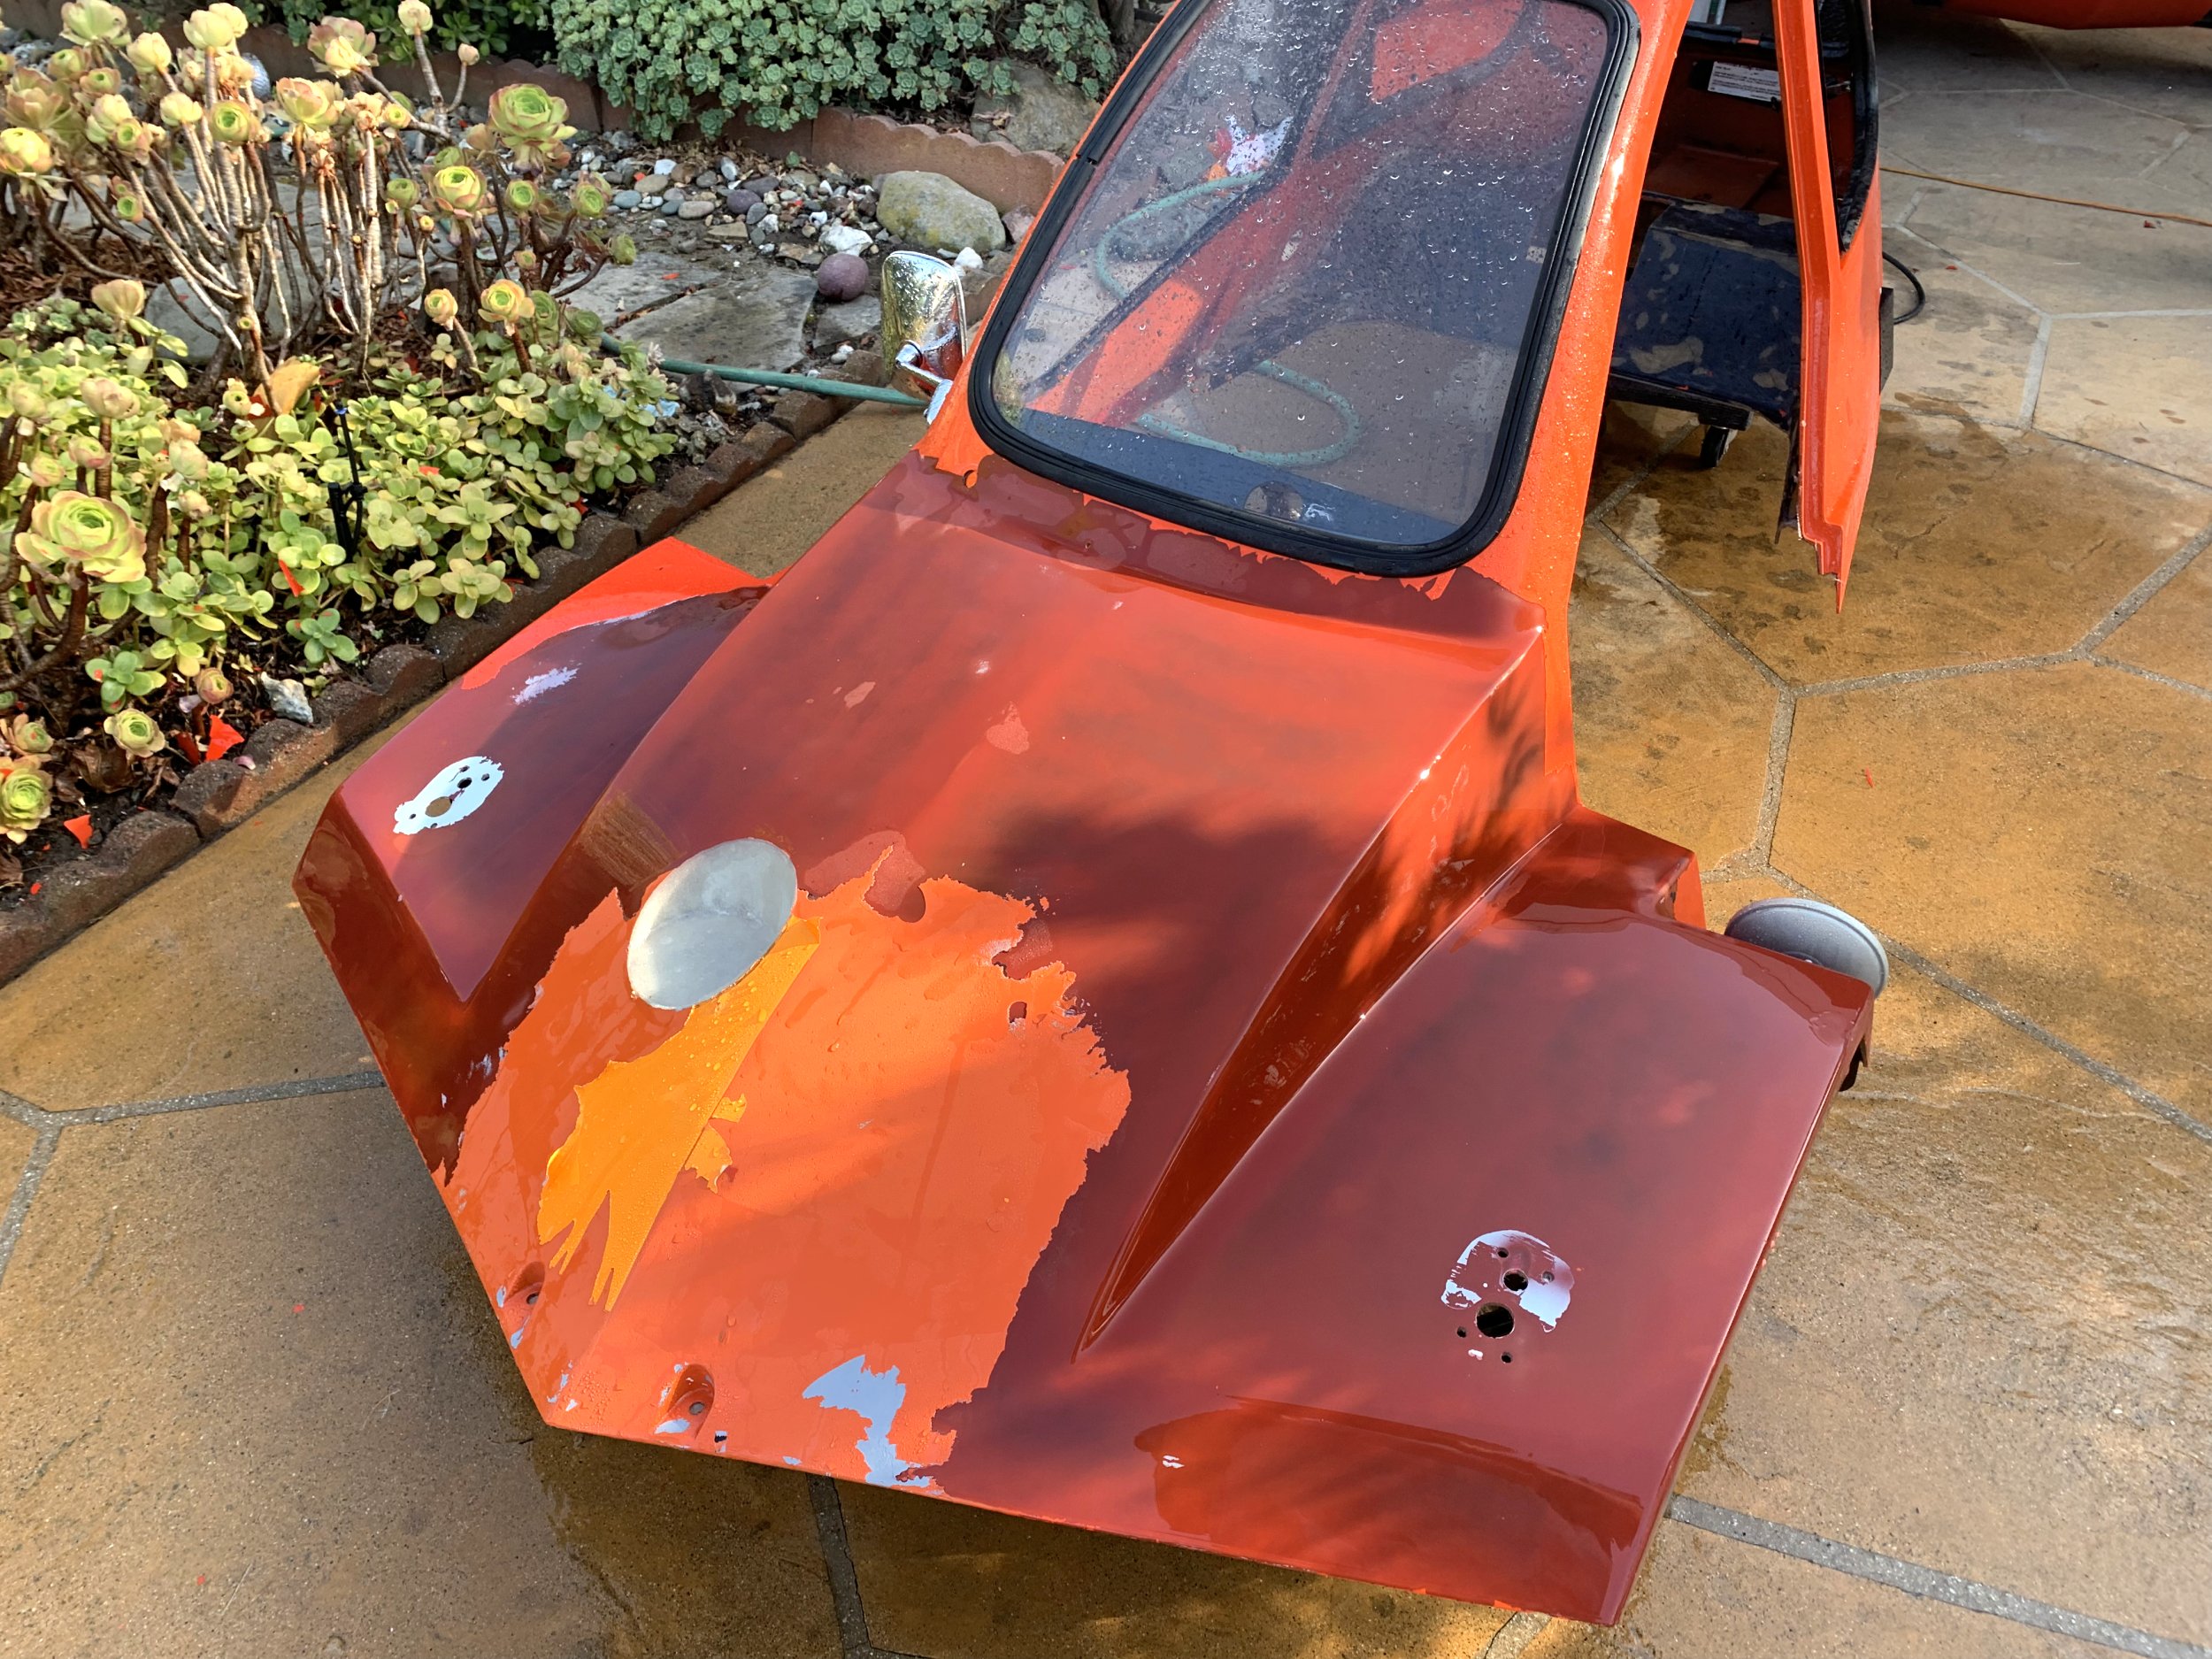
So, the final issue I had here is that after I had done all the fiberglass work, I was powerwashing the body again, primary to remove some of the vinyl stickers I had been experimenting with, and well, apparently whoever did the orange/red paint on top of the original red paint did a completely shit job.

IMG_8308.jpg

The powerwasher caught under an edge and wound up lifting a huge section of the paint layer in seconds. There is about zero adhesion between the primer layer on top of the original paint and the color coat (the clearcoat is also barely adhering, but that’s not the issue here).

IMG_8307.jpg

Anyways, after a hour or so with the powerwasher, the entire front end is basically stripped of paint.

IMG_8309.jpg

You can also see the newly shaped fuel filler hole here. The mold came out quite well, though I had to pry a bit to get it to finally pop out.

Considering this was effectively the first time I’ve ever attempted fiberglass molding, I’m pretty damn happy with the result. I think I should have used a couple more coats of partall wax (or I wasn’t layering it on thick enough), but it came out without issue in the end, despite pulling a bit of the paint from the mold surface. I’m also super encouraged by the idea of making a mold for a rear internal fender.

At this point, I’ve more or less concluded I’m going to have to either repaint the entire upper body section, or have another go at vinyl wrapping it. The vinyl wrap sticks SUPER well to a surface with a bit of a key to it, and I think most of my trouble with my previous attempt was that I thought I needed to do the entire area with one single vinyl section. I believe if I do the coating in multiple sections, it should be a lot more tractable. It’ll have seams, sure, but hopefully I can live with that.

I don’t have a lot of pictures of the work here (or most of the fiberglass stuff), since it’s a very messy process and I’m wearing gloves with either resin or lots of fiberglass dust on them for most of it.

Monday, June 16, 2025

First Run-Testing of the reassembled Freeway

So, I had the freeway mostly assembled (I haven’t re-installed the door), and I couldn’t resist taking it for a test drive even with a bunch of wiring dangling everywhere.

In retrospect, this wasn’t the brightest idea.

It runs fine, though I did discover a number of minor issues.

I don’t think the front brakes are completely bled. Or the brake balance is just terrible in general. The front brakes work, but by the time they engage firmly, the rear brake is on the edge of locking the rear tire up. Considering I did a one-person bleeding job for the front brakes, I strongly suspect I just need to re-bleed them with someone to help.

The tachometer doesn’t work. I was guessing that I could pick a RPM signal off the same wire used for engine-kill. Either this isn’t true, or I derped the wiring somewhere. This isn’t a huge deal, I just need to poke it with an oscilloscope.

I have the switch for the O2 sensor power and the oil pump power reversed (just need to swap the terminals).

The major issue is that apparently I didn’t tighten the drive clutch pulley fastening bolt enough. I was ~0.5 miles from my house when I heard a loud BANG, and the movable sheave of the belt-CVT assembly went flying off to my left in two sections.

IMG_8289.JPG

It was not fun having to push the thing home.

IMG_8290.JPG